Many people incorporate visual elements to make a presentation memorable on Google Slides. One of the biggest engaging elements in Google Slides is videos. By adding videos, you can demonstrate the subject in the best quality. You can create a story in your video to strengthen your narrative. Moreover, it can make your audience attentive and engaged. Thus, there are several benefits of adding videos to Google Slides.
This article will highlight authentic techniques through which you can add videos to Google Slides. Furthermore, we will suggest powerful software to enhance your presentation on Google Slides.
In this article
- Why Is It Important To Add Video Visuals in Presentations?
- First Technique: Embedding a Video Onto Google
- Second Technique: Inserting a Video Into Google Slides
- Making Further Edits to Videos In Google Slides
- Bonus Part. Create Flawless and Personalized Video Presentations Using Wondershare Presentory
Part 1. Why Is It Important To Add Video Visuals in Presentations?
As discussed above, inserting videos into Google Slides can produce many benefits. Videos can be a useful tool to target your audience while presenting. Here are some of the main benefits of inserting videos in Google Slides:
- Attracts Attention: Videos in a presentation can break the monotony of boring slides. Your audience may feel distracted by the text and images in your slides. Hence, by inserting videos, grasp the attention of your viewers.
- Easy Tutorials: If you want to give a demo about your product or service, videos can help. Through videos, record comprehensive tutorials in high quality. By looking at the video, your audience will understand it easily.
- Simplifies Complex Data: There are some concepts that are hard to comprehend. Through animated videos on Google Slides, simplify the concepts for your viewers. By doing so, your audience will absorb the information from the video.
- Improves Efficiency: Rather than using long textual paragraphs, you can insert relevant videos. It can increase your time efficiency while creating a presentation. Moreover, it will make your Google Slides less cluttered.
- Makes the Content Diverse: Videos have the ability to communicate regardless of cultural barriers. People from different cultural backgrounds can comprehend the presentation by looking at the visuals. Hence, videos can minimize the language barriers and make the content diverse.
- Adds Entertainment: You can insert entertaining videos on Google Slides according to the nature of your content. It will create an impact on viewers by lighting up their mood. Furthermore, it will offer a humorous experience for your viewers.
Part 2. First Technique: Embedding a Video Onto Google Slides
Embedding or adding a video to Google Slides means incorporating a video in the slide. By doing so, the size and format of the slide will be altered accordingly. Here are the instructions that can assist you in embedding a video onto Google Slides:
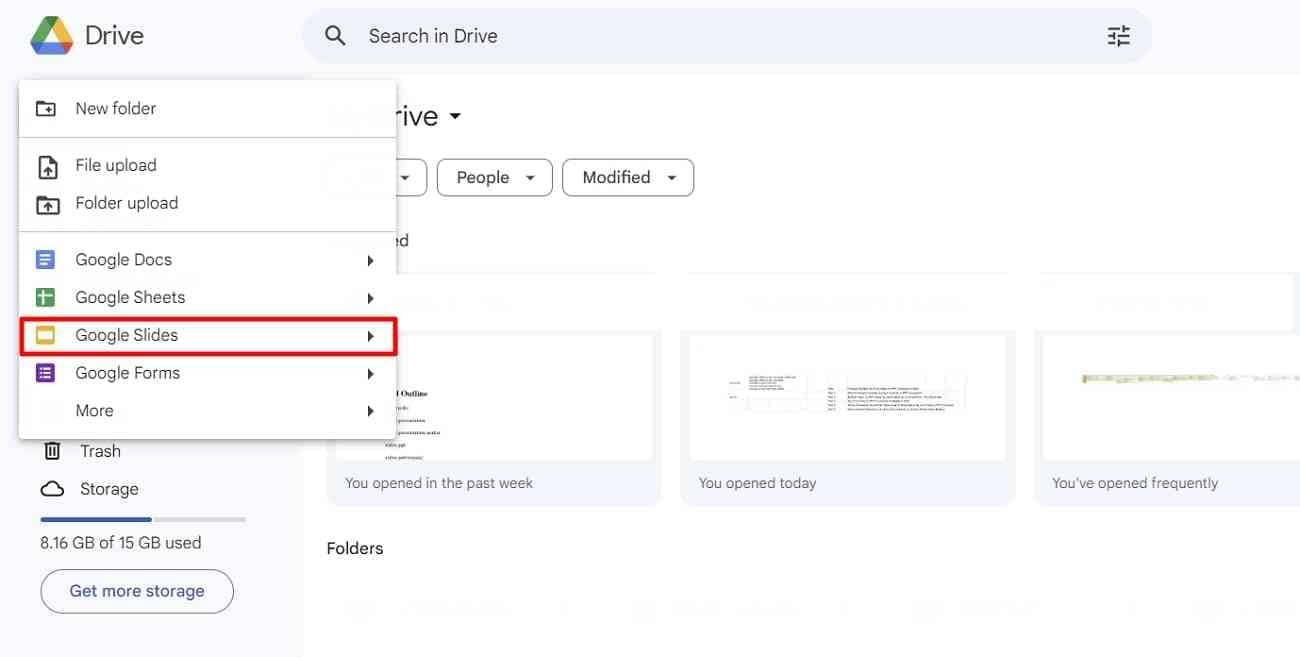
Step 1: Start by opening Google Slides and creating a new presentation on your PC. You can go to your Google Drive and tap on the “New” button displayed at the top-left corner. Click “Google Slides” from the drop-down menu to move forward.
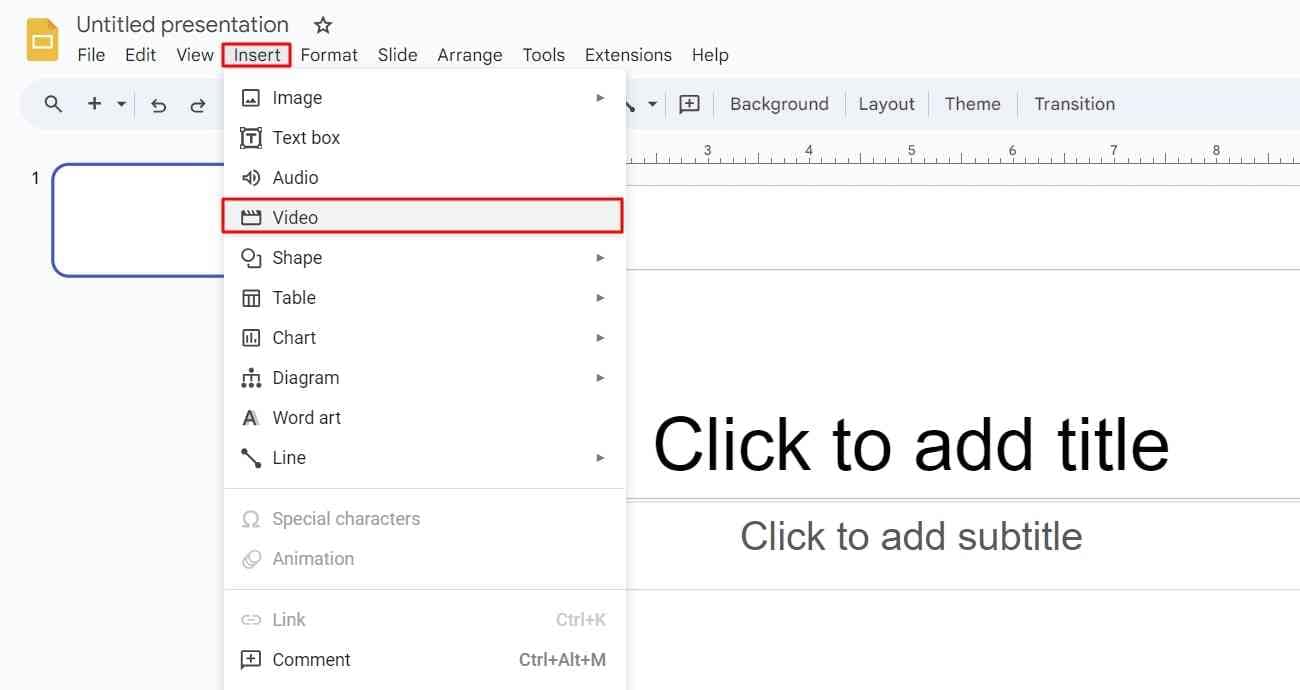
Step 2: You can tap the "Blank" option to create a new presentation on Google Slides. Now, choose the slide where you want to embed the video. Afterward, click the “Insert” button from the top toolbar and select “Video.”
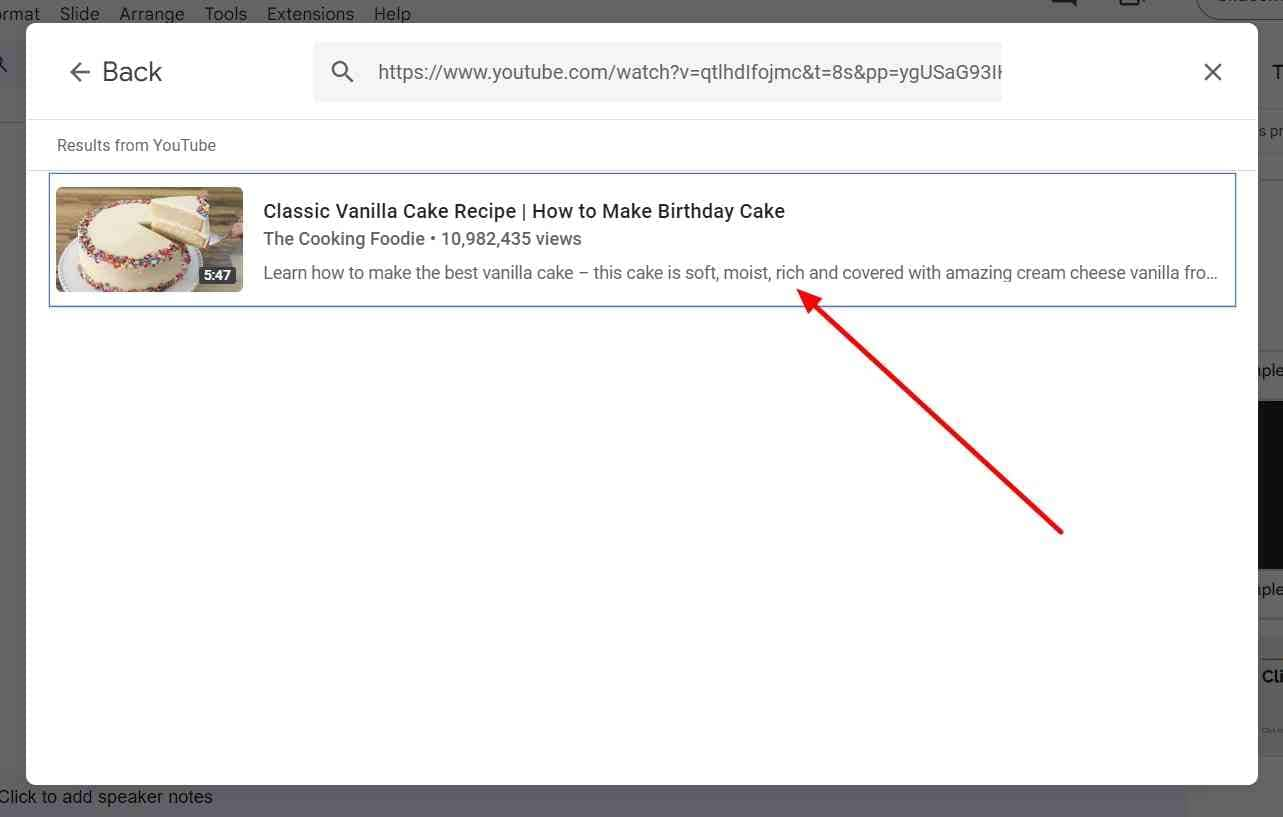
Step 3: On the “Insert Video” window, you can select a video from YouTube or Google Drive. To add a YouTube video, you can make a quick search. You can paste the URL of your desired YouTube video on the “YouTube” tab. If you don’t have the URL of the YouTube video, you need to upload it on Google Drive. Afterward, you can import it from Google Drive to the Slides.
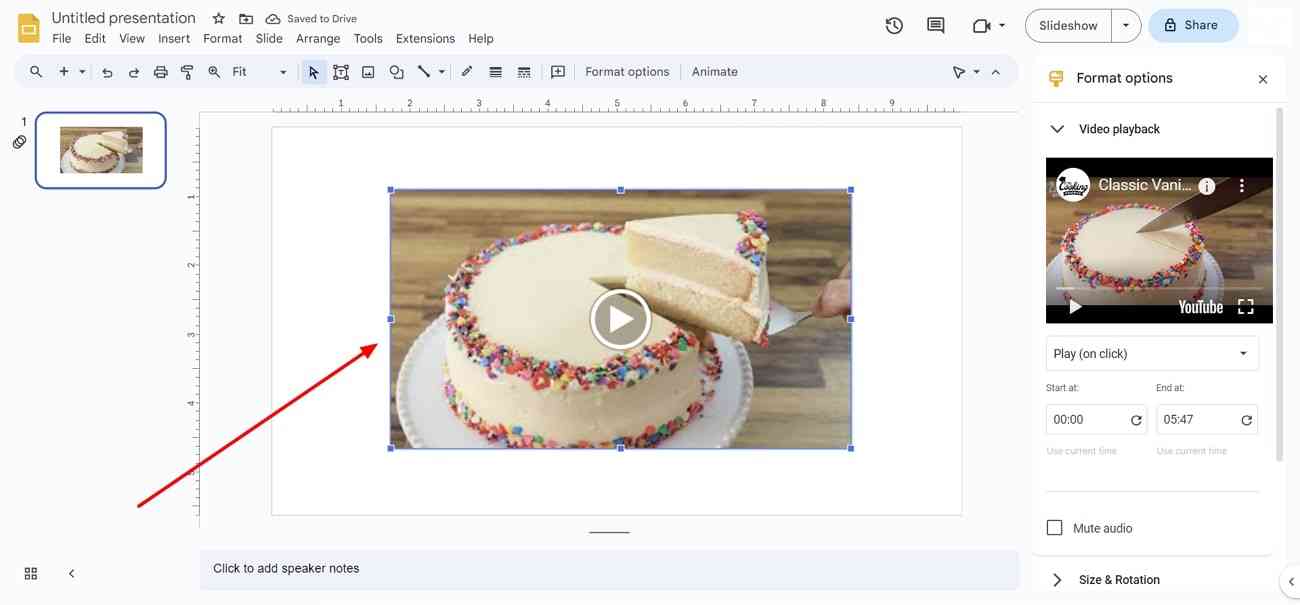
Step 4: After importing the video, click the “Insert” button. Within a few moments, your selected video will be embedded into the Google Slide.
Part 3. Second Technique: Inserting a Video Into Google Slides
In this technique, you can paste the link to the video on Google Slides. If you don’t want to insert a YouTube video, you should store a video on your Google Drive. Thus, you can read the below guidelines on inserting video in Google Slides:
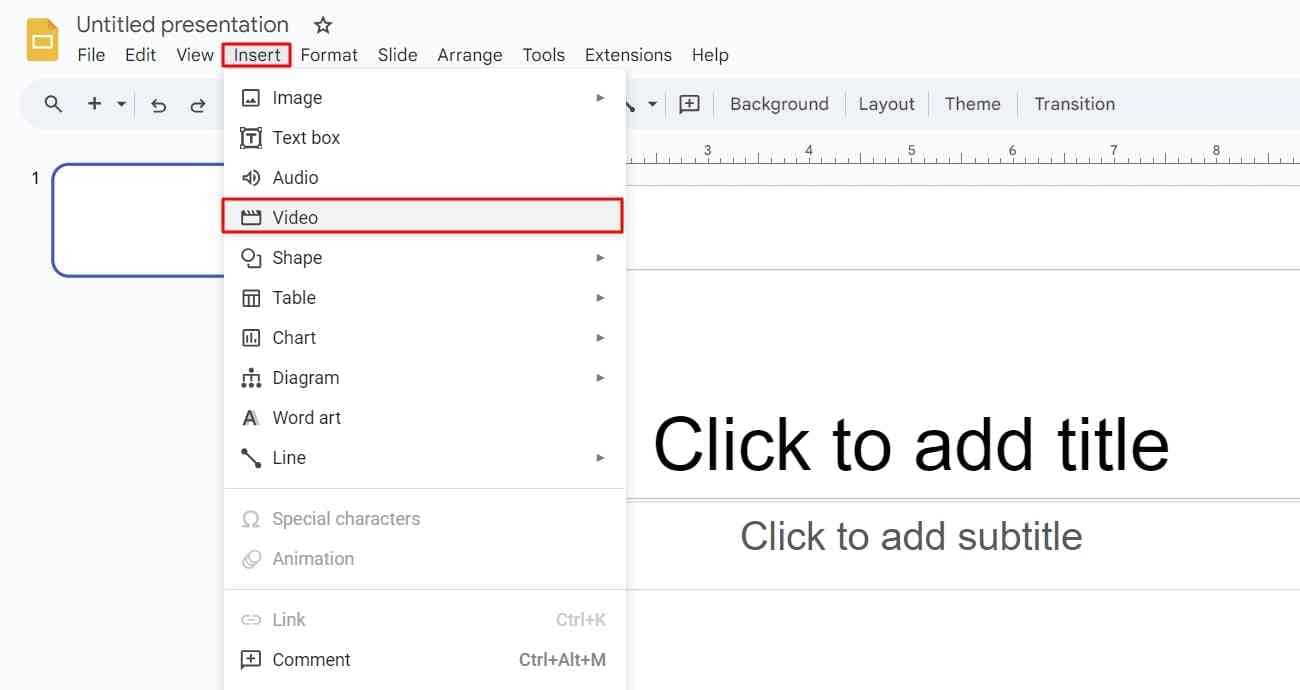
Step 1: Open your Google Slides and locate the slide where you want to insert the video. Now, navigate to the “Insert” tab and select “Video” to proceed.
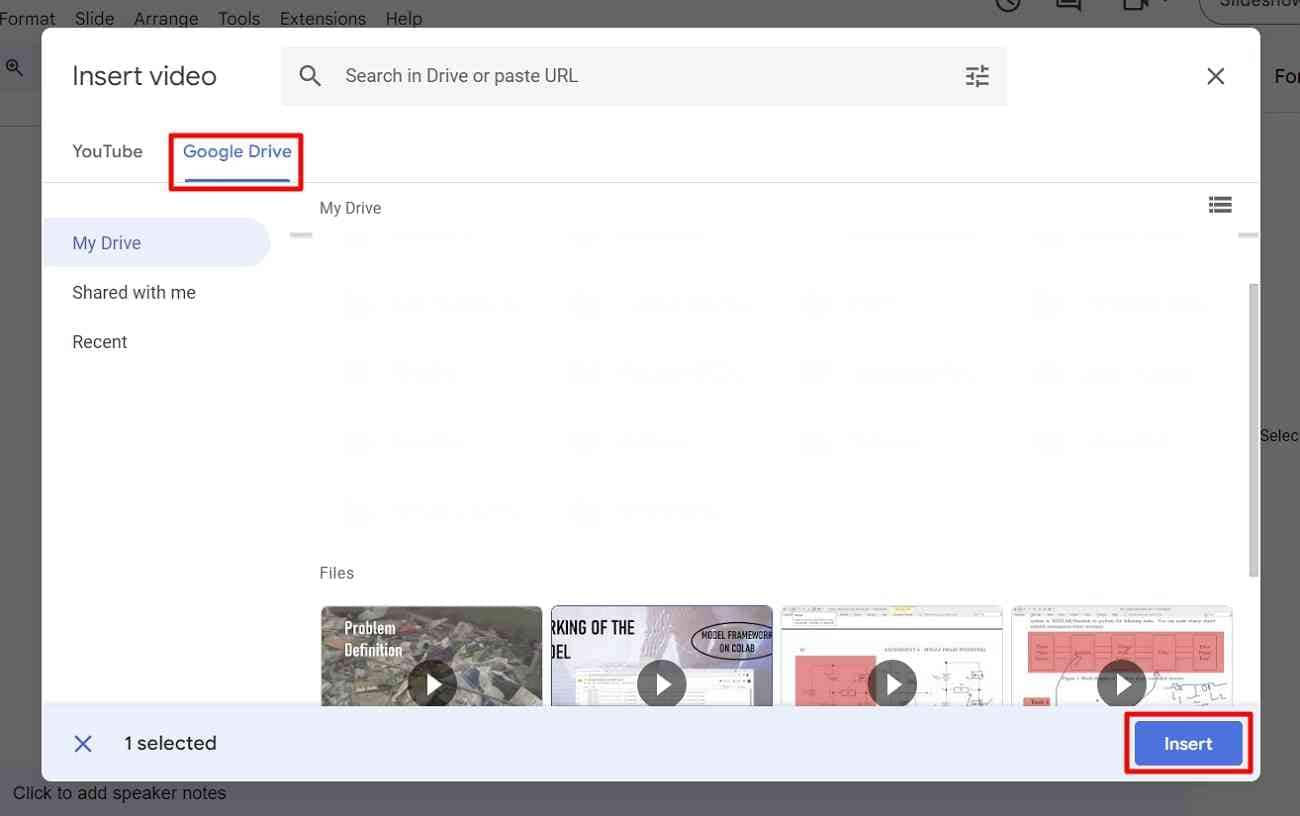
Step 2: Now, go to the “Google Drive” tab and locate your desired video. After choosing a video, hit the “Insert” button. Thus, the video will be inserted into the Slide instantly.
Part 4. Making Further Edits to Videos In Google Slides
After inserting videos in Google Slides, you can modify them as necessary. Google Slides is a complete forum that offers major editing tools to make presentations attractive. Here are the steps that can instruct you to edit the inserted videos in Google Slides:
Step 1: Open Google Slides and choose the video you have inserted. Go to the toolbar at the top and choose “Format options.” The format options will be displayed on the right side.
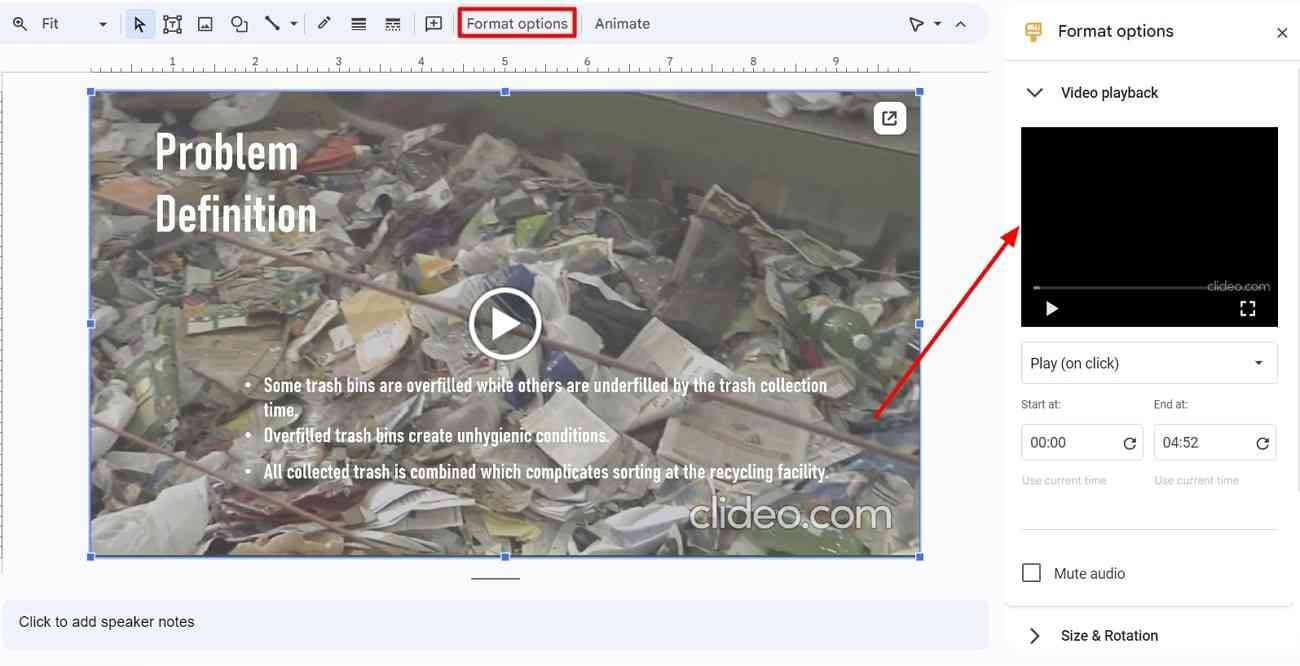
Step 2: Tap the “Video Playback” drop-down arrow to see more options. From there, you can change the start and end times accordingly. You can also mute the video by checking its box.
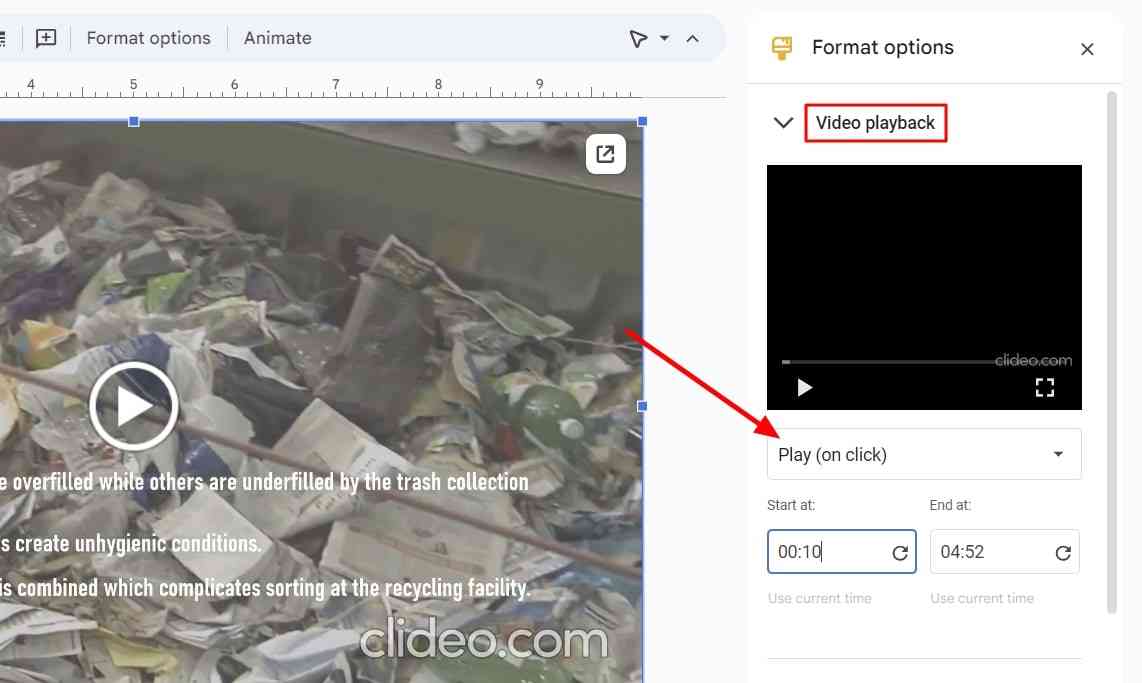
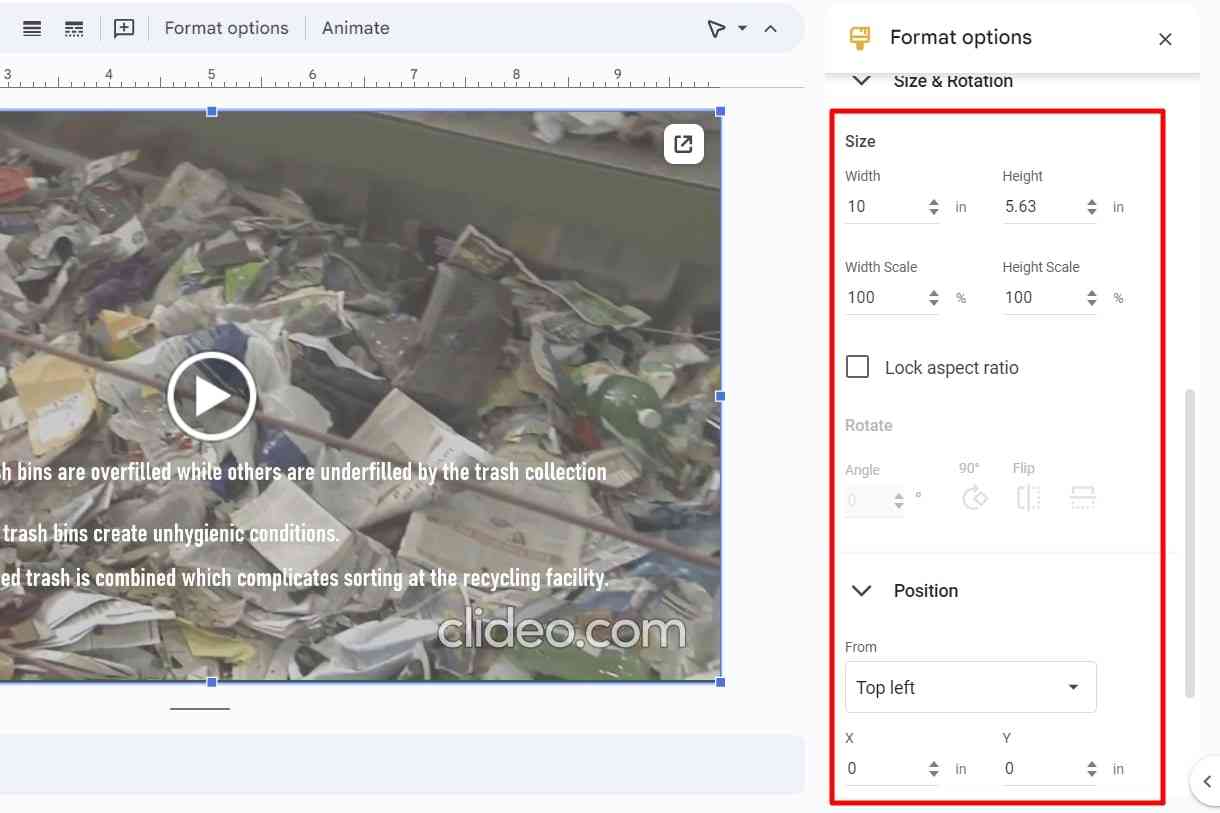
Step 3: Continue to select the “Size and Rotation” tab for more modifications. From this tab, you can change the height and width of the video. Lock the aspect ratio for the video from the given options. By opening the “Position” tab, you can manage the positioning of the video. Alter the X and Y axis to move the video accordingly.
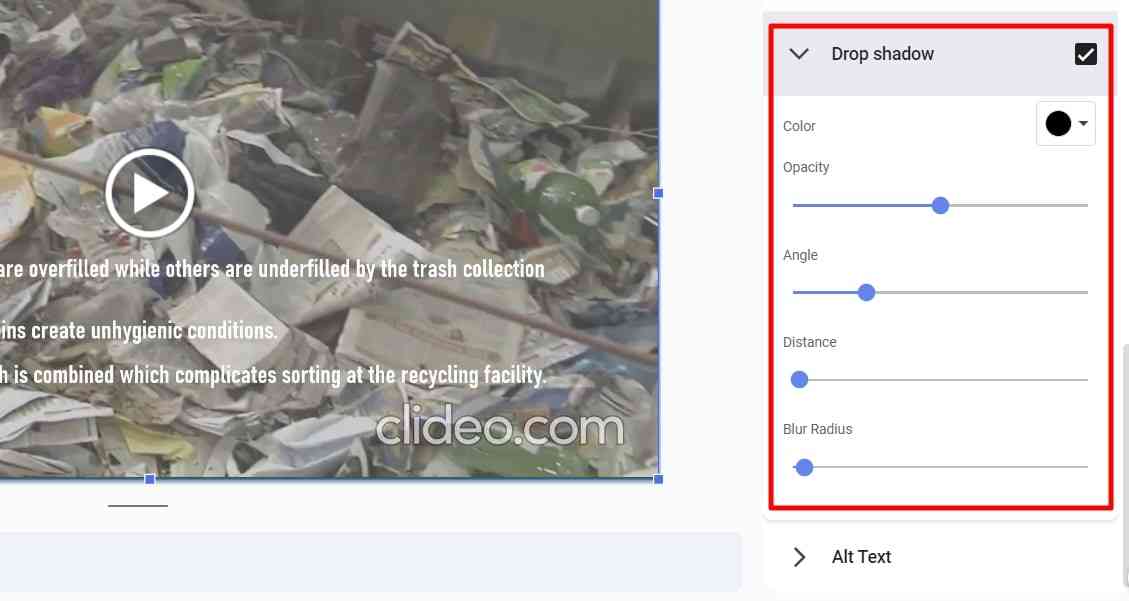
Step 5: Now, click on the “Drop Shadow” option to change the color properties of the video. From this tab, you can change your video's angle, transparency, and blurriness.
Bonus Part: Create Flawless and Personalized Video Presentations Using Wondershare Presentory
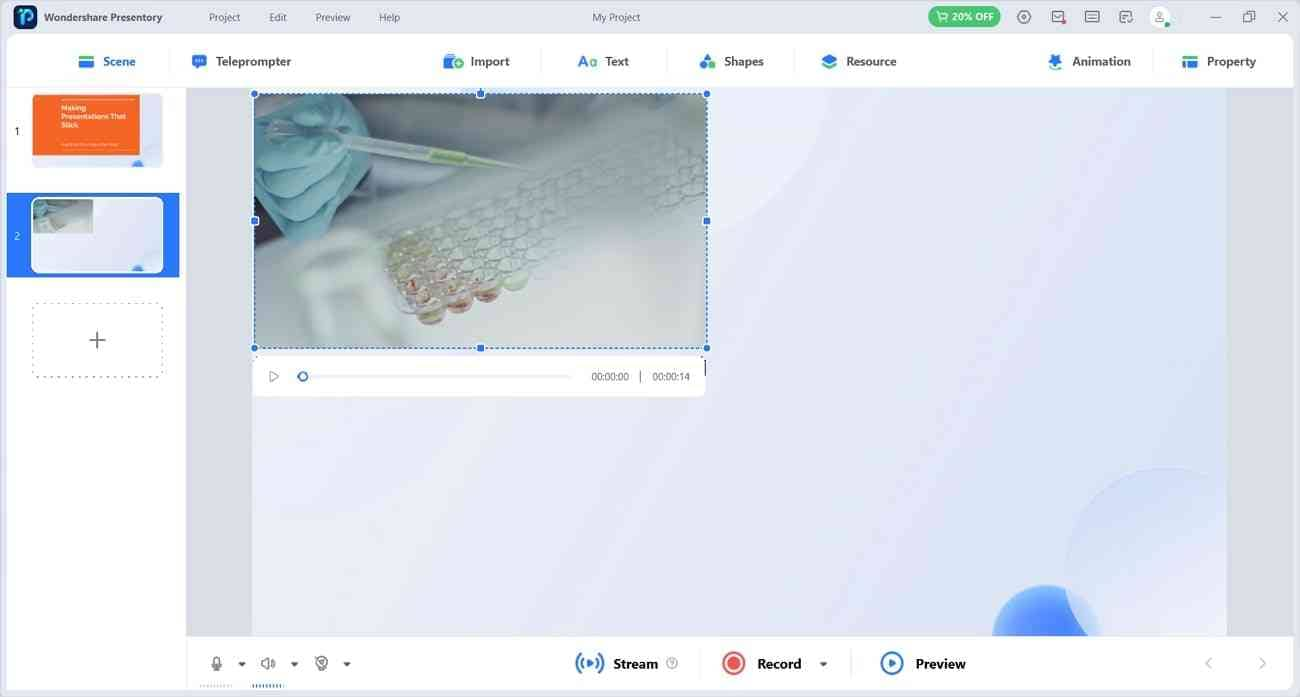
Do you want to create a personalized video presentation? To do so, you should try an advanced tool called Wondershare Presentory. It can enhance your efficiency with its powerful features and user interface. With a few clicks, you can rearrange your slides seamlessly. It helps you add vibrant backgrounds to your slides to grasp the attention of your viewers. Explore its "Resources" to add 3D backgrounds, web stickers, and text graphics.
Moreover, it supports various options to import the desired files. Along with PPT slides, it allows you to incorporate images and videos in your slides. To get some creative ideas, you can explore its popular templates. Thus, Presentory is a must-have presentation maker to boost your productivity. It offers intuitive controls to let you generate creative presentations.
Key Features Of This Impressive AI Presentation Maker
- AI Assistant: Do you want to generate an instant presentation? The AI assistant of Presentory can generate an entire presentation outline for you within a few minutes. You can enter the presentation’s topic or keyword in the given box. The tool will provide an authentic and practical presentation draft with a single tap.
- Efficient Teleprompter: To ensure you do not miss any point while presenting, use a teleprompter. On this teleprompter, you can upload text files as your helping material. Consequently, it gives the option to paste the text and adjust its properties. Moreover, manage the timing of your teleprompter accordingly.
- Live Stream Presentations: This tool is compatible with many platforms to live stream your presentation. You can stream your presentation on Zoom, Discord, Teams, Google Meets, YouTube, etc.
- Record Presentations: Along with streaming, record your presentation with a webcam. Adjust the settings of the microphone, webcam, and sound efficiently. The recording will begin after a small countdown. With its easy-to-interpret toolkit, pause, resume, and stop the recording anytime.
- Animation and Transitions: Do you want to create a good impression on your audience? Add animation effects to the slides from multiple options. It will make your presentation dynamic and unique. Moreover, it provides the option to add transitions between the slides for a smooth look.