PowerPoint can be considered synonymous with presentation creation software. Among the Microsoft Office suite, alongside Word and Excel, it is widely used and is a very convenient and user-friendly software.
However, while it has many features, beginners or those who haven't used it in a while might find it complex or feel unsure about where to start.
In this article, we will provide a detailed explanation of how to use PowerPoint. We will cover key points for using it and touch upon techniques for professionals. So, please be sure to read it all the way to the end.
In this article
Part 1. [For Beginners] How to Use Basic Functions of PowerPoint
Let's start by looking at how to use the fundamental functions of PowerPoint.
In this chapter, we will explain the following four operations with tips:
- Adding Slides
- Adding Text
- Inserting Images or Graphs
- Saving
Step 1. Adding Slides
First, let's take a look at how to add slides in PowerPoint.
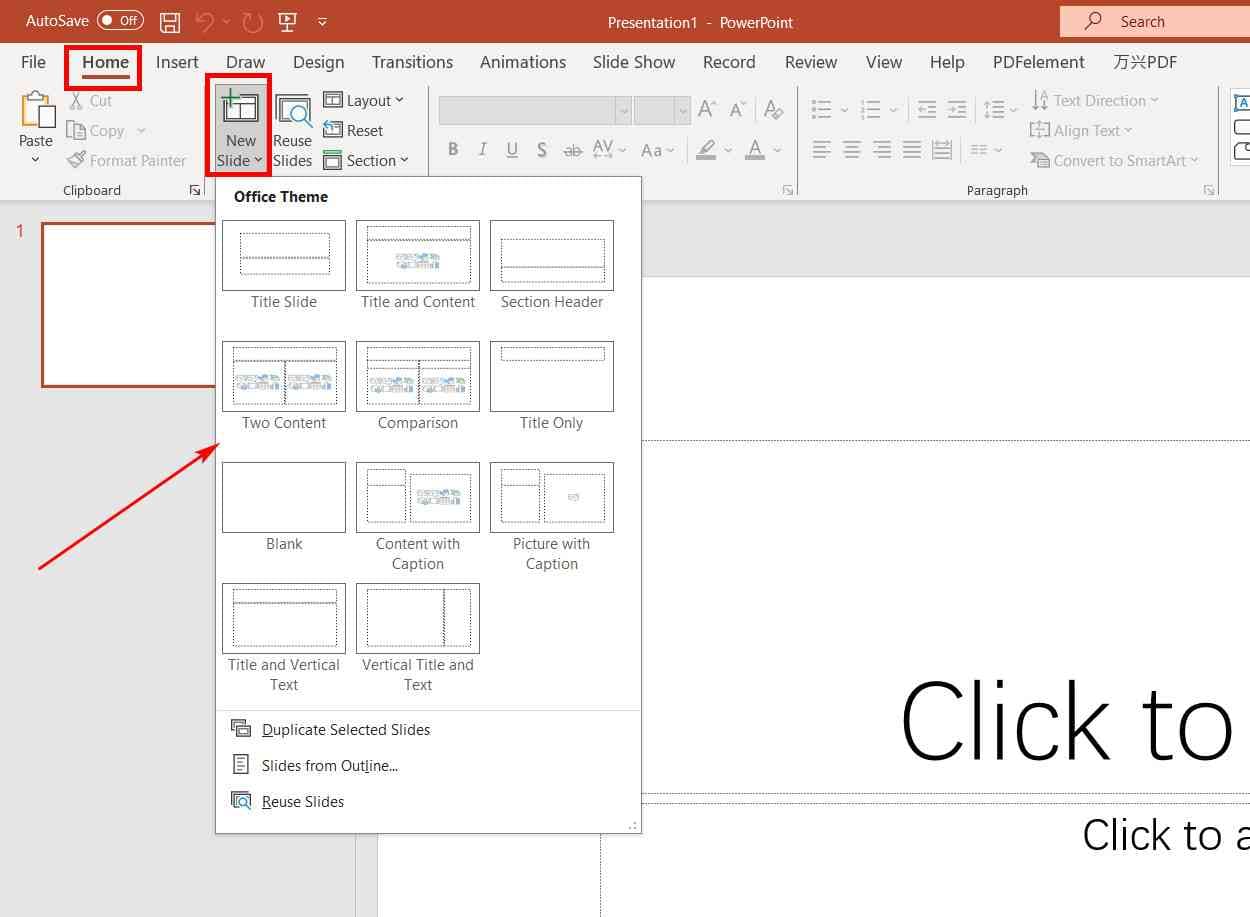
Adding Slides
Step 1: Select [Home] > [New Slide].
Step 2: Choose an appropriate layout.
It's clear and straightforward!
Here are two key points to keep in mind:
Point 1: Master the Use of Slide Duplication
You can use existing slides that you've already created by duplicating and editing them, so there's no need to add a completely new slide every time.
When creating presentations, situations often arise where you want to maintain the same layout but change the content. How well you can master duplication can significantly impact your efficiency.
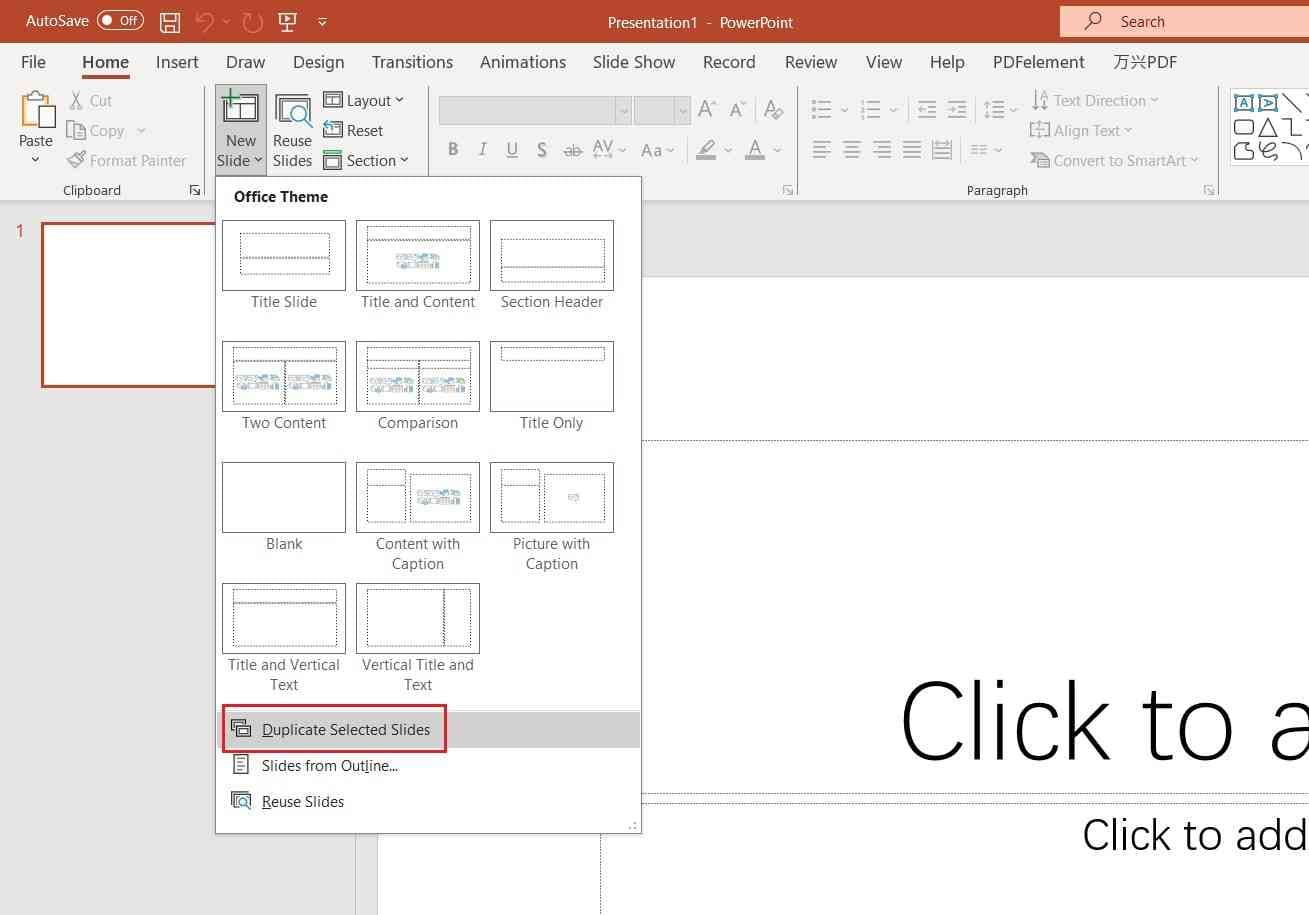
Duplicating Slides
Step 1: Select the slide you want to duplicate.
Step 2: Choose [Home] > [New Slide].
Step 3: Click [Duplicate Selected Slides].
Point 2: Choose a Theme that Suits Your Purpose
Selecting a theme that aligns with your presentation's purpose can enhance its visual appeal and effectiveness. The right theme can help convey your message more effectively to your audience.
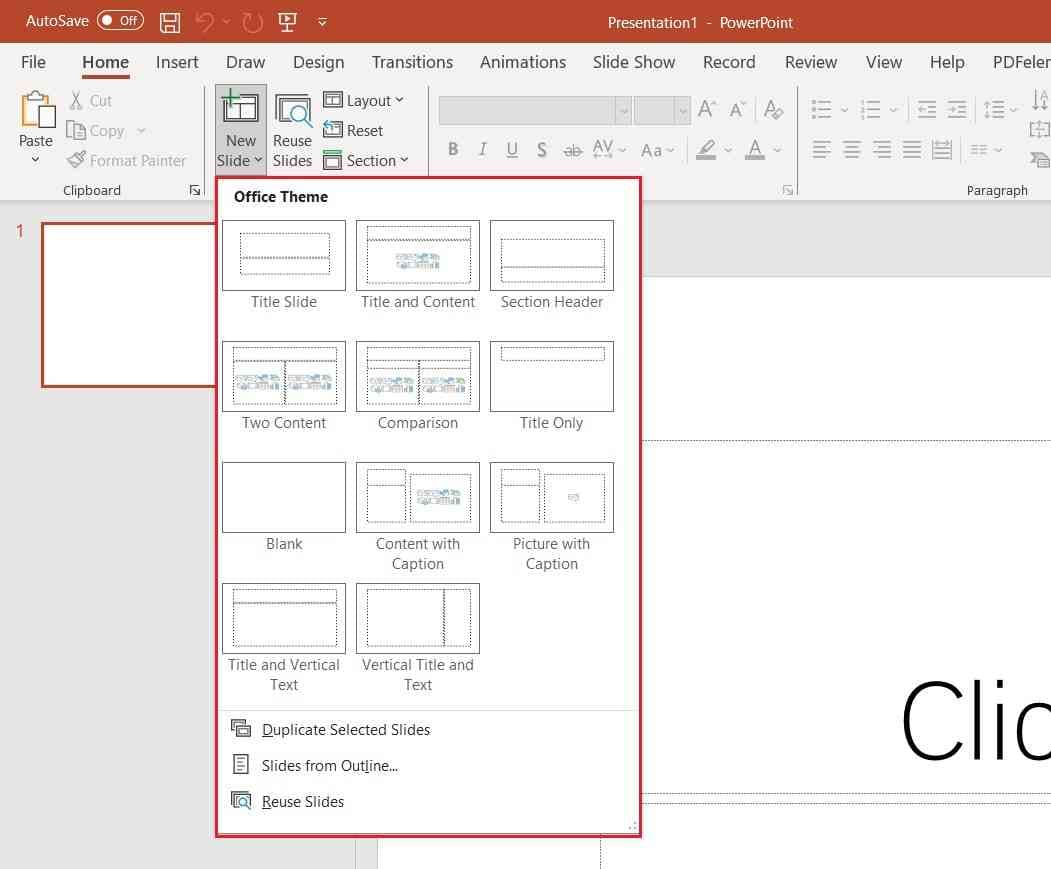
PowerPoint comes with several Office themes preloaded. By selecting a theme that aligns with the purpose of your slides, you can expect a significant improvement in work efficiency and an increase in overall quality.
Step 2. Adding Text
In many presentations, explanations through text are essential. Let's explore how to add text in PowerPoint and how to edit the added text.
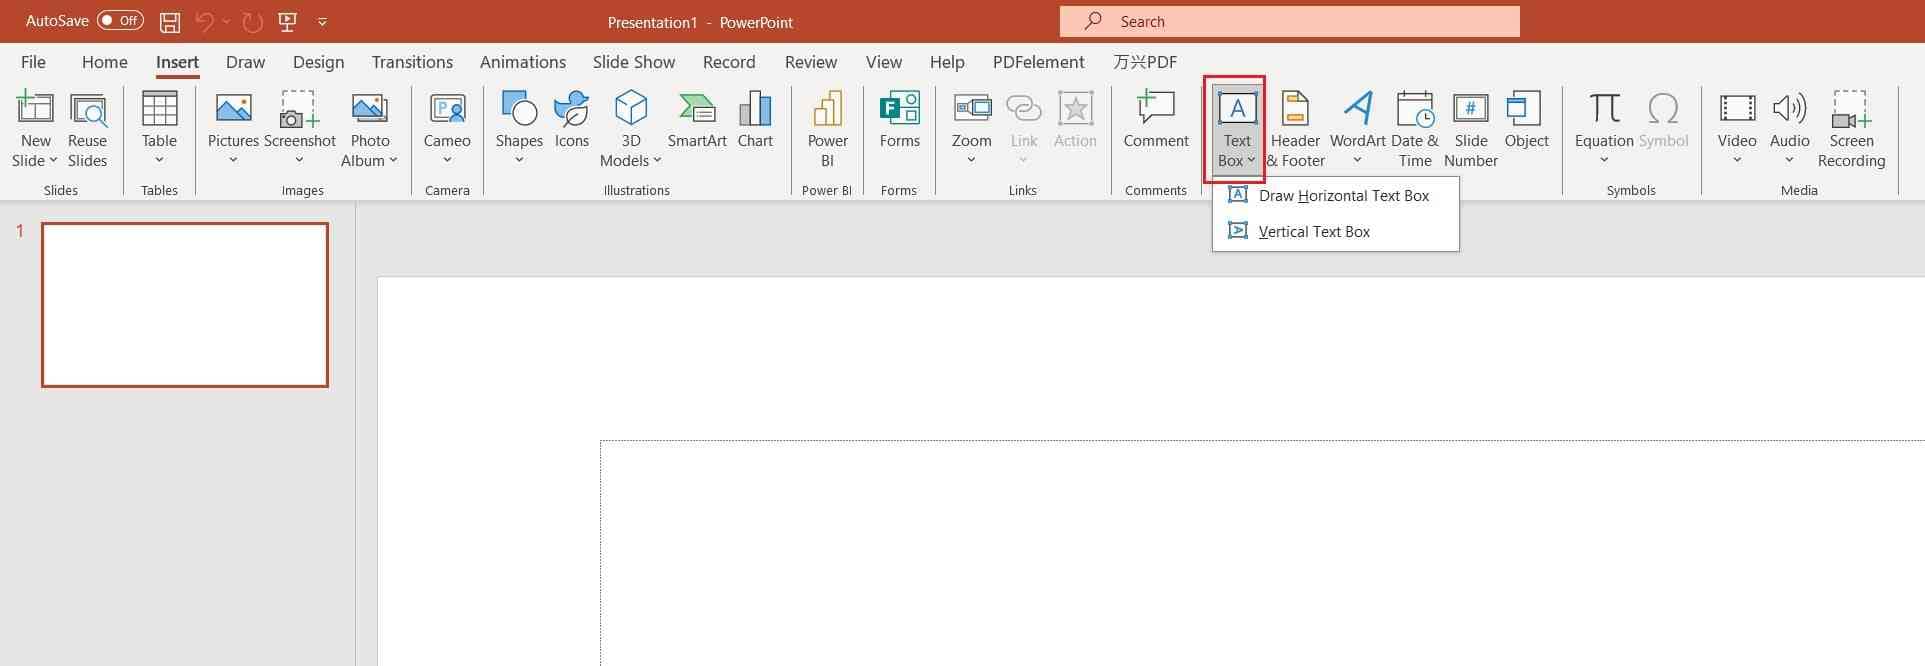
Adding Text
Step 1: Click on [Text Box] in the [Insert] tab of the ribbon.
Step 2: Choose between "Horizontal" or "Vertical" text orientation.
Step 3: Click and drag to add a text box to the slide.
Step 4: Enter your text in the added text box.
Following the above steps, you've successfully added a text box and text to your slide!
Now, let's proceed to edit the added text.
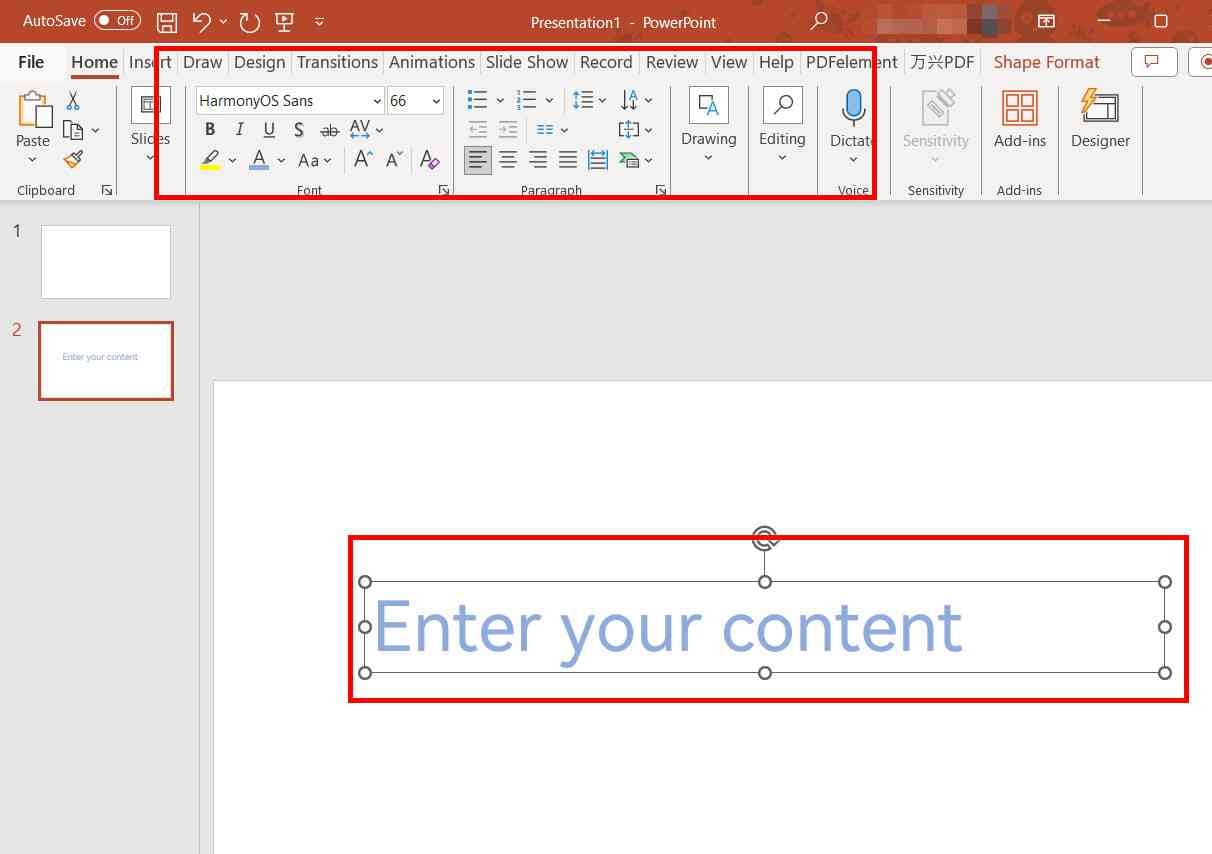
Editing Text
Step 1: Select the text box you want to edit.
Step 2: Under [Font] in the [Home] tab, you can make various formatting adjustments such as font style, font size, bold, italic, underline, text color, highlighting, and letter spacing.
Step 3: Under [Paragraph] in the [Home] tab, you can configure paragraph settings for the text.
Point 1: Adjusting Line Spacing

When you compare the two images above, you may notice that the After image has become slightly more readable.
In presentations where the goal is to convey information to a broad audience, even small improvements in readability and comprehension can make a significant difference.
By paying attention to letter spacing, you can achieve a presentation that is easier to read and understand overall.
Changing Line Spacing
Step 1: Select all the text you want to change the line spacing for.
Step 2: Go to [Home] > [Line Spacing] and then choose [Line Spacing Options].
Step 3: Under [Spacing], change the [Line spacing] to [1.2].
Point 2: Utilizing Text Box Borders

Text box borders can be used to visually separate text from the surrounding content, making it stand out and enhancing the overall clarity of your presentation. You can customize text box borders in PowerPoint to suit your design and organization preferences.
Using Text Box Borders
Step 1: Select the text box.
Step 2: Go to [Format Shape].
Step 3: Under [Line], you can set options like line thickness, style, and color to customize the text box border.
Step 3. Inserting Images or Graphs
Inserting images and graphs to visualize ideas and data is crucial in presentations. The impact of conveying information through visuals like images and graphs can be significantly different from using text alone.
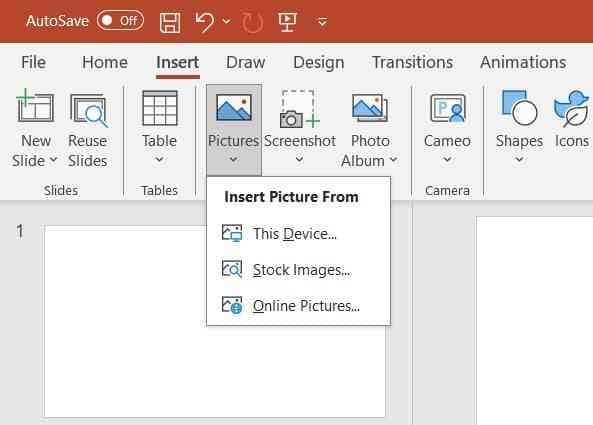
Inserting Images
Step 1: Click on the [Insert] tab.
Step 2: Choose [Picture] from the [Images] category.
Step 3: Click on [This Device...] to select the image you want to insert.
Step 4: Place and edit the image as needed.
Using visuals effectively can make your presentation more engaging and help your audience better understand your message.
Next, here's how you can insert a graph into your presentation:
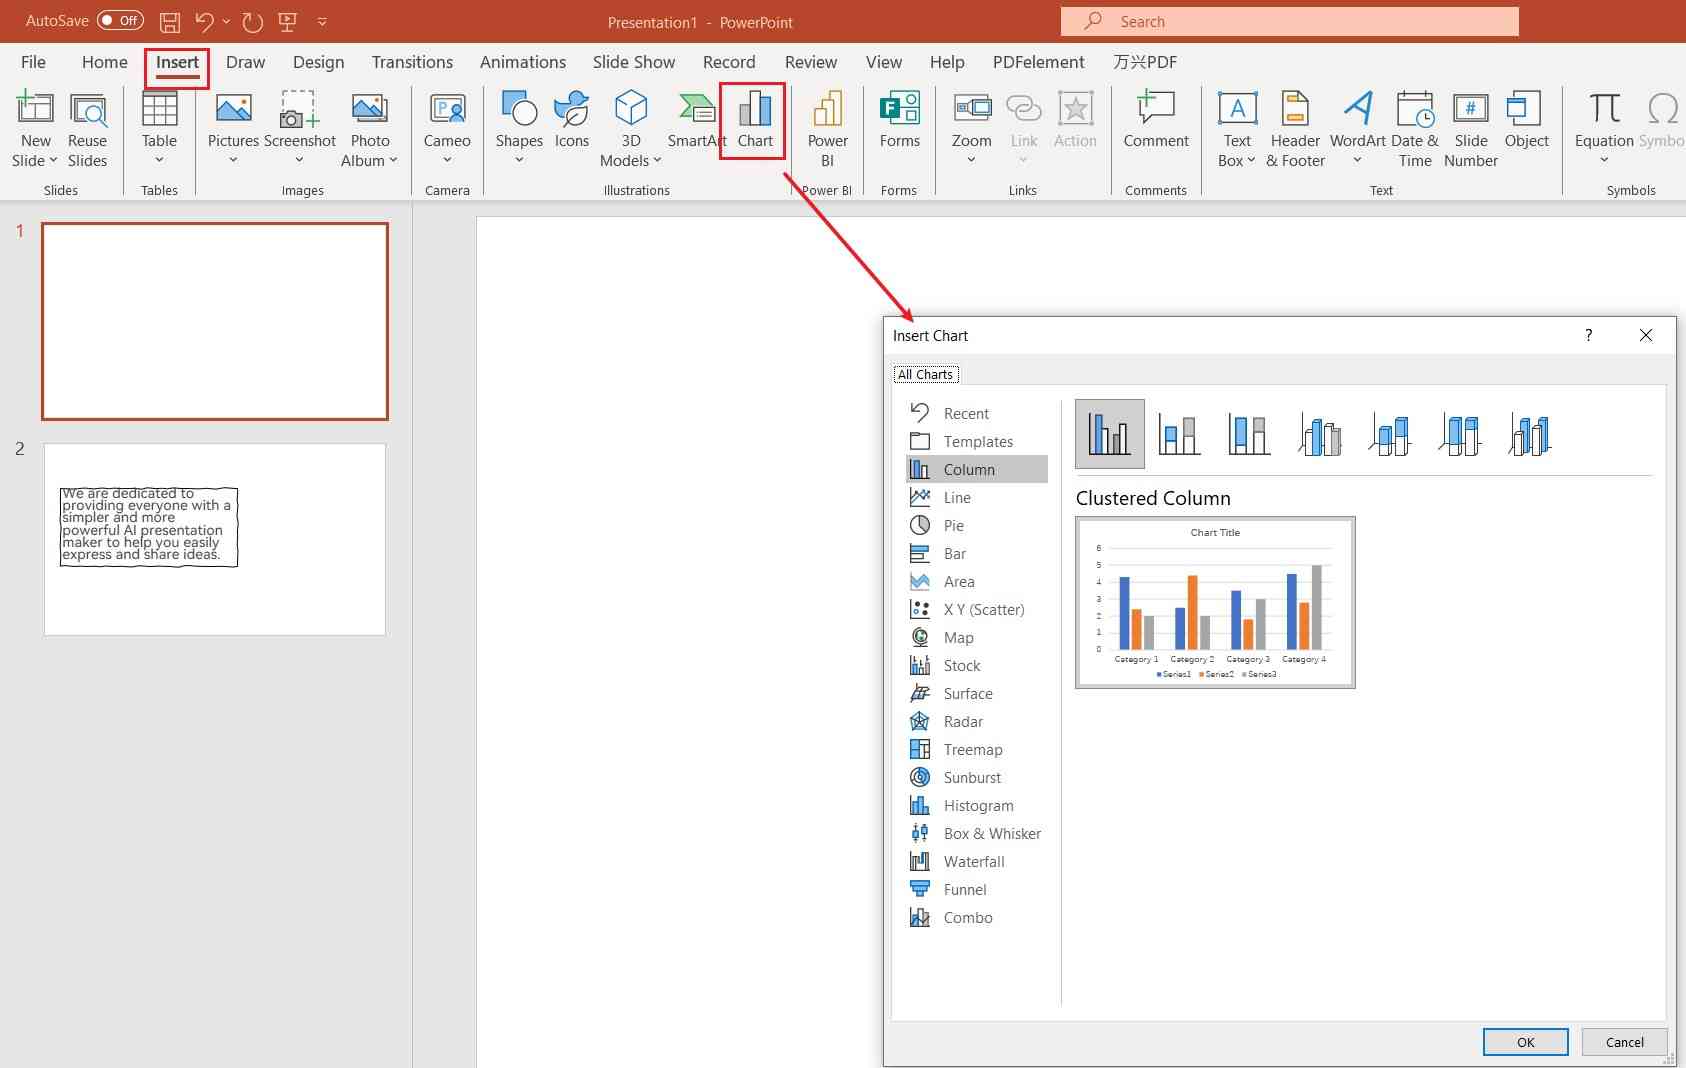
Using Charts
Step 1: Click on the [Insert] tab.
Step 2: Choose [Chart] from the [Illustrations] category.
Step 3: Select the type of graph you want to use.
Step 4: Click [OK] to insert the chart.
Step 5: Enter your data in the Excel sheet that appears.
Adding graphs can make complex data more understandable and visually appealing in your presentation.
Point 1: Choosing the Right Chart for Your Data
Absolutely, the choice of chart in PowerPoint can have a significant impact on how your data is perceived by the audience. Even with the same dataset, the visual representation can vary greatly, affecting how your message is communicated.
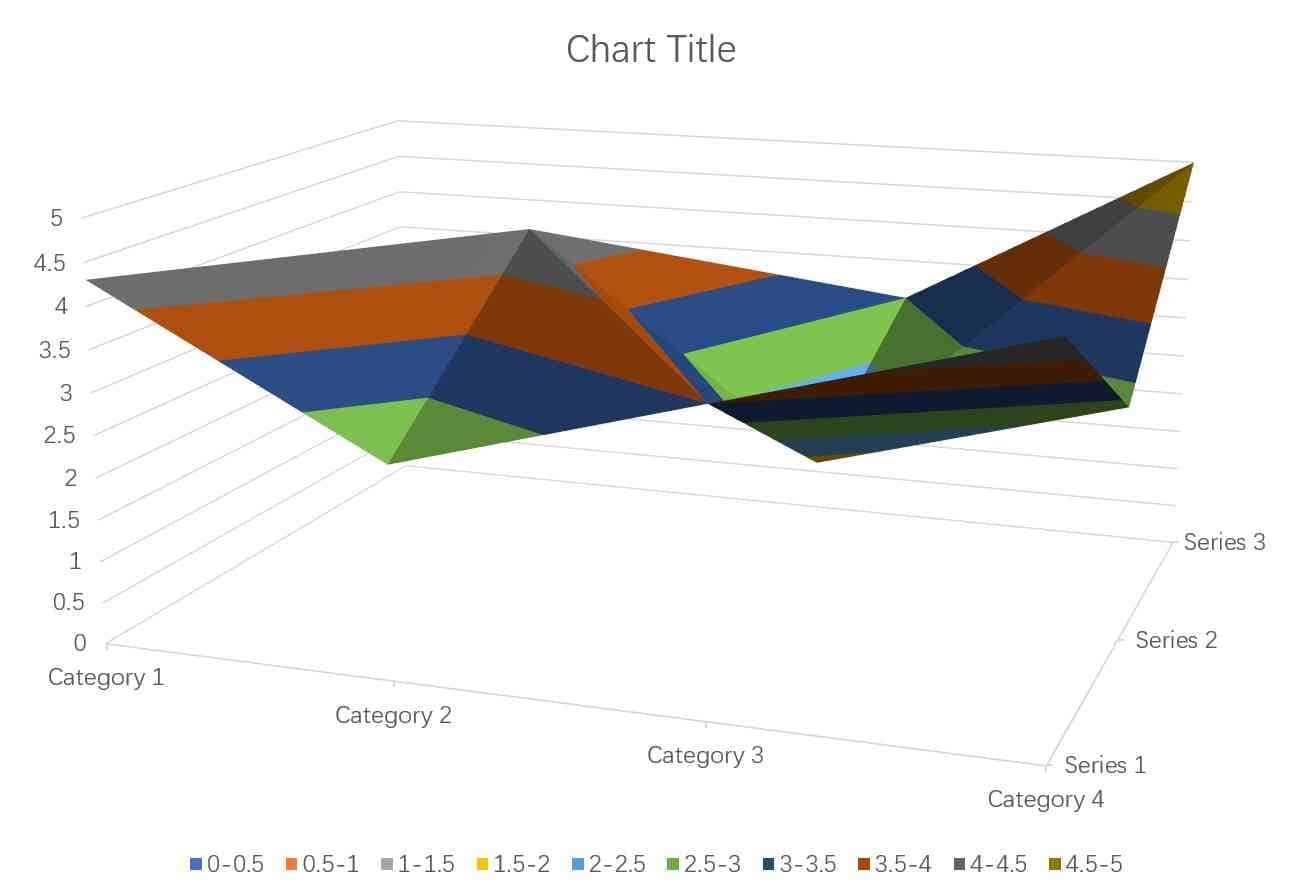
By keeping in mind what you want to convey with your data and ensuring the accuracy of the information, you can make more informed decisions about which type of chart to use for each dataset. This thoughtful selection process can lead to a more comprehensible and effective presentation.
Point 2: Utilizing Stock Images
For those using Microsoft's subscription service "Microsoft 365," PowerPoint also includes a "Stock Images" feature.
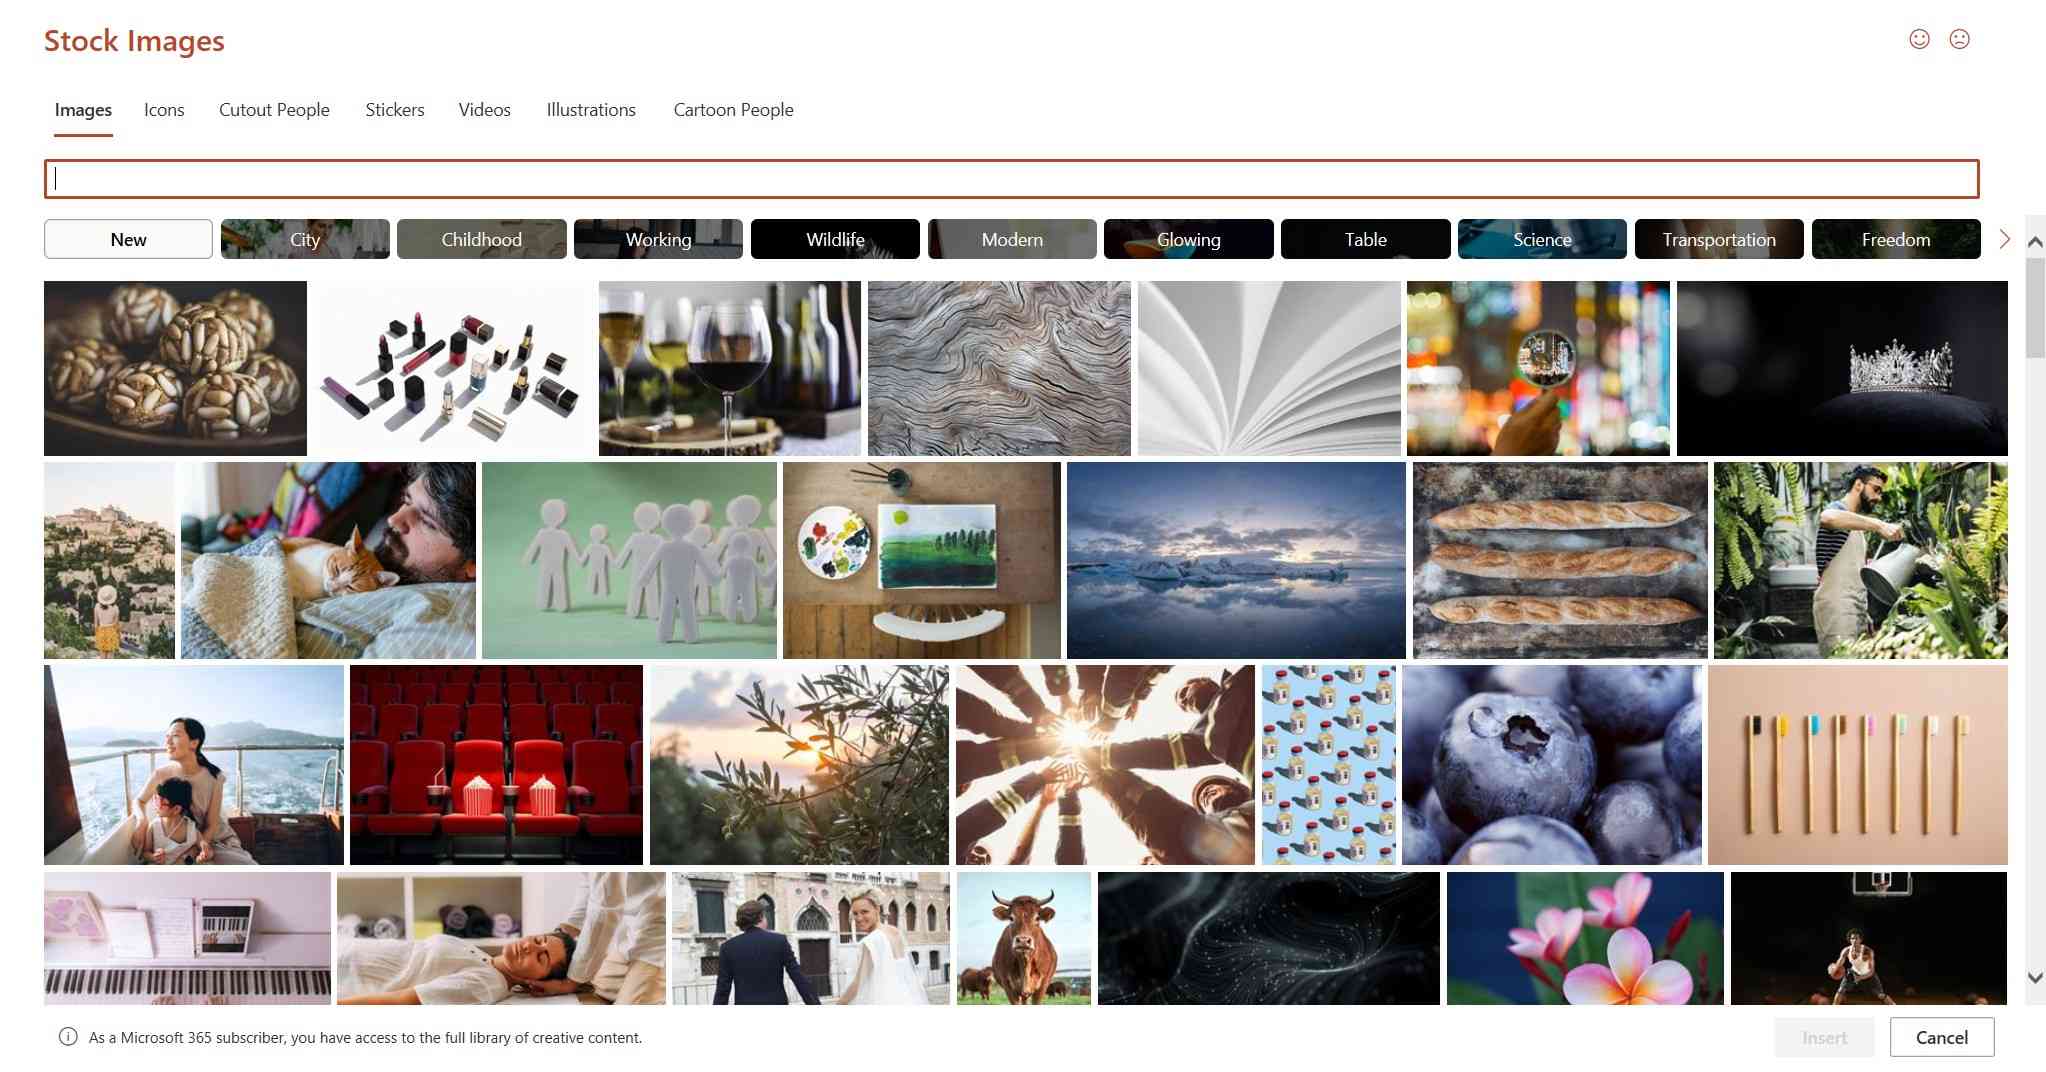
By using the Stock Images feature, you can search for and use the desired images directly within PowerPoint without the need to open a web browser. This saves you time and increases your efficiency when creating presentations. If you're using Microsoft 365, be sure to give it a try.
Using Stock Images
Step 1: Click on the [Insert] tab.
Step 2: Choose [Picture] from the [Images] category.
Step 3: Click on [Stock Images] to search for and select the image you want to insert.
Step 4: Place and edit the image as needed.
Step 4. Saving your powerpoint
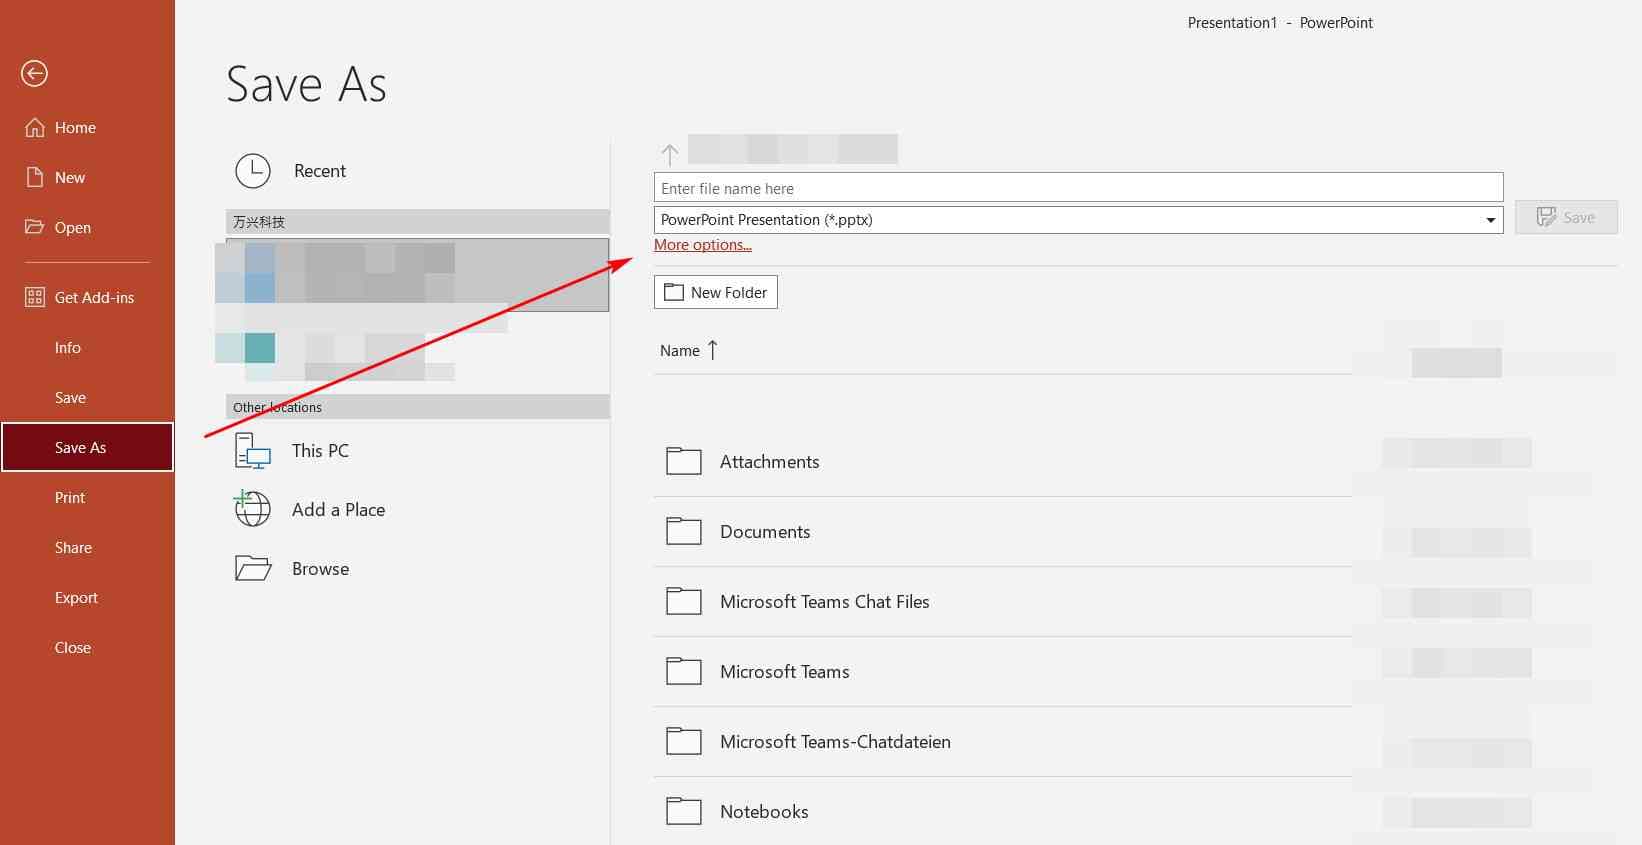
It's important to know how to save your slide presentation. Here are the specific steps:
Saving Slide Presentation
Step 1: Click on the [File] tab.
Step 2: Select [Save As].
Step 3: Set the [Save Location] and [File Name].
Step 4: Click [Save].
By following these steps, you can ensure that your slide presentation is saved and can be accessed or shared as needed.
Part 2. [For Professionals] How to Use Essential Features for Creating Outstanding PowerPoint Presentations
In addition to the fundamentals introduced earlier, we will now introduce four additional features and their uses that you should remember to create even more impressive PowerPoint presentations. By mastering these features on top of the basics, you can create high-quality presentations that stand up to professional standards.
Feature 1: Using Templates
In PowerPoint, you can save time and create aesthetically pleasing presentations by utilizing a wide range of well-designed templates. Using templates eliminates the need to start your presentation from scratch.
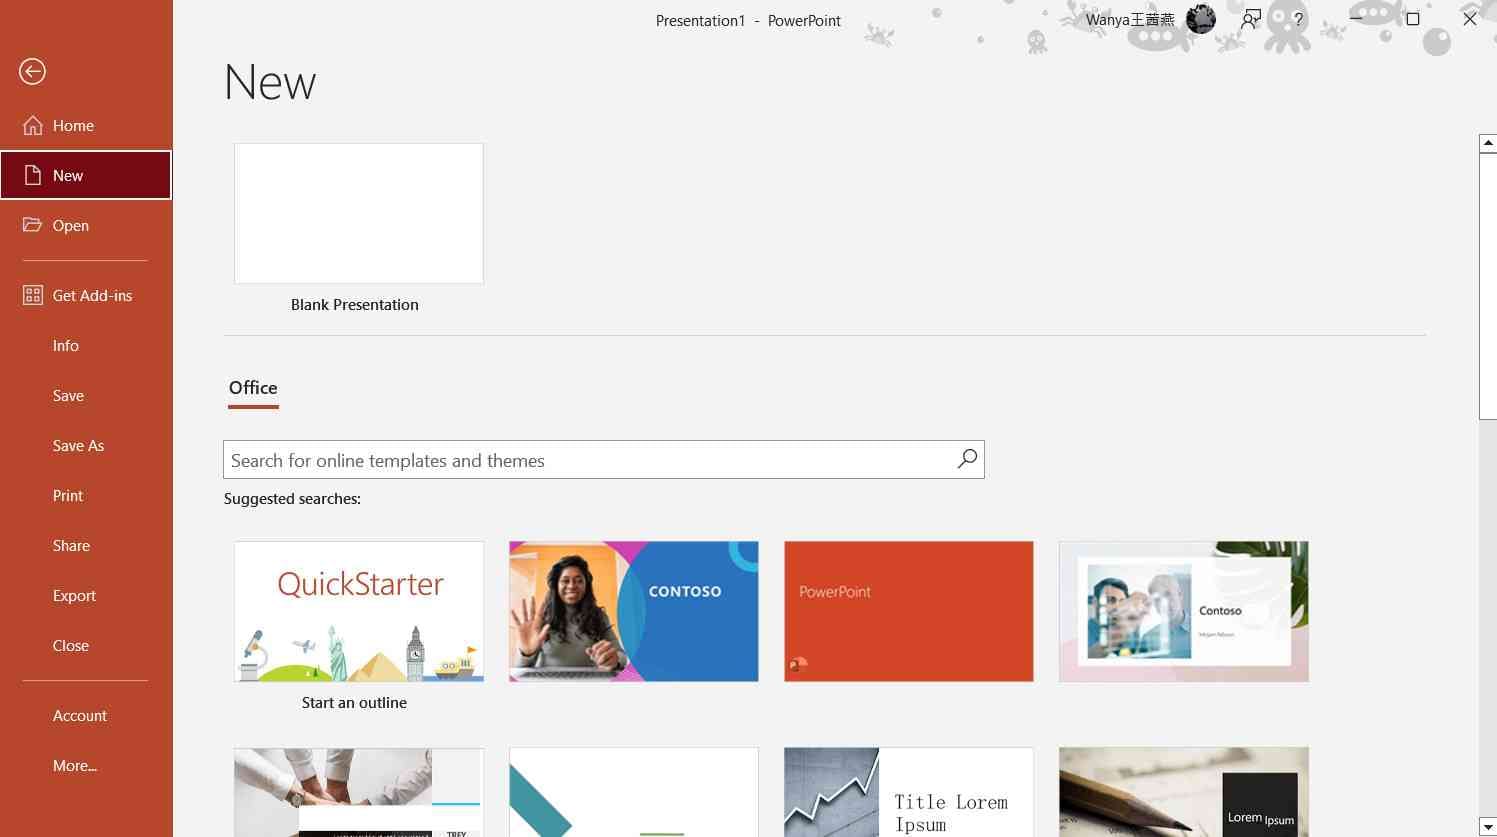
How to Use Templates
Step 1: Click on the [File] tab and select [New].
Step 2: Choose a template (you can search for more templates online for an even wider selection).
Step 3: Review the details and instructions, then click [Create].
By using templates, you can enhance the visual appeal of your presentation while saving valuable time in the creation process.
Feature 2: Saving as a Template
By saving a PowerPoint presentation that you've meticulously created as a template, you can start your future presentations with the same format, ensuring consistency and saving time.
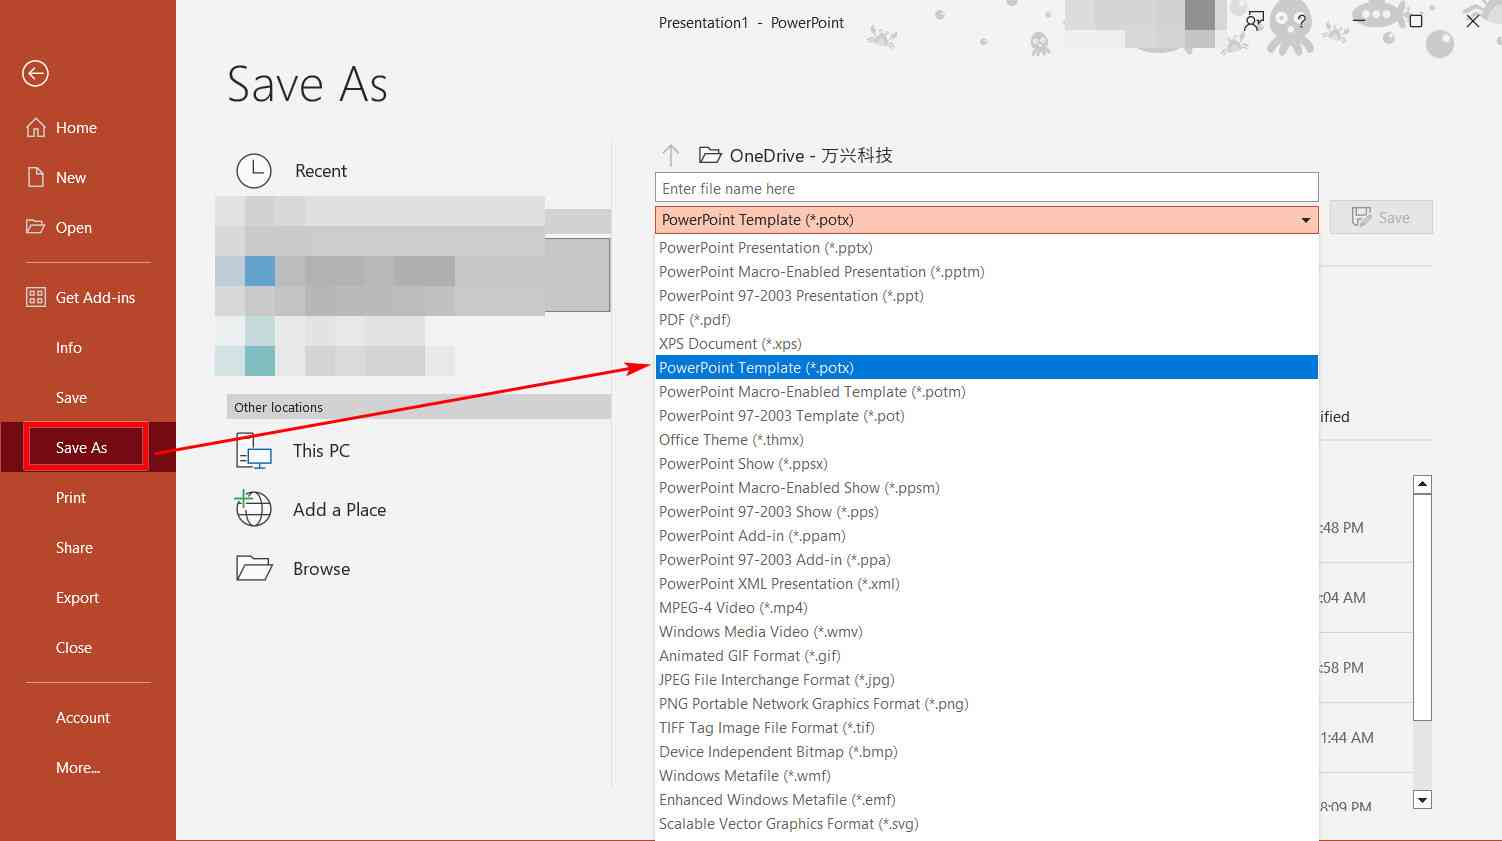
How to Save as a Template
Step 1: Click on the [File] tab and select [Save As].
Step 2: Change the save format to [PowerPoint Template (*.potx)].
Step 3: Set the name and save location, then click [Save].
This allows you to reuse your custom design, providing a convenient way to maintain a consistent style across multiple presentations.
Feature 3: Adding Animations
In PowerPoint, you can capture your audience's attention by adding animations to text, images, objects, and more. Animation can make your presentation more engaging and dynamic.
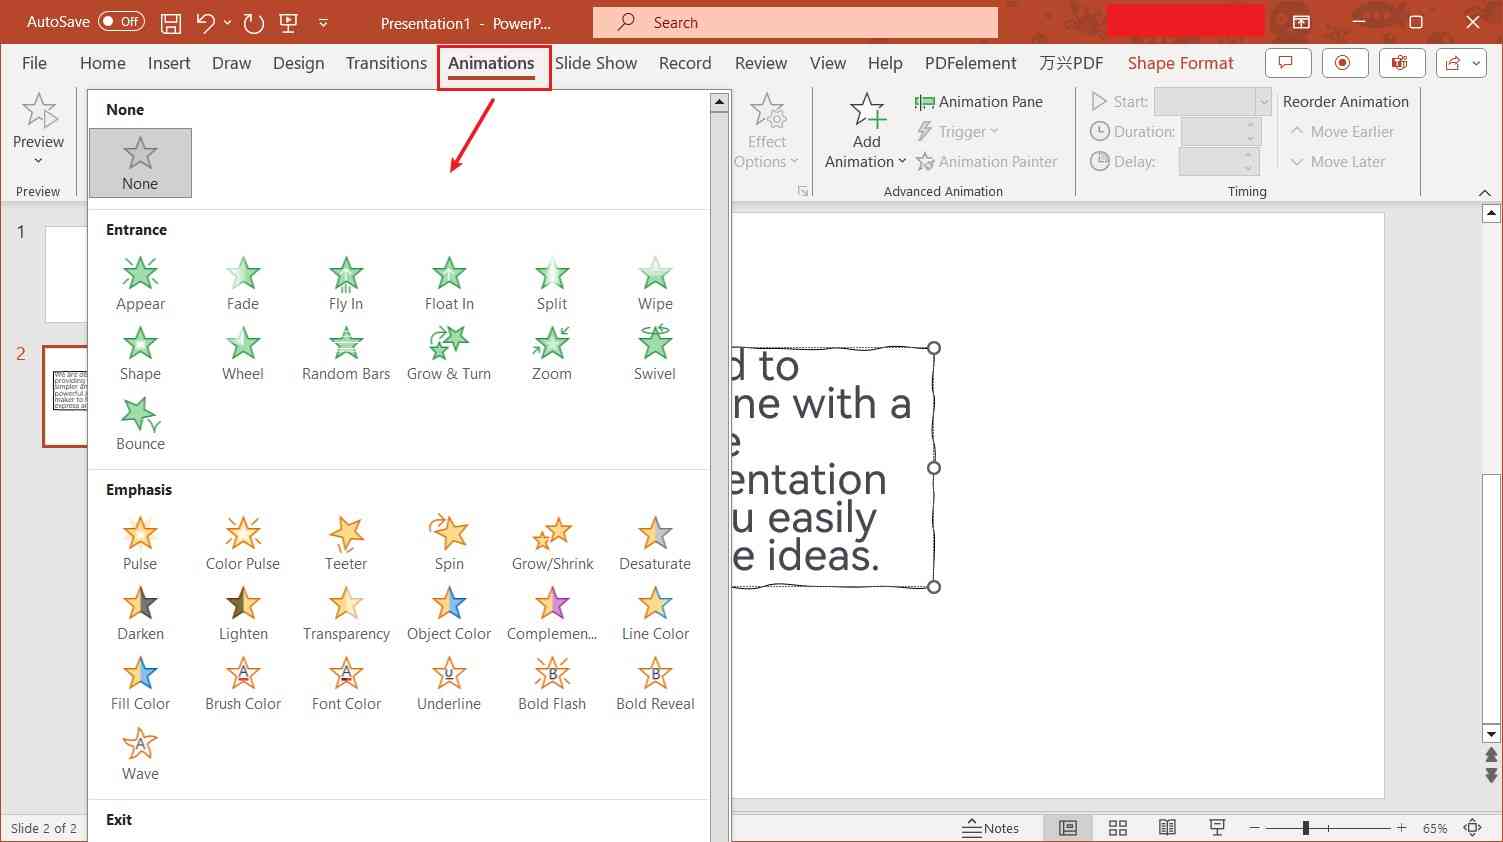
How to Use Animations
Step 1: Select the item you want to animate.
Step 2: Go to the [Animations] tab.
Step 3: Choose an animation from [Animation Select] or [Add Animation].
Step 4: Configure animation settings such as [Animation Options] and [Timing].
Step 5: Preview the animation using [Preview].
By incorporating animations, you can effectively convey your message and create a more captivating presentation.
Feature 4: Inserting Stunning Graphs
In addition to existing graphs, Microsoft offers premium templates for graphs on their official website. If you can't find the perfect graph within the existing options, you can explore this resource.

Please note that this feature is available exclusively to Microsoft 365 subscription users.
How to Use Graphs
Step 1: Access templates/graphs.
Step 2: Choose a graph you like and download it.
Step 3: Open the downloaded file.
Step 4: Copy the slides.
Step 5: Paste them into the PowerPoint where you want to use them.
Step 6: Edit as needed.

This feature allows you to enhance your presentation with professionally designed graphs, making your data more visually appealing and impactful.
Absolutely, downloading and customizing templates, such as an organizational chart template, can save you a significant amount of time and effort. It allows you to create visually appealing and clear slides quickly, making your presentations more professional and engaging. Taking advantage of available templates is a smart way to streamline your presentation creation process.
Feature 5: Adding Sound Effects
In PowerPoint, you can also add sound effects or background music, which can play a significant role in setting the atmosphere for your presentation. This technique is essential to remember when you want to enhance the overall ambiance of your presentation.
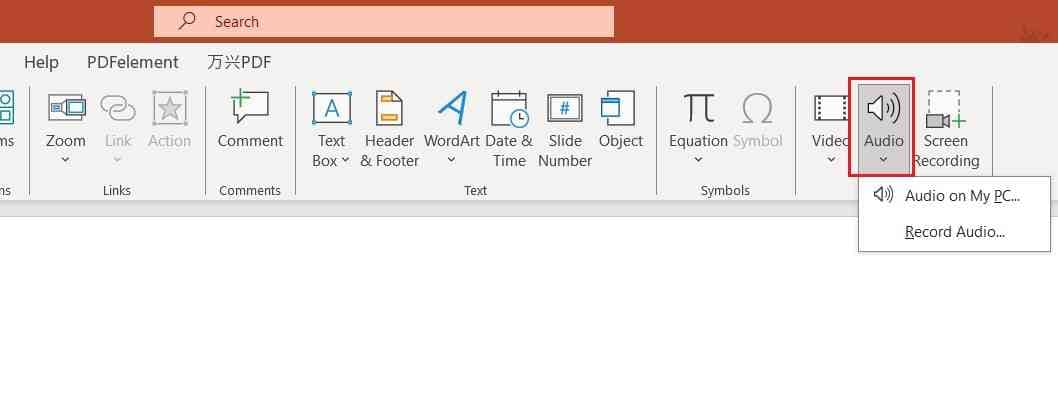
Additionally, you can apply a similar process to add videos with sound effects.
How to Add Sound Effects
Step 1: Click on the [Insert] tab, then [Audio] > [Audio on My PC].
Step 2: Select the audio file you want to add from your computer.
Step 3: Click [Insert].
Adding sound effects or background music can make your presentation more engaging and memorable.
Part 3. Presentory: The Next-Generation Presentation Tool as an Alternative to PowerPoint
When it comes to presentation creation tools, PowerPoint is widely known and used. However, there are other convenient presentation creation tools available, and one highly recommended option is "Presentory".
1. What Is Presentory?
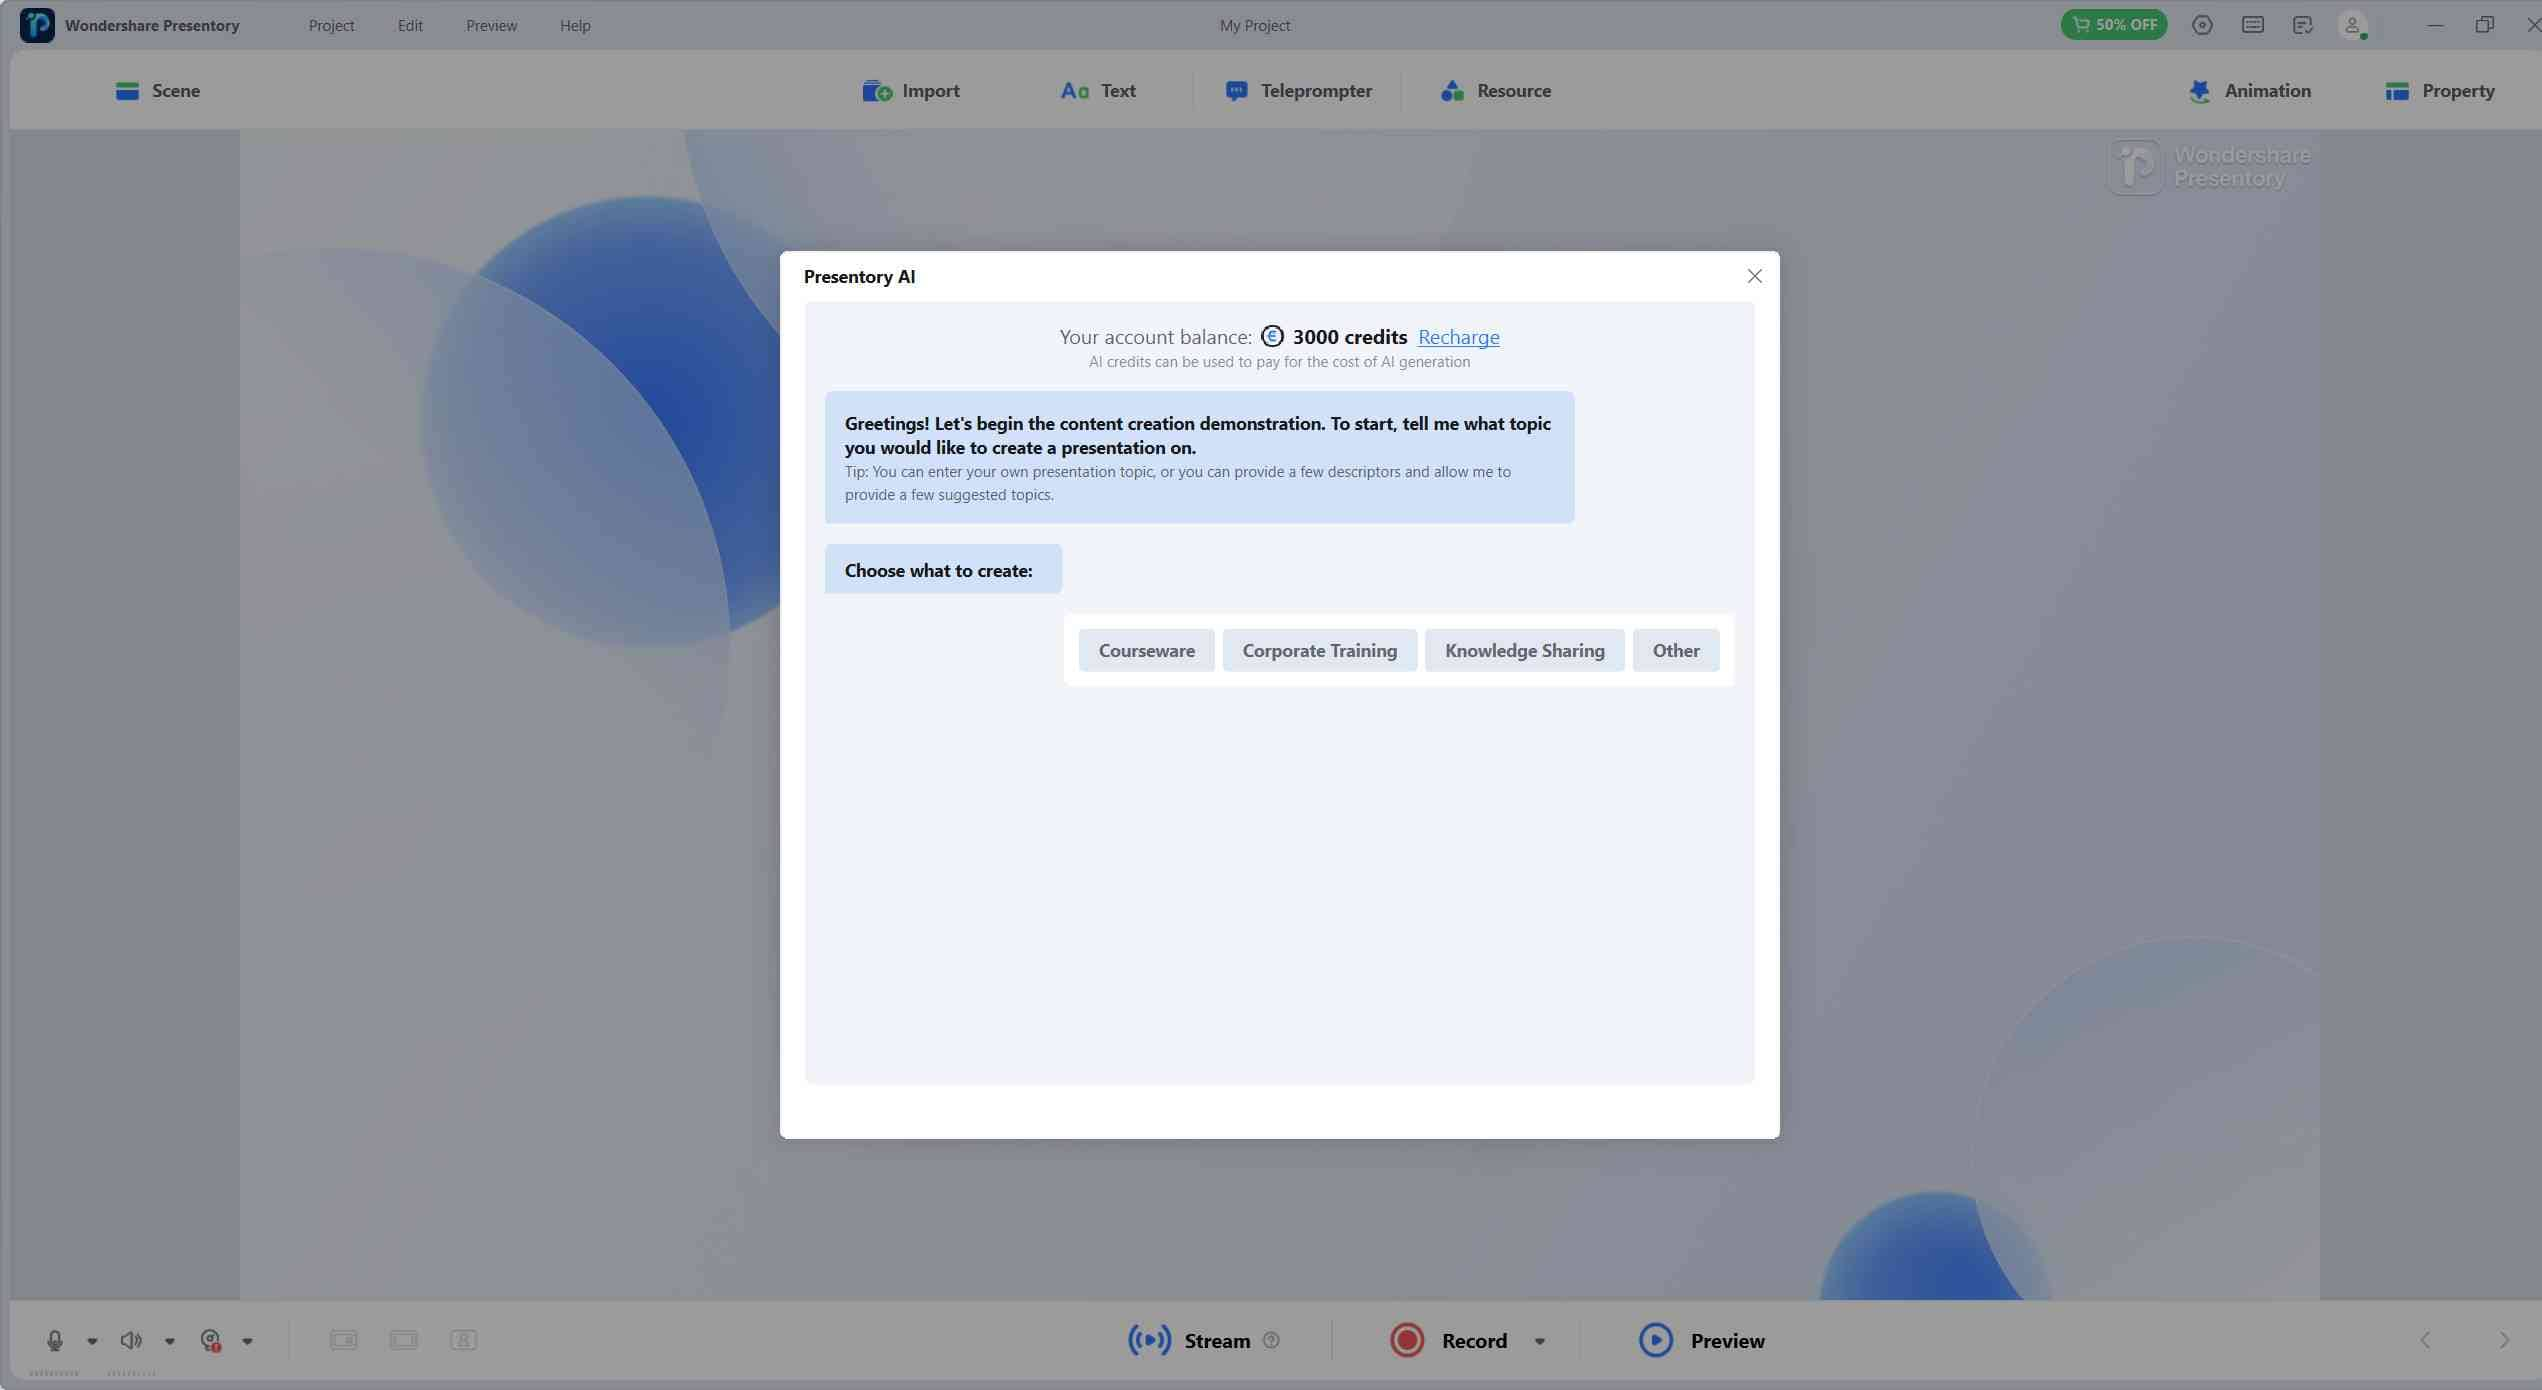
Presentory is the latest presentation creation software developed by the renowned global creative software maker, Wondershare. It is designed to be extremely user-friendly, making it intuitive to use even for those who find PowerPoint challenging.
Despite its simple design, Presentory boasts a wide range of features. Notably, it offers AI presentation generation capabilities that can propose and create content and outlines with just a few simple instructions—an unusual feature in the industry. When combined with its abundant animations, transitions, templates, and other tools, you can quickly create high-quality presentations.
Presentory offers three main categories of features:
Feature 1: Presentation Creation
Presentory includes a robust presentation creation feature, which goes beyond typical presentation software. It incorporates AI-generated content and AI-powered background removal, making it easy for anyone to create high-quality presentations by combining a variety of templates and animations.
Feature 2: Recording Function
Presentory includes a recording function, allowing you to record your presentation and export it as a video. This feature extends the utility of Presentory beyond traditional presentations, enabling you to upload your presentation to platforms like YouTube or distribute it to audiences who couldn't attend in real-time.
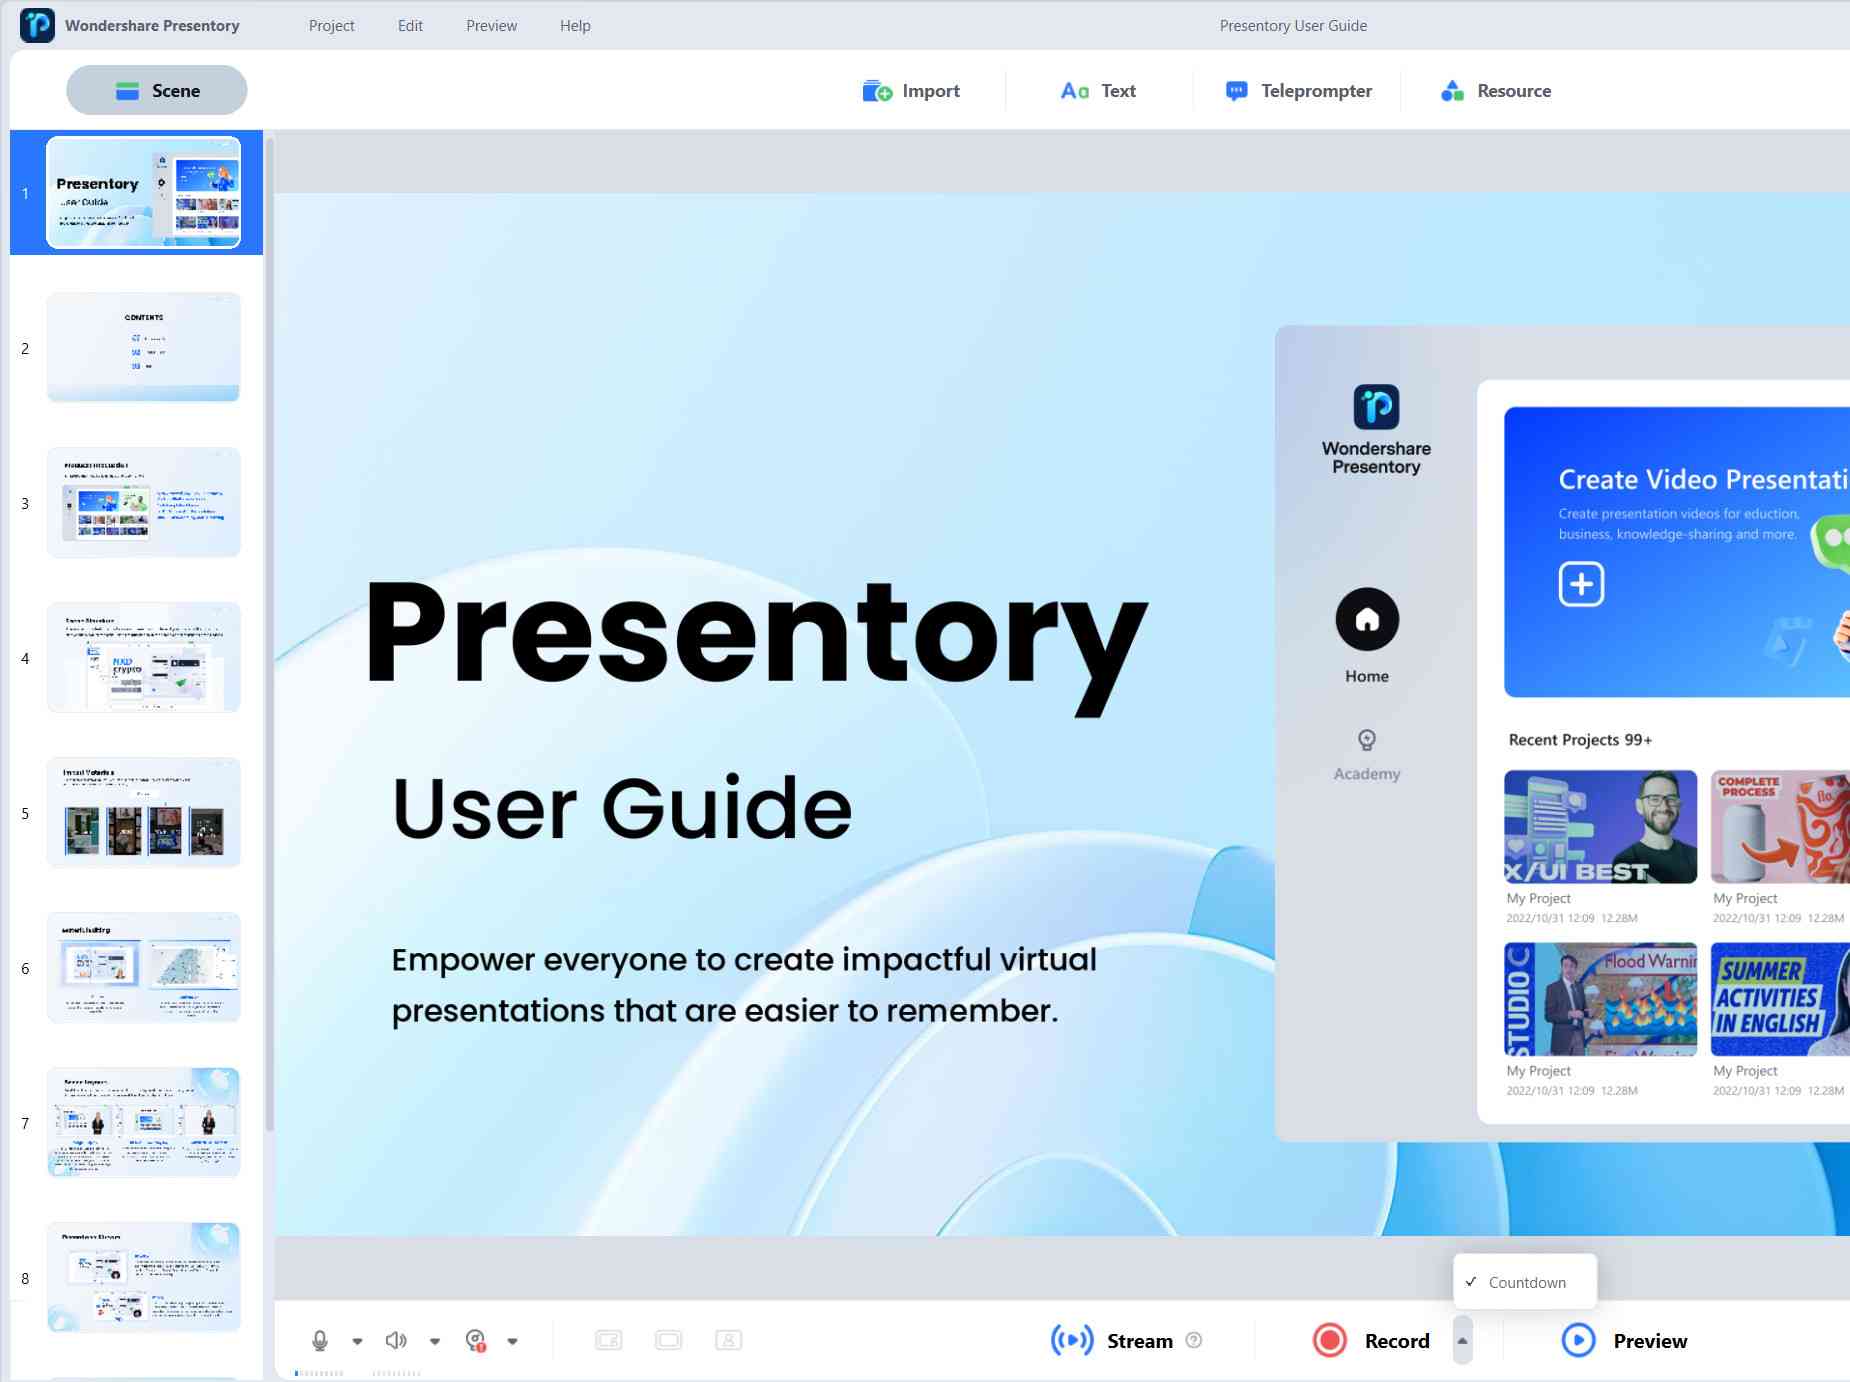
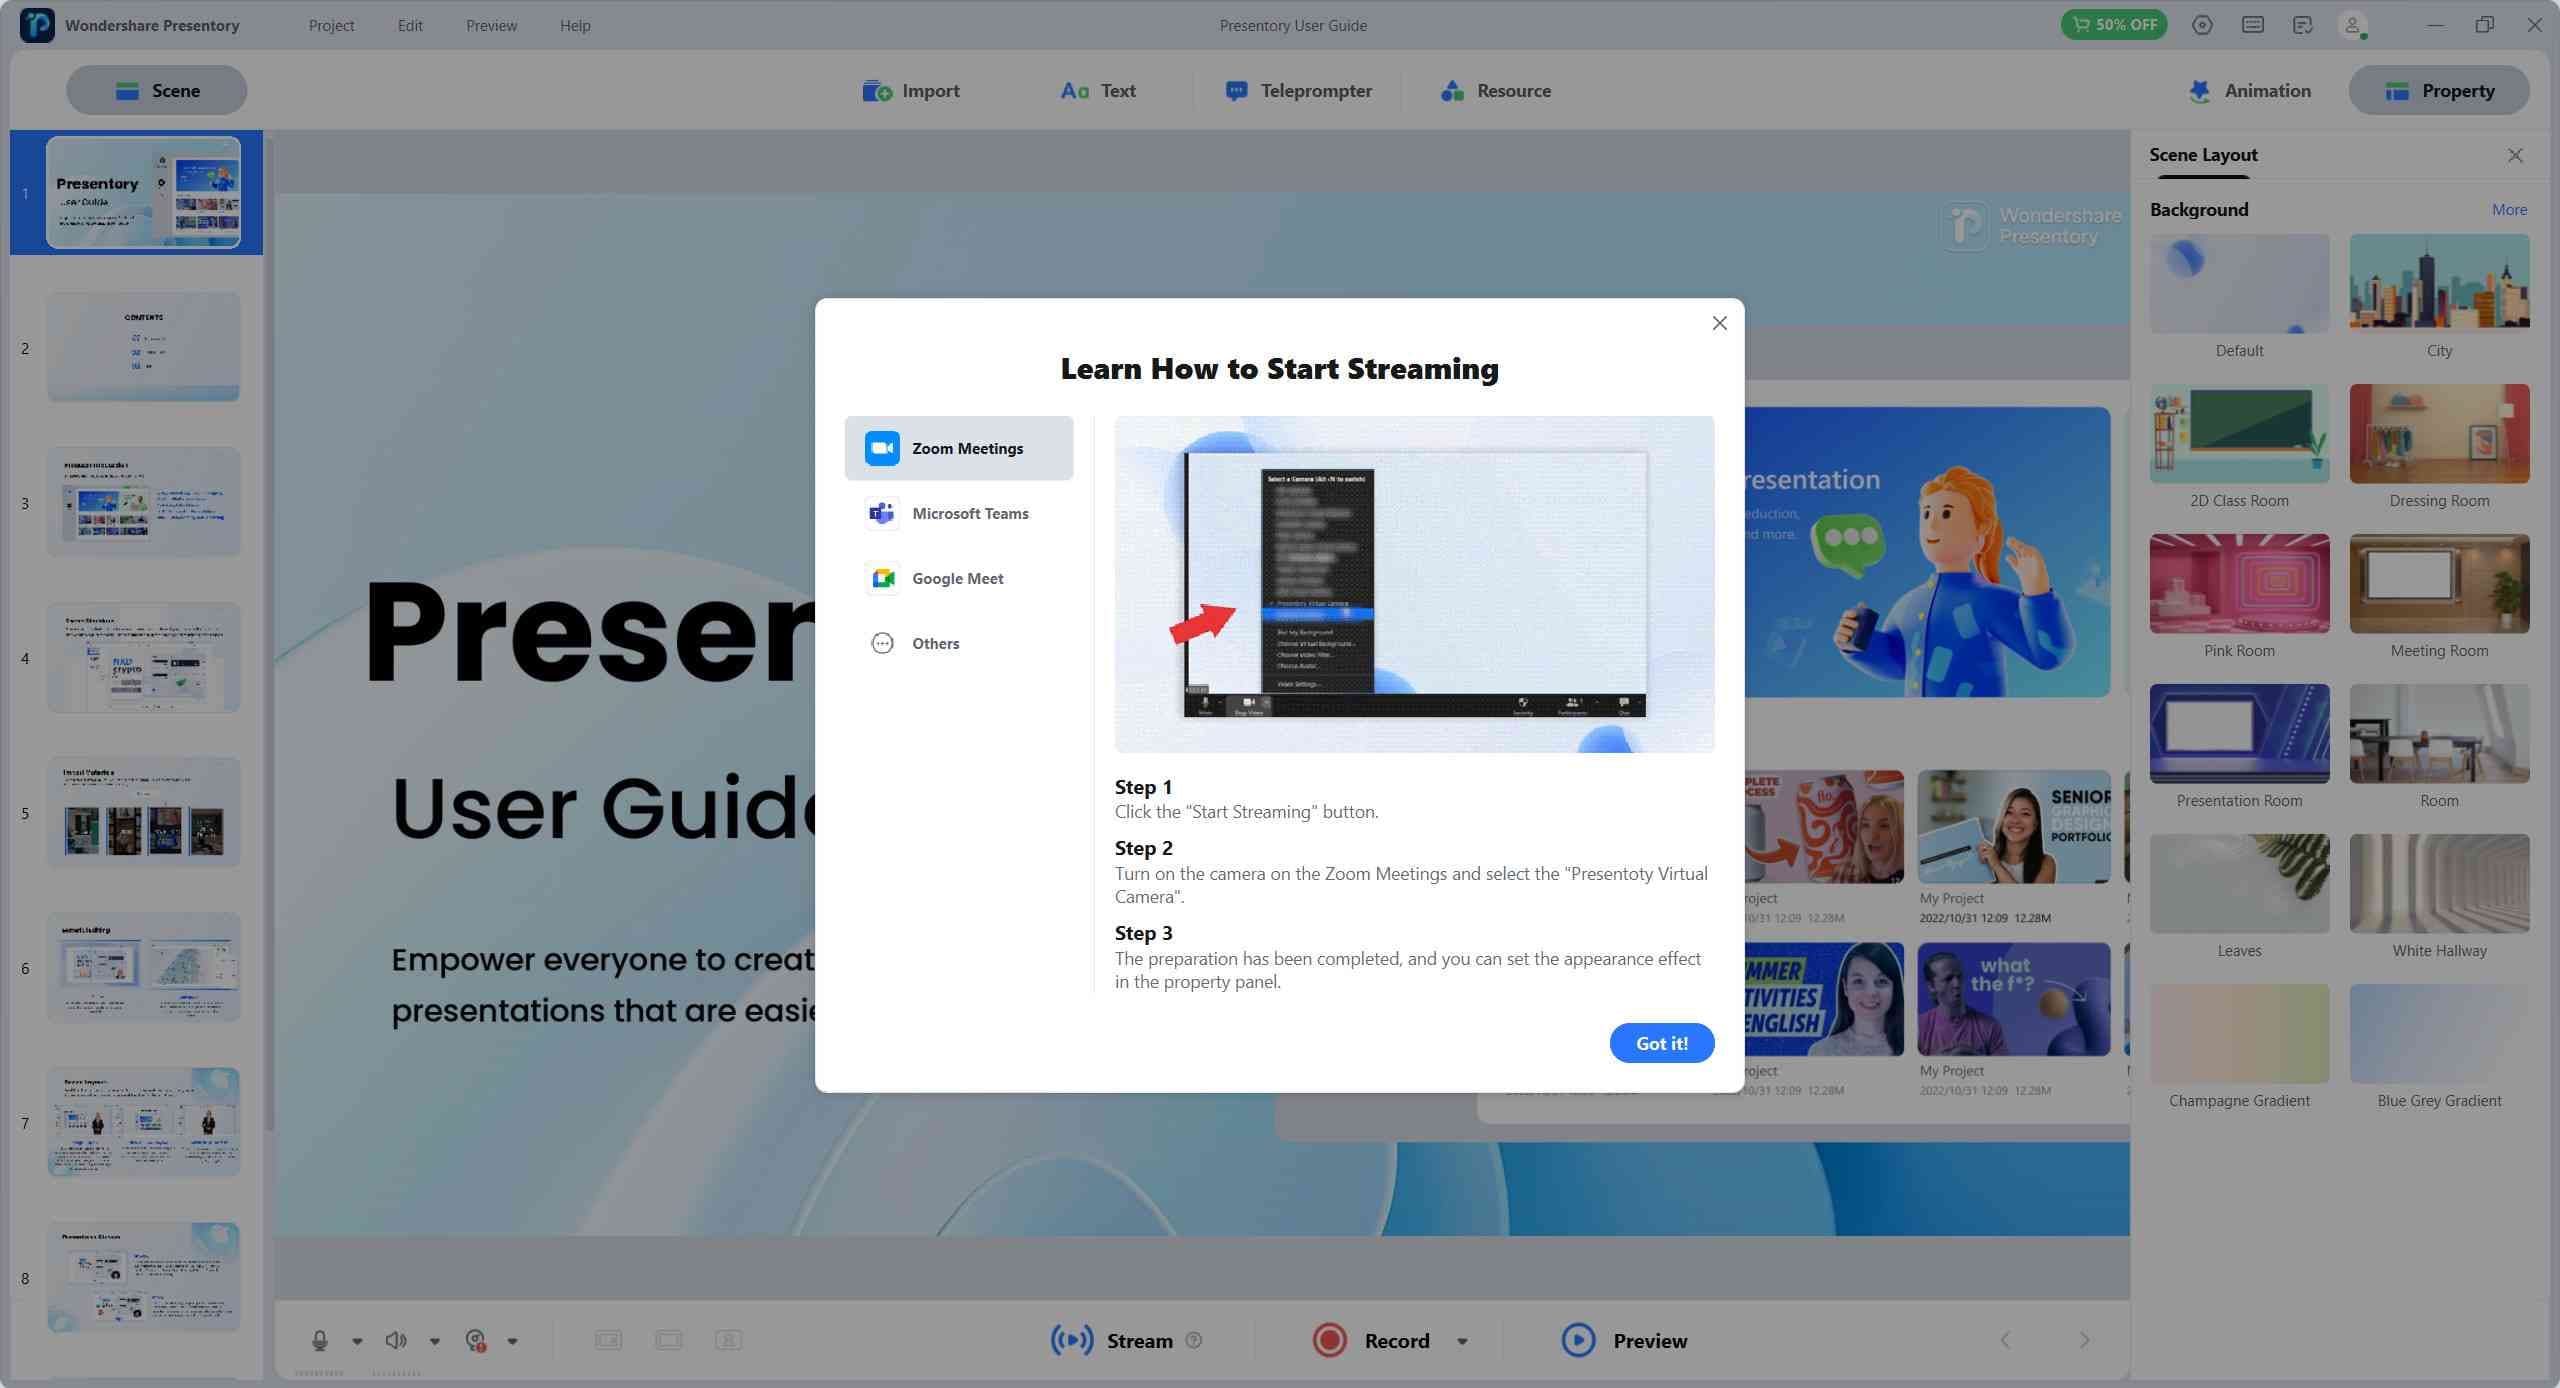
Feature 3: Streaming
One of the highlights of Presentory is its streaming feature, which allows direct connections to platforms like Zoom and Google Meet for seamless presentation delivery. This feature eliminates the need for complex setups, making it suitable for various scenarios such as online meetings and virtual classes.
Part 4. Using PowerPoint Shortcut Keys
Shortcut keys allow you to access key functions within PowerPoint using keyboard combinations. PowerPoint has designated shortcut keys for various essential functions, and remembering them can significantly streamline your presentation creation process.
For example:
| Feature | Shortcut keys |
| Copy Animation | Alt + Shift + C |
| Group Selected Objects | Ctrl + G |
| Increase Font Size | Ctrl + Shift + > |
These are just a few examples of the available shortcut keys.
You can find a list of official shortcut keys on Microsoft's website to explore more options and their functionalities.
Reference: PowerPoint Shortcut Keys - Microsoft
Additionally, here's how you can add new custom shortcut keys:
Adding Sound Effects in PowerPoint - Custom Shortcut Keys
You can set up custom shortcut keys to easily add sound effects in PowerPoint. Here's how:
Step 1: Open the "User Settings" in the Quick Access Toolbar.
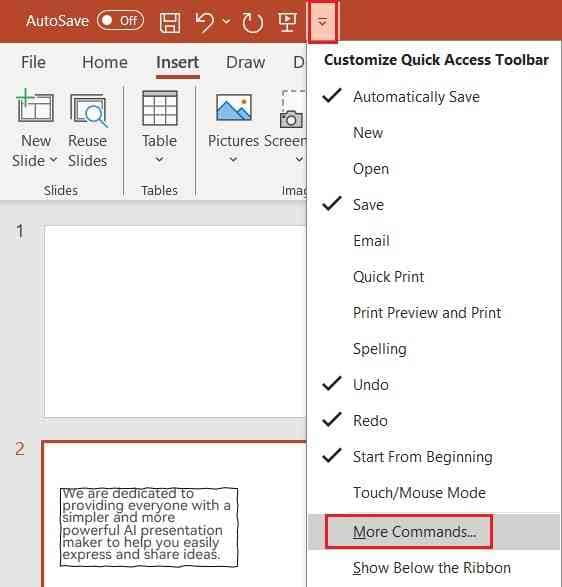
Step 2: Click "More Commands."
Step 3: Click "Other Commands."
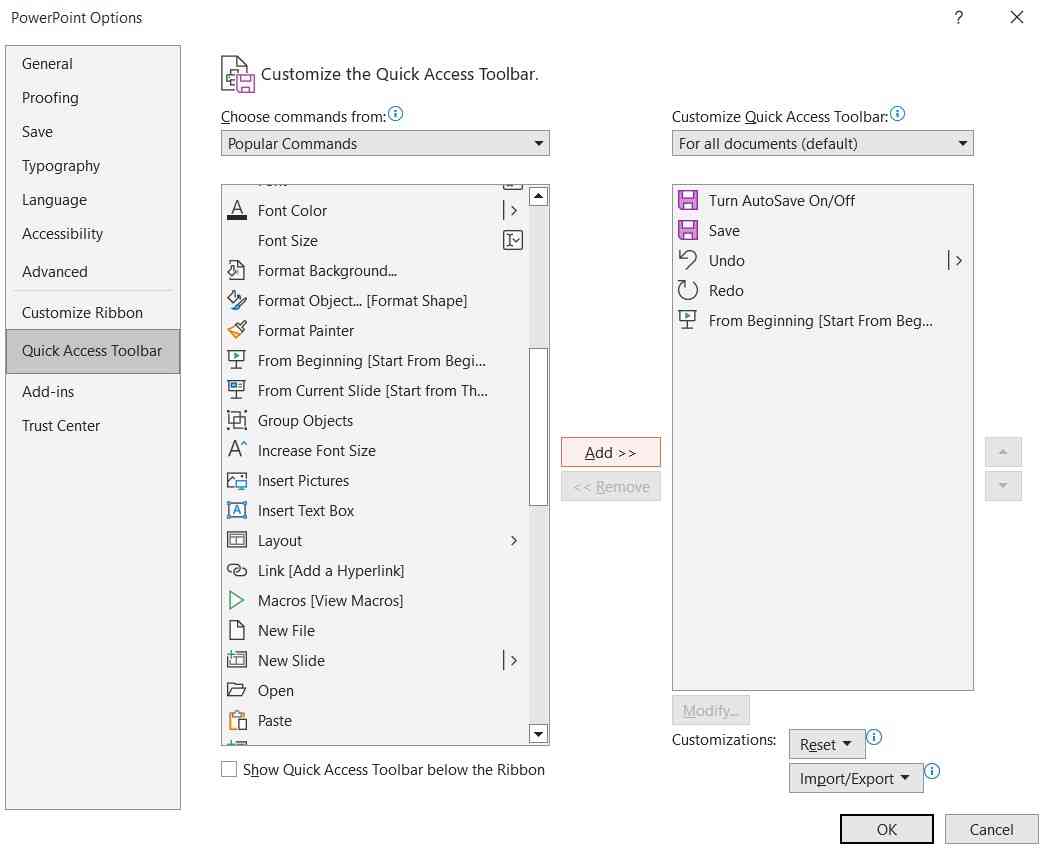
Step 4: Select the action you want to associate with a shortcut key and click "Add."
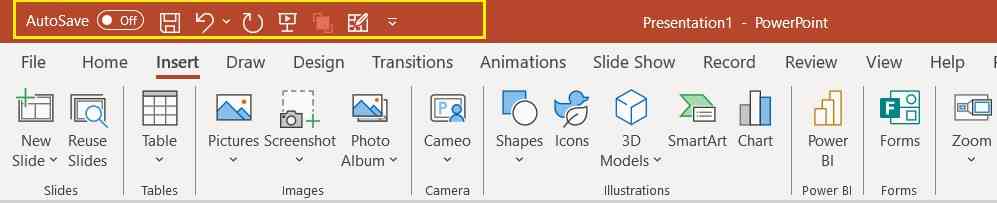
Now, you can call up the configured command using the "Alt key + the assigned shortcut key" to quickly add sound effects in PowerPoint.
Summary: Master PowerPoint by Understanding the Basics!
This article has provided a comprehensive guide to PowerPoint, covering its fundamental usage and professional-level techniques. PowerPoint, with its rich features, can seem daunting at first, but after reading this article, your perception of it may have significantly changed.
In addition to what has been covered in this article, PowerPoint offers many more features. However, by grasping the content presented here, you should be able to intuitively utilize other features as well, without resistance.
For those who may not have fully understood certain aspects, I encourage you to use this article as a reference and practice step by step while working with PowerPoint. With time and practice, you'll become proficient in creating engaging and effective presentations.