"Google Slides," a popular presentation creation app that can now be considered on par with PowerPoint.
It can be used online, regardless of location or device, and it's well-received for its ease of collaboration among multiple users and its intuitive user interface.
However, for those who are using Google Slides for the first time or are not familiar with it, they may find it challenging:
"Not sure where to start."
"Don't know where to find the features I want."
In this article, we will explain the basics of how to use Google Slides. We will also answer common questions and introduce some highly intuitive and advanced presentation creation software as alternatives to Google Slides. Please be sure to read to the end.
In this article
Part 1. What is Google Slides?
"Google Slides" is an online presentation creation application developed and provided by Google.
One of its distinctive features is that it can be accessed through a web browser or an app, making it compatible with smartphones, tablets, and PCs, regardless of the operating system.
Moreover, it doesn't require installation, and as long as you have a Google account, you can use it for free, which has garnered support from a large user base.
Particularly noteworthy is its ability to reflect changes and additions in real-time on the cloud, allowing you to collaborate simultaneously with teammates who may be located remotely. It also includes features like commenting, making it well-suited for team collaborations involving multiple individuals.
Furthermore, it comes with design templates and offers relatively intuitive operations, making it user-friendly, even for beginners.
It is also compatible with "PowerPoint", which is commonly used in the business scene (exporting and uploading are possible), adding to its popularity by expanding its range of use cases.
Part 2. Basic Usage of Google Slides
The basic functionalities of Google Slides include the following:
No 1. Creating a Google Slides Presentation
No 2. Inserting Content in Google Slides
No 3. Uploading PowerPoint Files
No.4 Sharing and Collaborative Editing of Slides
No.5 Export (to POWERPOINT files, PDF, and more)
No 1. Creating a Google Slides Presentation
Let's start by looking at how to create a Google Slides presentation, which is the very basics.
Step 1: Sign In to Google
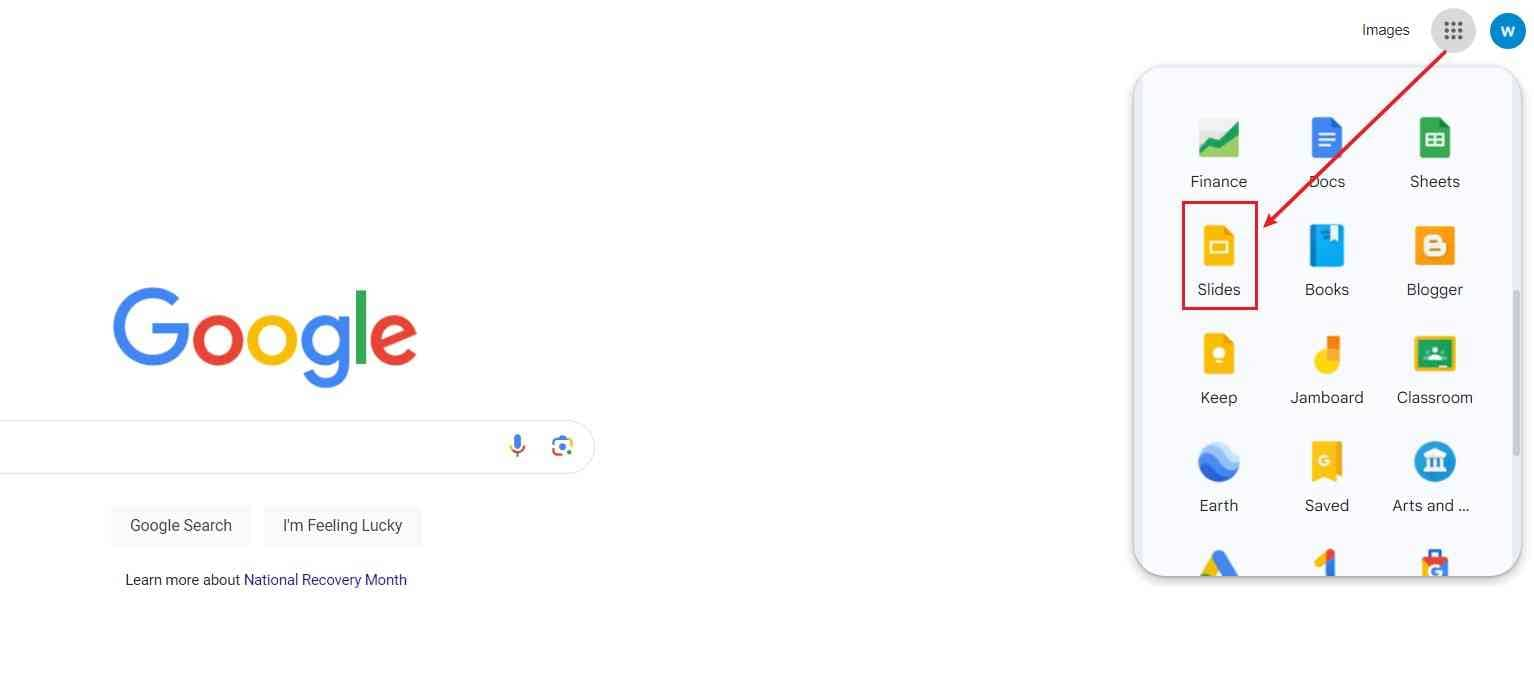
First, sign in to your Google account. If you don't have a Google account yet, please create one. You can access Google Slides by clicking on [Google Apps] in the upper right corner of the home screen or by directly going to Google Slides.
Step 2: Create a New Presentation
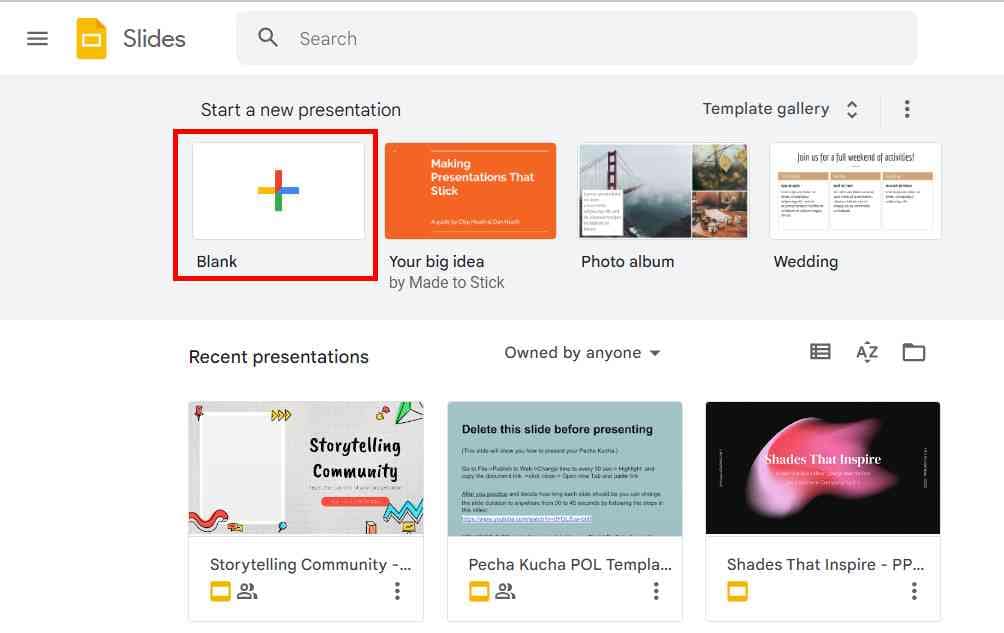
To create a new presentation in Google Slides, follow these steps:
Click on the [+] button located in the bottom-right corner of the screen.
Select "Create a new presentation".
Additionally, if you want to use a template, you can select "Choose a template " to create new slides from the available templates.
Step 3: Editing Your Presentation
Let's edit your presentation. Here are the basic editing steps:
① Changing the Presentation Title
To set or change the title of your presentation in Google Slides:
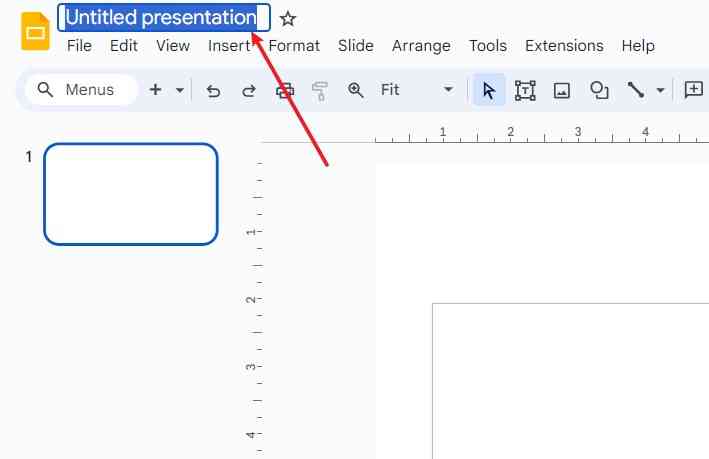
Click on the box displayed in the top-left corner of the screen, which initially says "Untitled Presentation". Enter your desired text to give your presentation a new title.
② Changing the Theme
Changing the theme in Google Slides is important for making your presentation visually appealing and engaging to the audience.
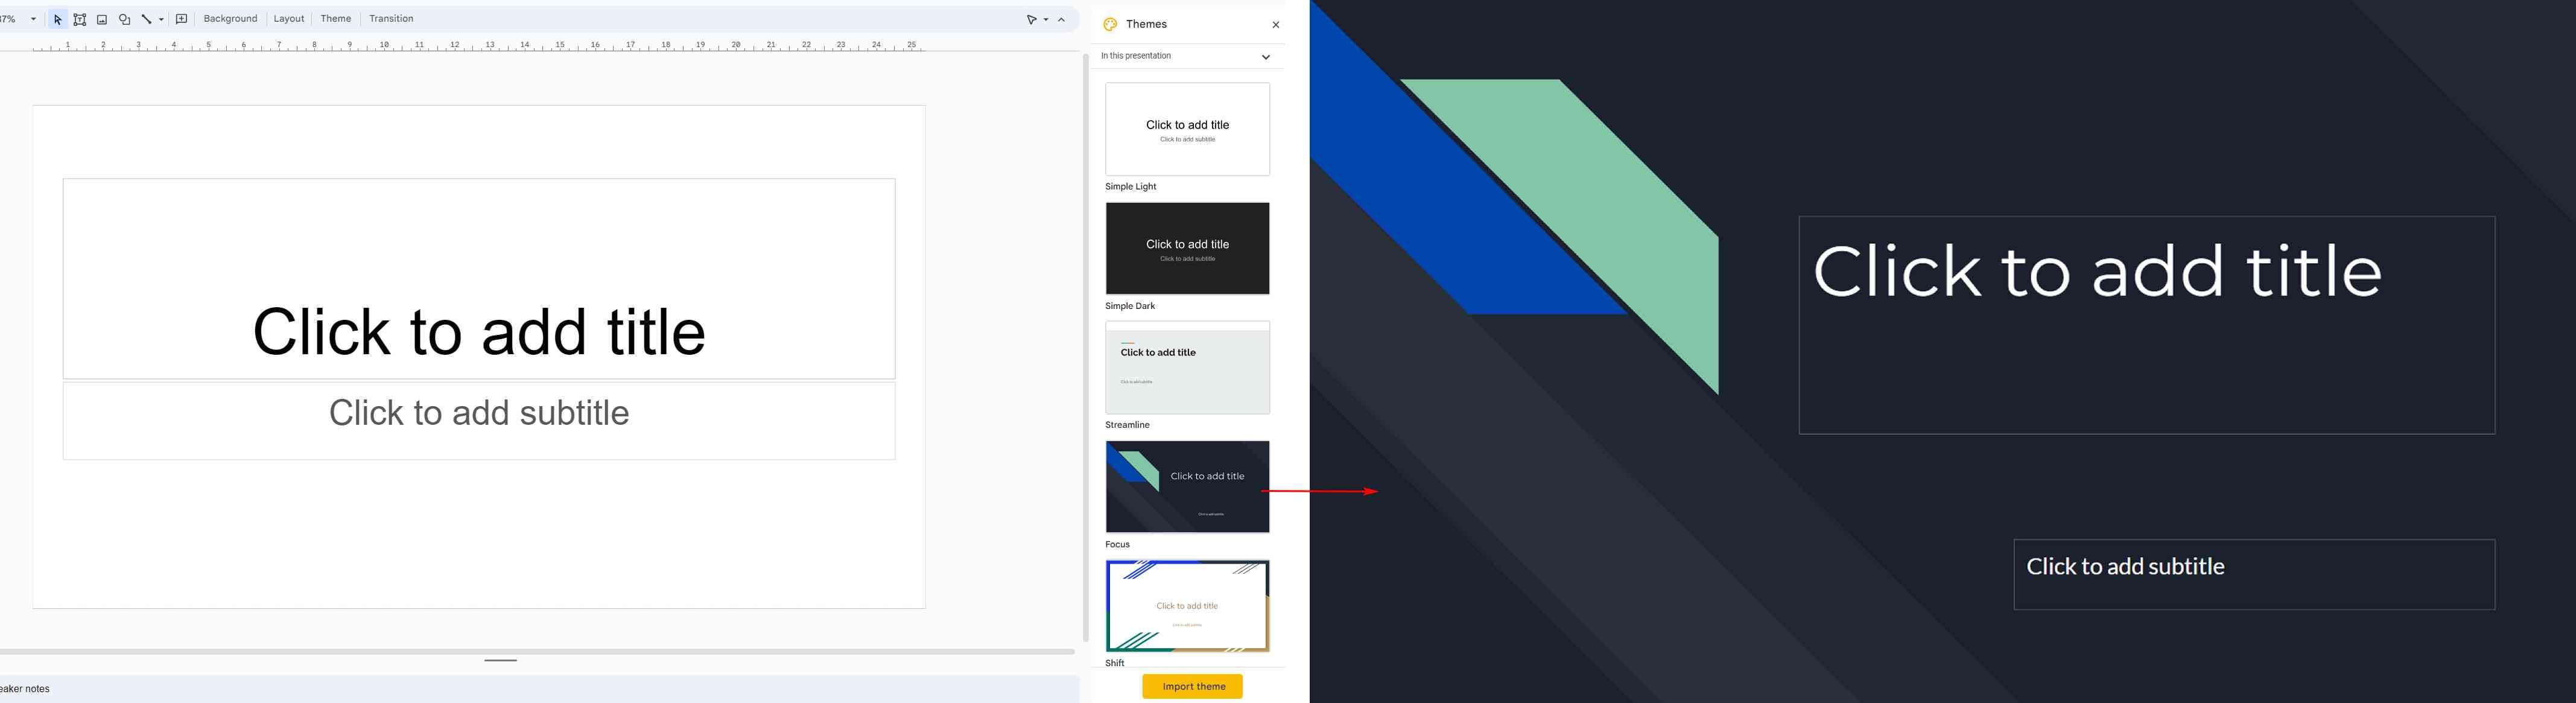
On the right side of the screen, you'll see the " Theme" option. Simply select it to easily change the overall look and feel of your presentation.
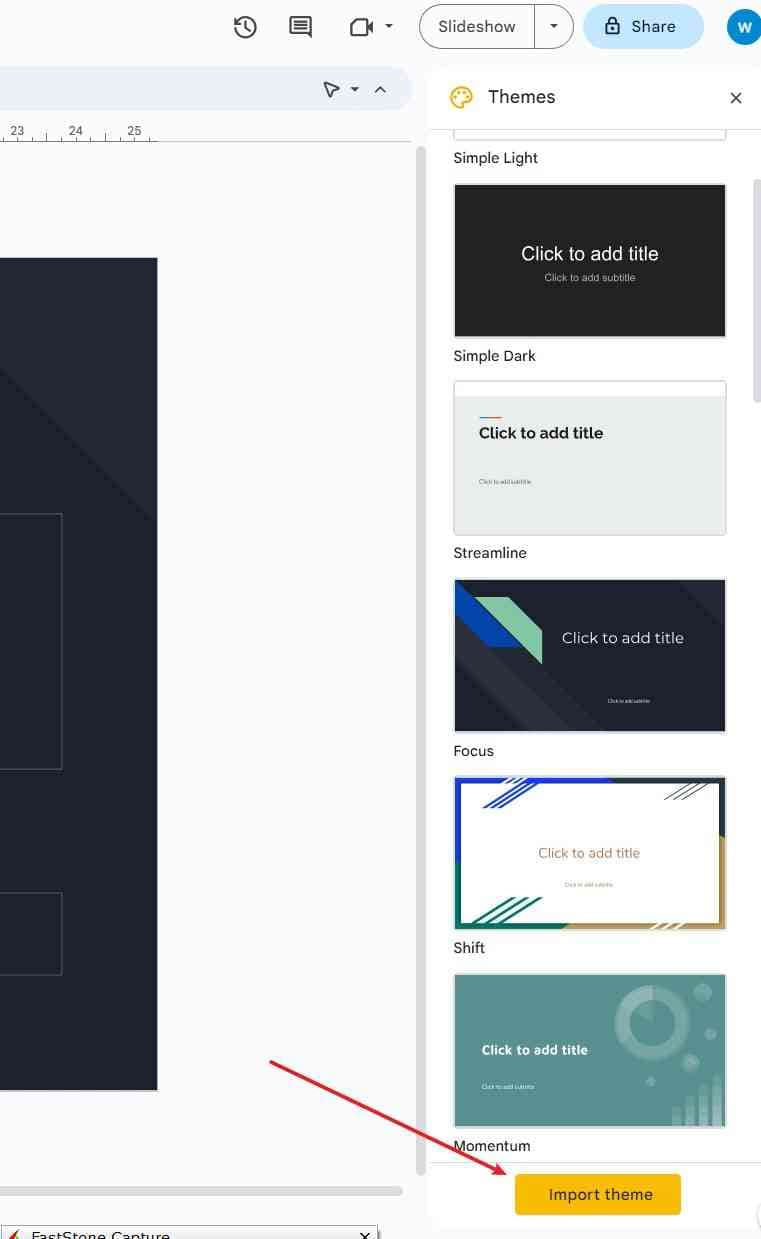
Furthermore, by selecting " Import Theme", you can import themes from external sources that are not pre-installed, expanding your options for customizing your presentation's appearance.
③ Inserting Text and Shapes
To insert text and shapes in Google Slides:
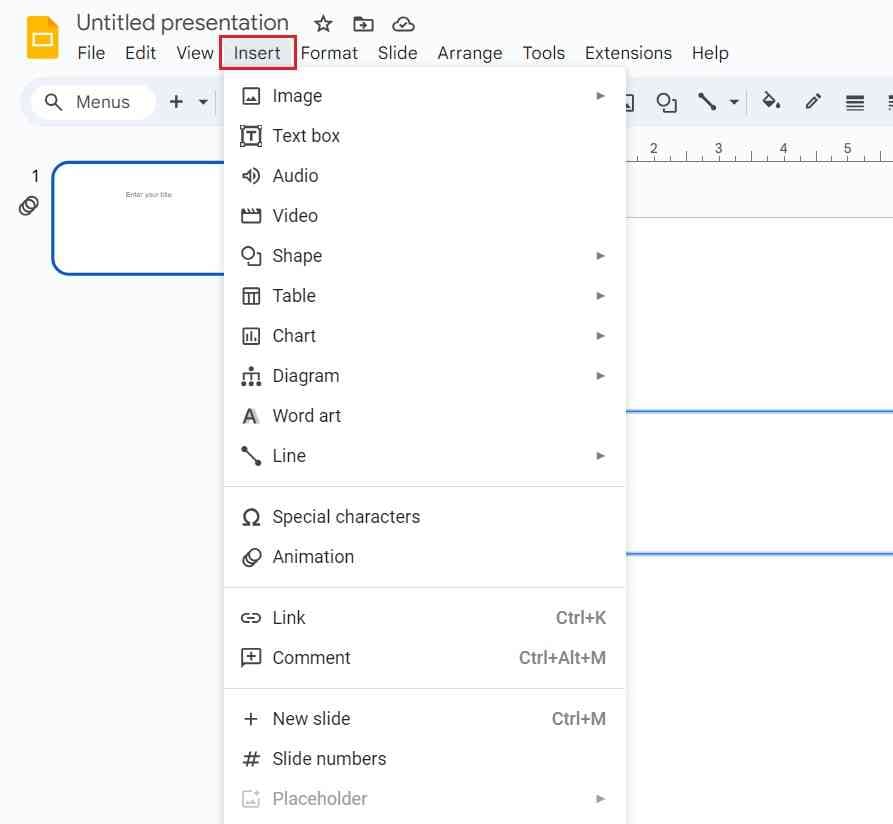
In the toolbar, you'll find the "Insert" option. From there, you can select "Text Box", "Shape" , "Table", "Chart", and more to add and insert them into your slides.
When you create a new presentation, it initially includes two text boxes by default. You can either use or delete these and add new ones as needed.
④ Text Editing
To edit text in Google Slides:
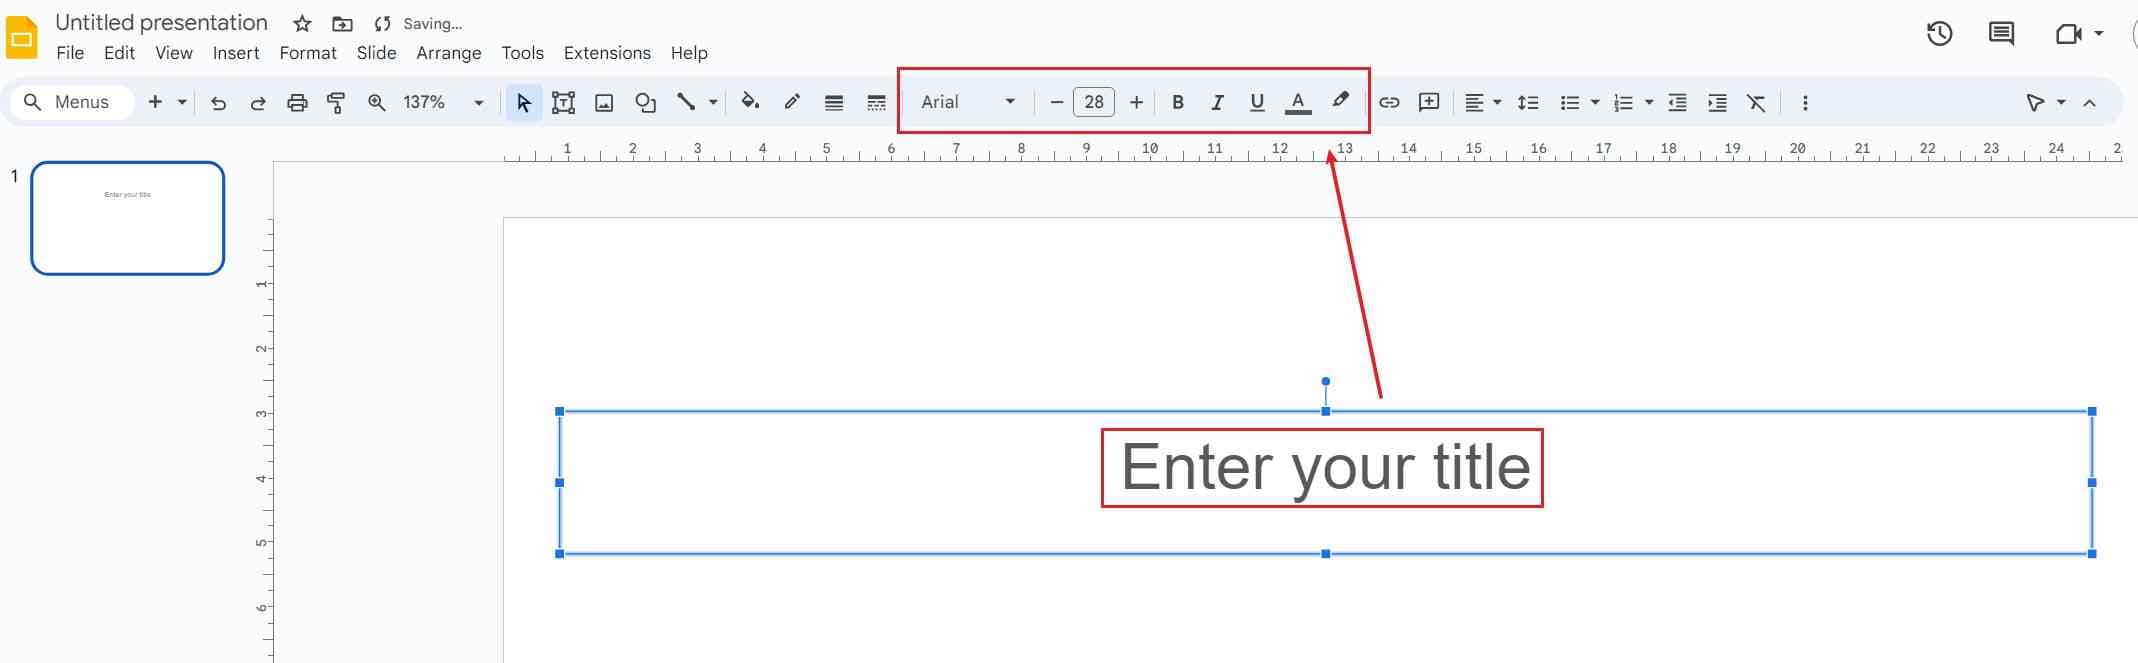
Select the text box you want to edit. This will allow you to make changes to the text inside the text box.
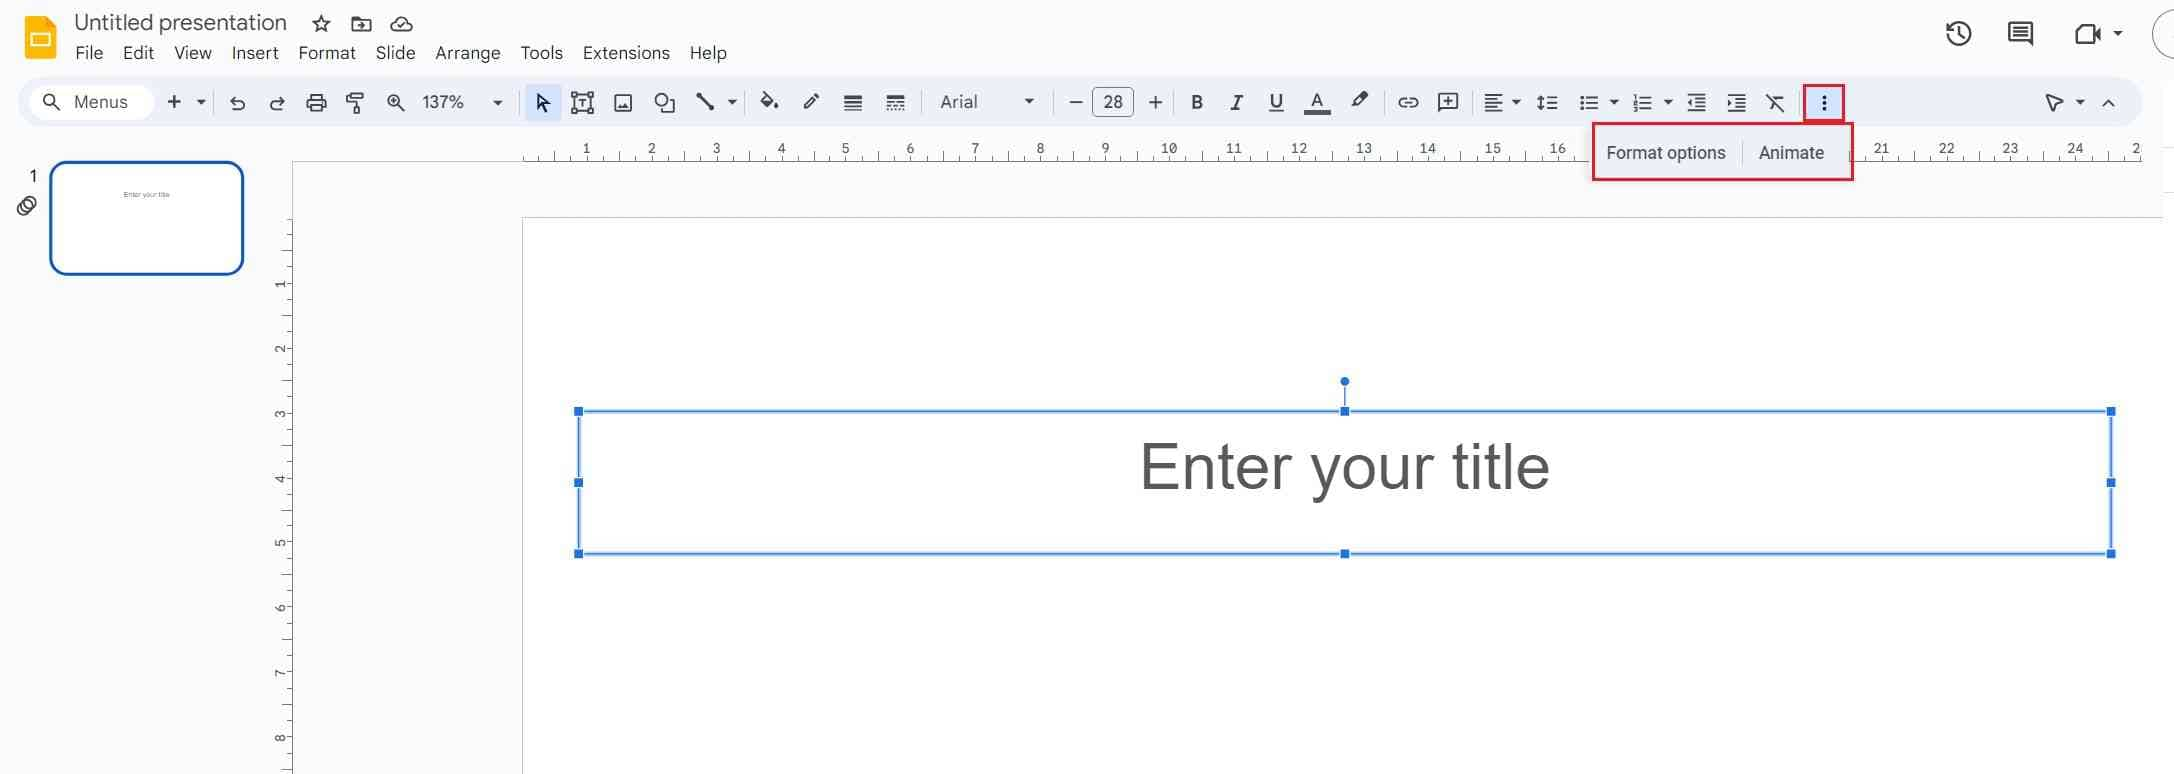
Furthermore, you can access detailed text editing options by clicking on [︙] next to the text box. This will allow you to specify details such as font, size, underline, bold, font color, and more.
⑤Adding/Deleting/Reordering Slides
In Google Slides, you may need to add, delete, or rearrange slides as your presentation evolves.
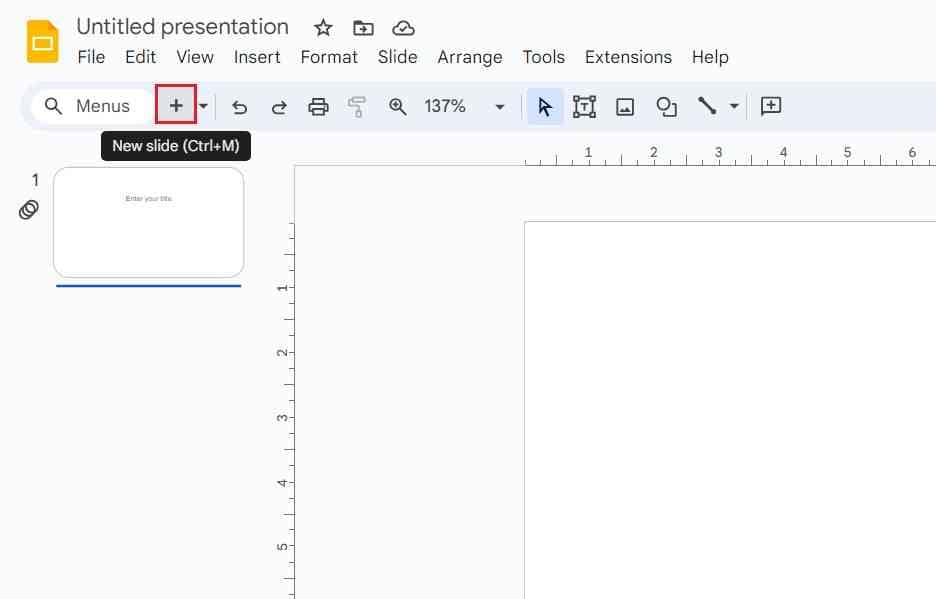
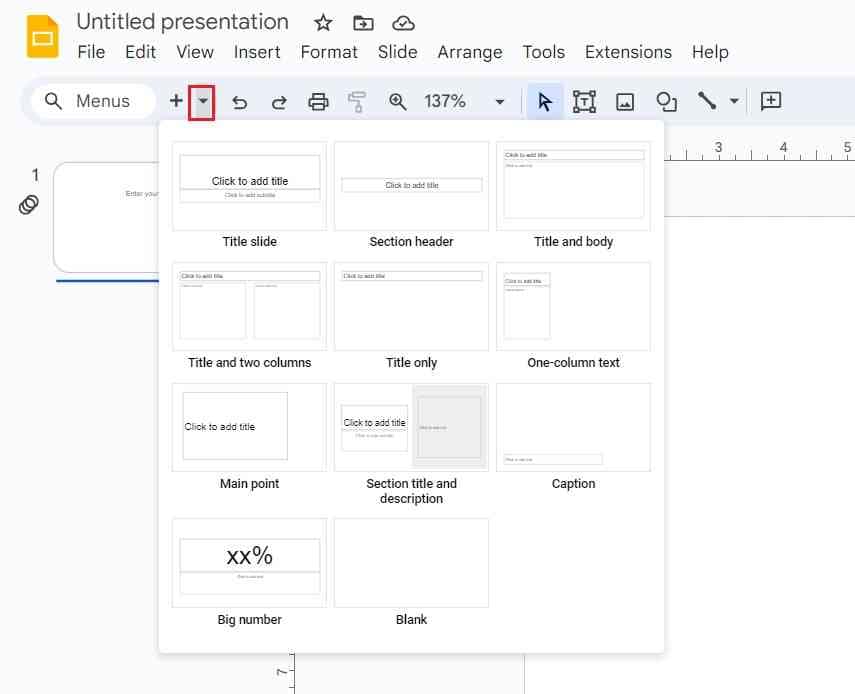
Adding Slides: Click the [+] icon at the top left of the toolbar or the [▼] located to its right. Choose a template based on the characteristics of the slide. Then, select a template and add a new slide. You can also add a new slide by pressing the [Ctrl+M] keys.
These steps will allow you to insert new slides into your presentation.
If you want to delete a slide, simply right-click on the slide thumbnail on the left-hand side and choose the "Delete slide" option. To reorder slides, you can click and drag the slide thumbnail to the desired position within the presentation.
No 2. Inserting Content in Google Slides
In addition to text and shapes, you can also insert media files such as videos, audio, and images into your Google Slides presentation. Here's how:
Step 1. Click on the "Insert" option in the toolbar.
Step 2. Choose the type of media you want to insert (image, video, audio).
Step 3. Select the media you want to insert. You can choose from files on your device, cloud storage, or by entering a URL.
Step 4. Adjust the formatting and placement of the media as needed.
Using images, videos, and audio in your presentation can make it more engaging and easier for your audience to understand, so it's a valuable feature to utilize.
No 3. Uploading PowerPoint Files
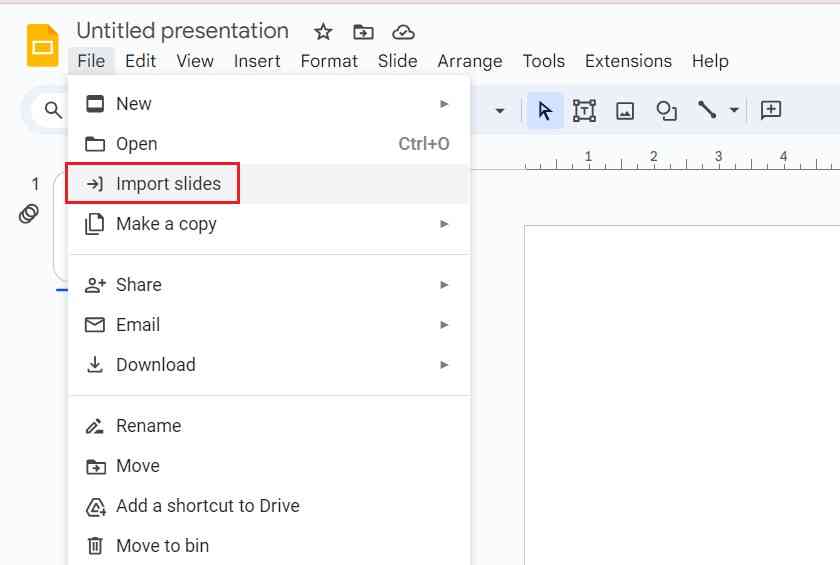
You can upload existing PowerPoint files and use them as Google Slides presentations. This allows you to make detailed edits in PowerPoint and then share and use them in Google Slides. Here are the steps:
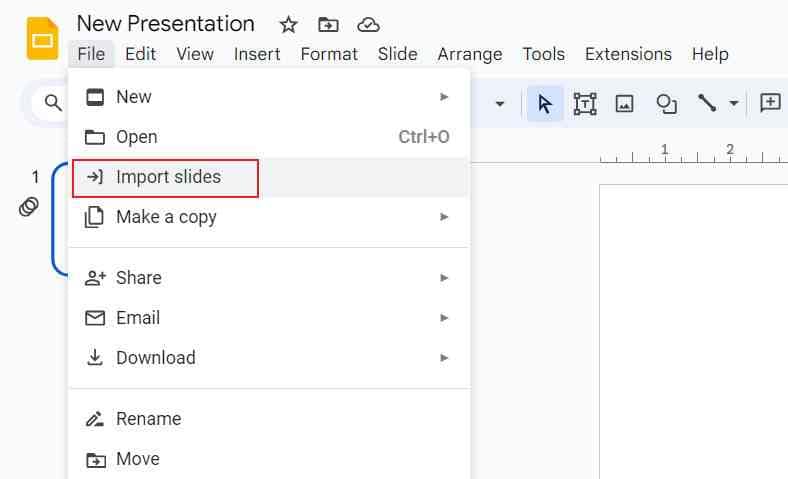
Step 1: Select "Import slides" from the "File" menu in the toolbar.
Step 2: Go to the "Upload" tab.

Step 3: Choose the PowerPoint file you want to add by clicking "Browse" and selecting the file, or simply drag and drop the file into the upload area.
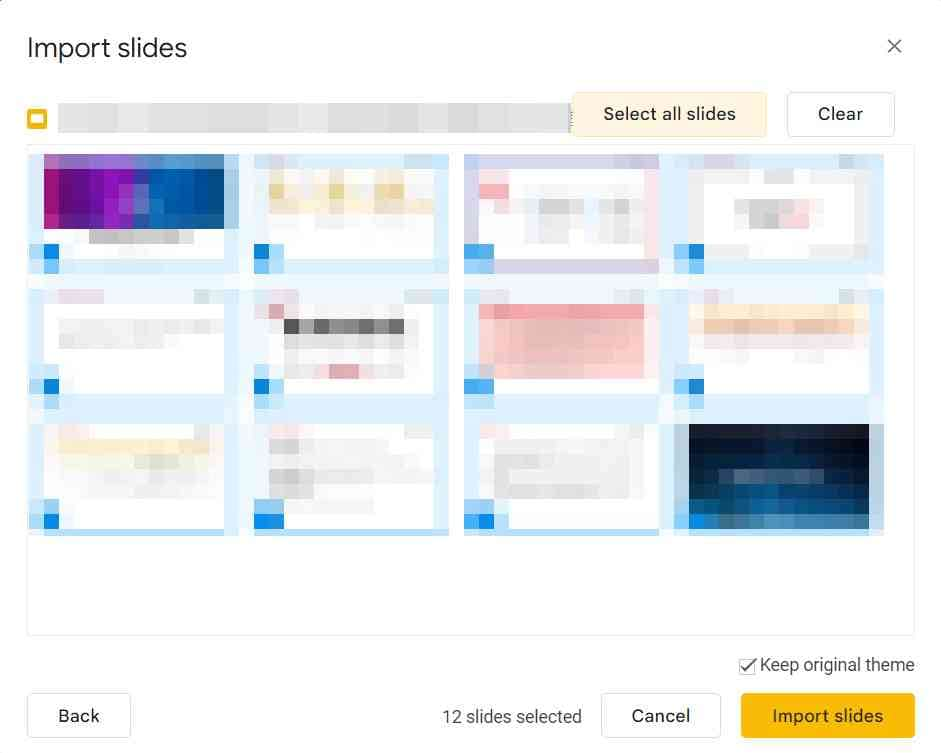
Step 4: Select the slides you want to import and click "Import slides".
Please note that the imported slides will be added as new slides. If you want to append them to an existing Google Slides presentation, you'll need to import them as a new presentation and then merge or copy them into your existing one.
No.4 Sharing and Collaborative Editing of Slides
Google Slides saved in the cloud can be shared and collaboratively edited by providing a URL and granting access.
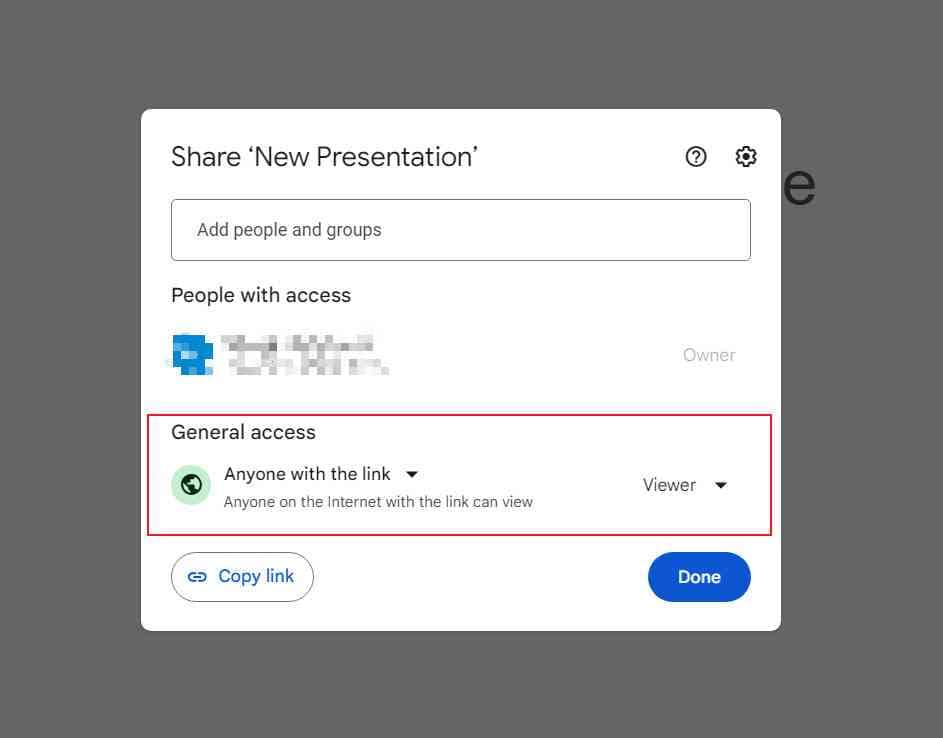
Step 1: Click on "Share" in the upper right corner of the screen.
Step 2: Initially, only the owner has access to the document. To change this, click on "Anyone with the link" under "Anyone with the link can view" by default.
Step 3: Modify the roles from "Viewer" to "Viewer (can comment) " or "Editor" as needed.
Step 4: Click "Copy link" and share the URL with the desired recipient.
Following these steps, the recipient of the URL can view and edit the slides based on their permissions.
Additionally, if you share only the URL without following the steps below, the screen shown above will appear.
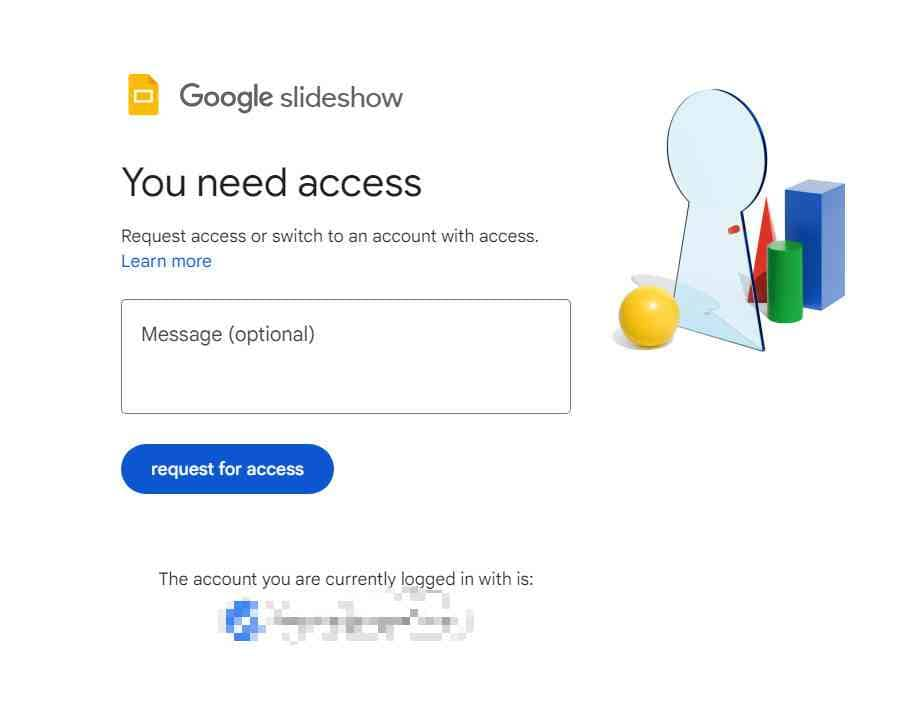
You can also request access rights individually by using the screen above and the owner can grant permission as well.
No.5 Export (to POWERPOINT files, PDF, and more)
The presentation you've created can be used as-is, but it's also possible to export it as a PowerPoint file or a PDF. Here are the steps:
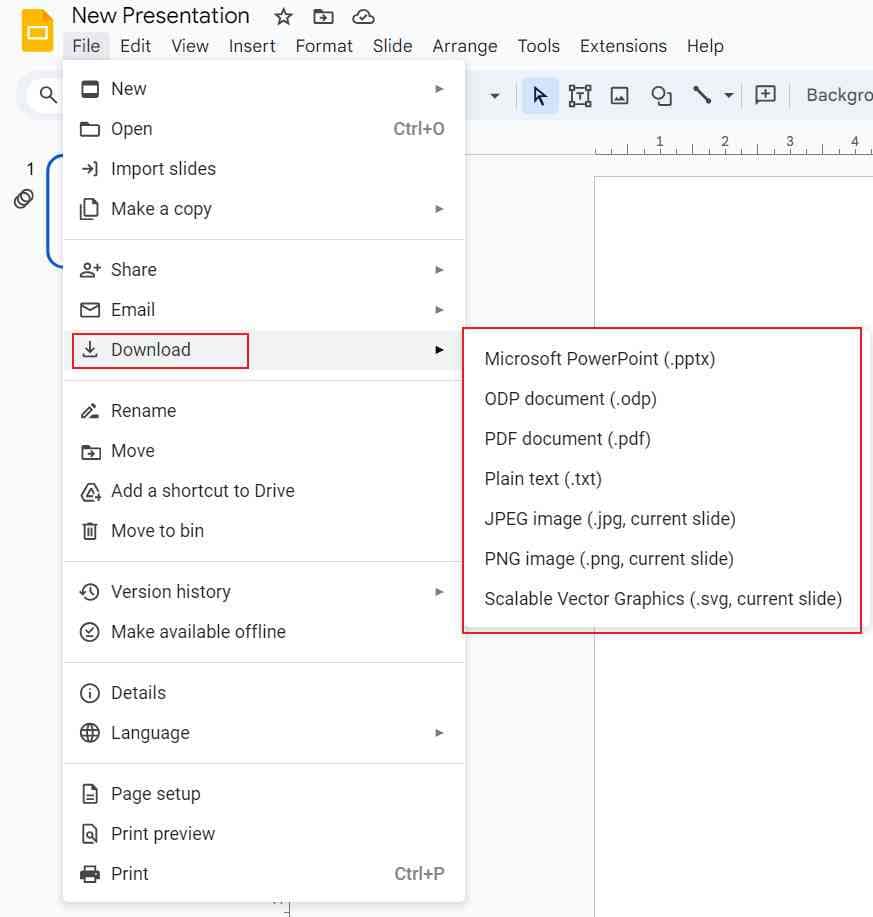
Step 1. Select "Download" from the "File" menu.
Step 2. Choose the file format you want to export.
It's as simple as that! Please note that when exporting as JPEG images or PNG images, only the currently displayed slide(s) will be included.
Part 3. The best alternative to Google Slides – Presentory
Google Slides is a high-quality application that offers many advantages, such as relatively intuitive operation and the ability to share and collaborate.
However, on the other hand, it has some disadvantages, including:
- It is not suitable for advanced presentation creation despite its simplicity.
- A Google account is required.
- Sharing partners also need to have Google accounts.
In this chapter, we will introduce Presentory, an advanced presentation creation software that is even simpler and more feature-rich, and it also incorporates AI.
You can download the AI presentation generator Presentory for free here.
1. What is Presentory?
"Presentory" is an innovative presentation creation software developed by Wondershare, a well-known company famous for video editing software like "Filmora," all-in-one media software like "UniConverter," and advanced screen recording/presentation software like "DemoCreator." It is designed to seamlessly integrate multimedia elements for creating presentations.
A common characteristic of Wondershare's software, including Presentory, is that they are designed to be usable by a wide range of users, from beginners in presentation creation to professionals. They feature a very simple and intuitive user interface, making it easy for anyone to create advanced presentations.
Presentory allows you to import PowerPoint files, images, videos, and more. With its rich collection of materials and templates, anyone can easily create engaging presentations.
Additionally,
- There is a wide range of templates available, allowing for quick and high-quality presentation creation by simply combining them.
- The software provides drag-and-drop functionality for adding animations and transitions, making it easy to create dynamic presentations.
These are some of the reasons why Presentory is recommended. Furthermore, it also features AI-powered presentation generation capabilities, where you can delegate tasks like outlining and content creation to AI and then fine-tune the details yourself, offering a versatile approach to presentation creation.
2. How to create a presentation using Presentory?
Let's take a look at how to create a presentation using Presentory:
step1Creating a Video Presentation
To begin, launch Presentory and select "Create Video Presentation".
Please note that for this guide, we'll skip the "AI-generated creation" feature, but it's also a very convenient function. If you're interested, feel free to try it out after reading this guide.

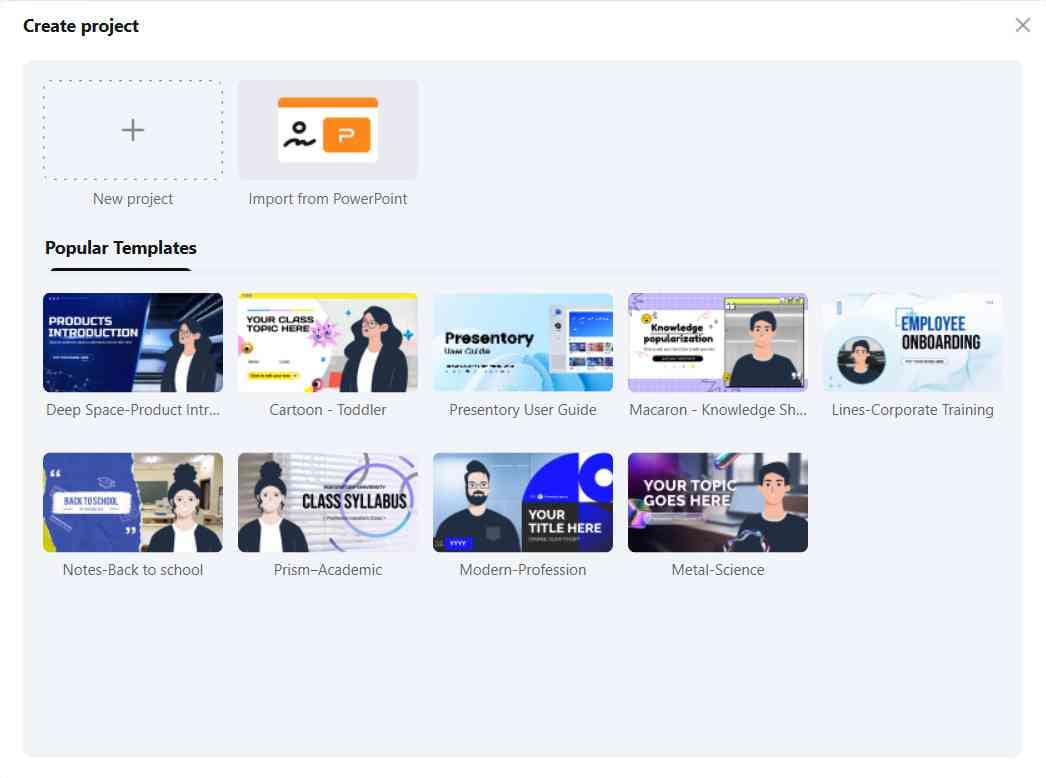
step2Selecting a New Project
The project creation screen will appear.
If you want to create a new presentation from scratch, choose "New Project". If you already have a PowerPoint file you want to work with, select "Import from PowerPoint". Alternatively, if you'd like to use a template, you can pick one from the "Popular Templates" option.
For this guide, we'll select "New Project".
step3Explaining the Screen Layout of Presentory
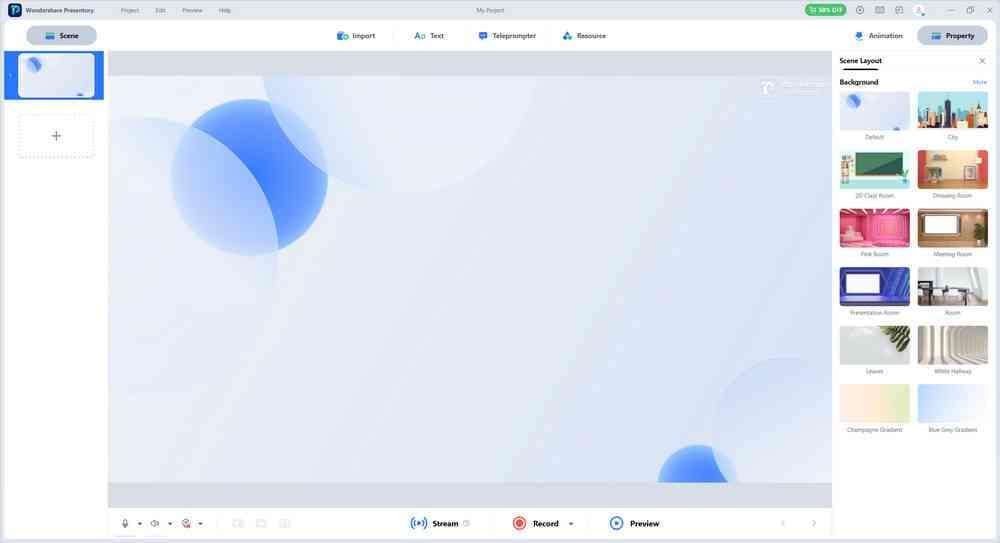
Here's an overview of the basic editing screen layout and how to use it in Presentory:
Import: This is where you can import media files like images and videos, PowerPoint files, and even share your desktop.
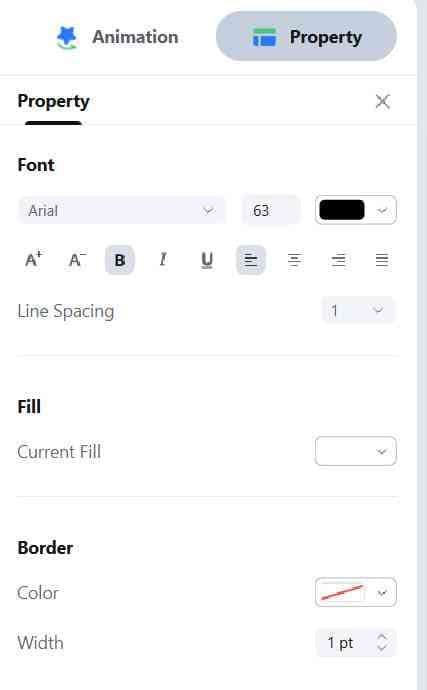
Text: You can add supplementary text to your presentation. Additionally, any added text can be edited by selecting it, allowing you to change fonts, line spacing, text color, width, and more.
Teleprompter: This feature allows you to add a teleprompter that enables you to read your script while maintaining eye contact with the camera.
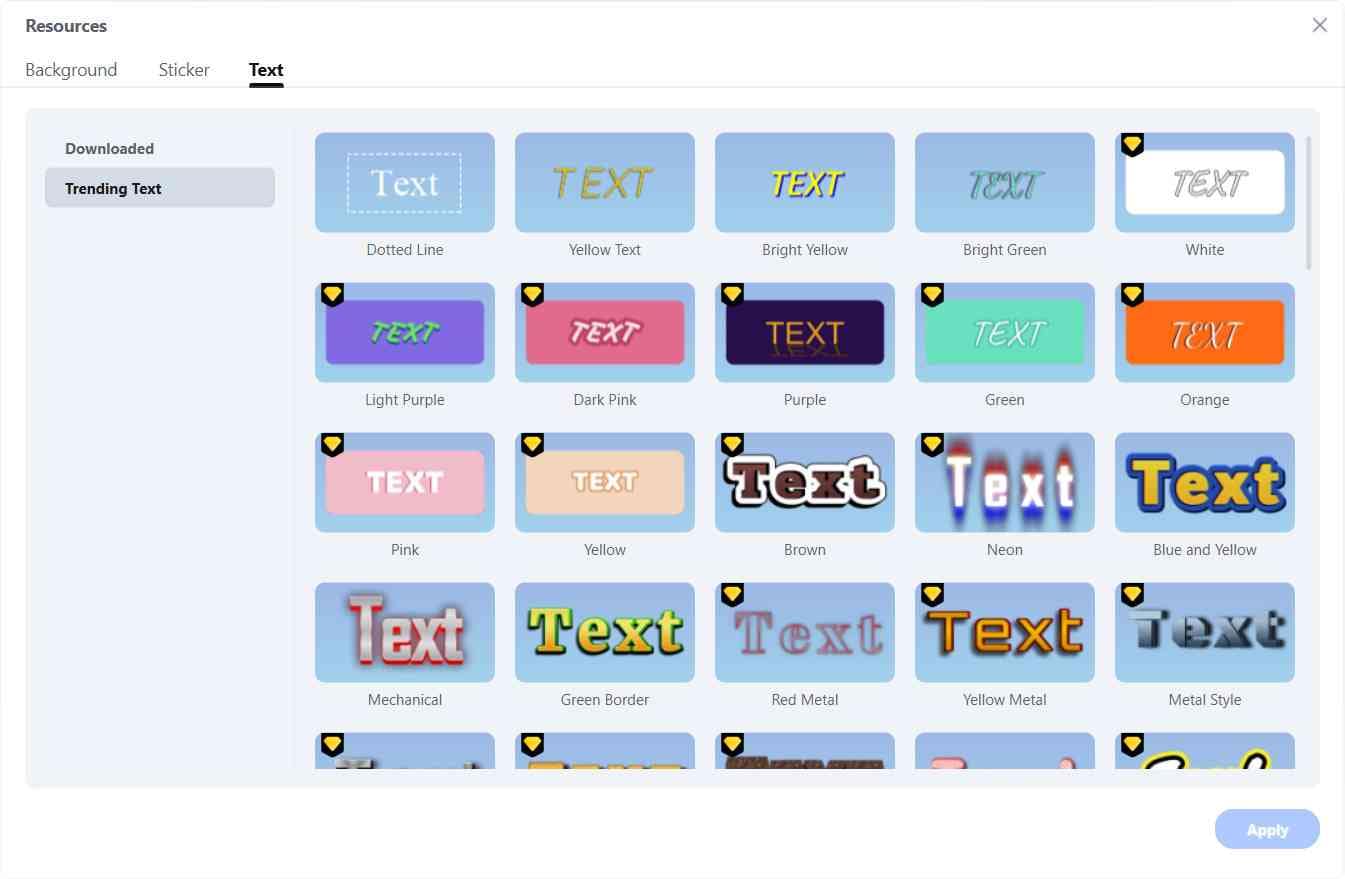
Resources: You can add backgrounds, text templates, stickers, and more. You can easily apply professionally created template resources by selecting them and clicking on "Apply".
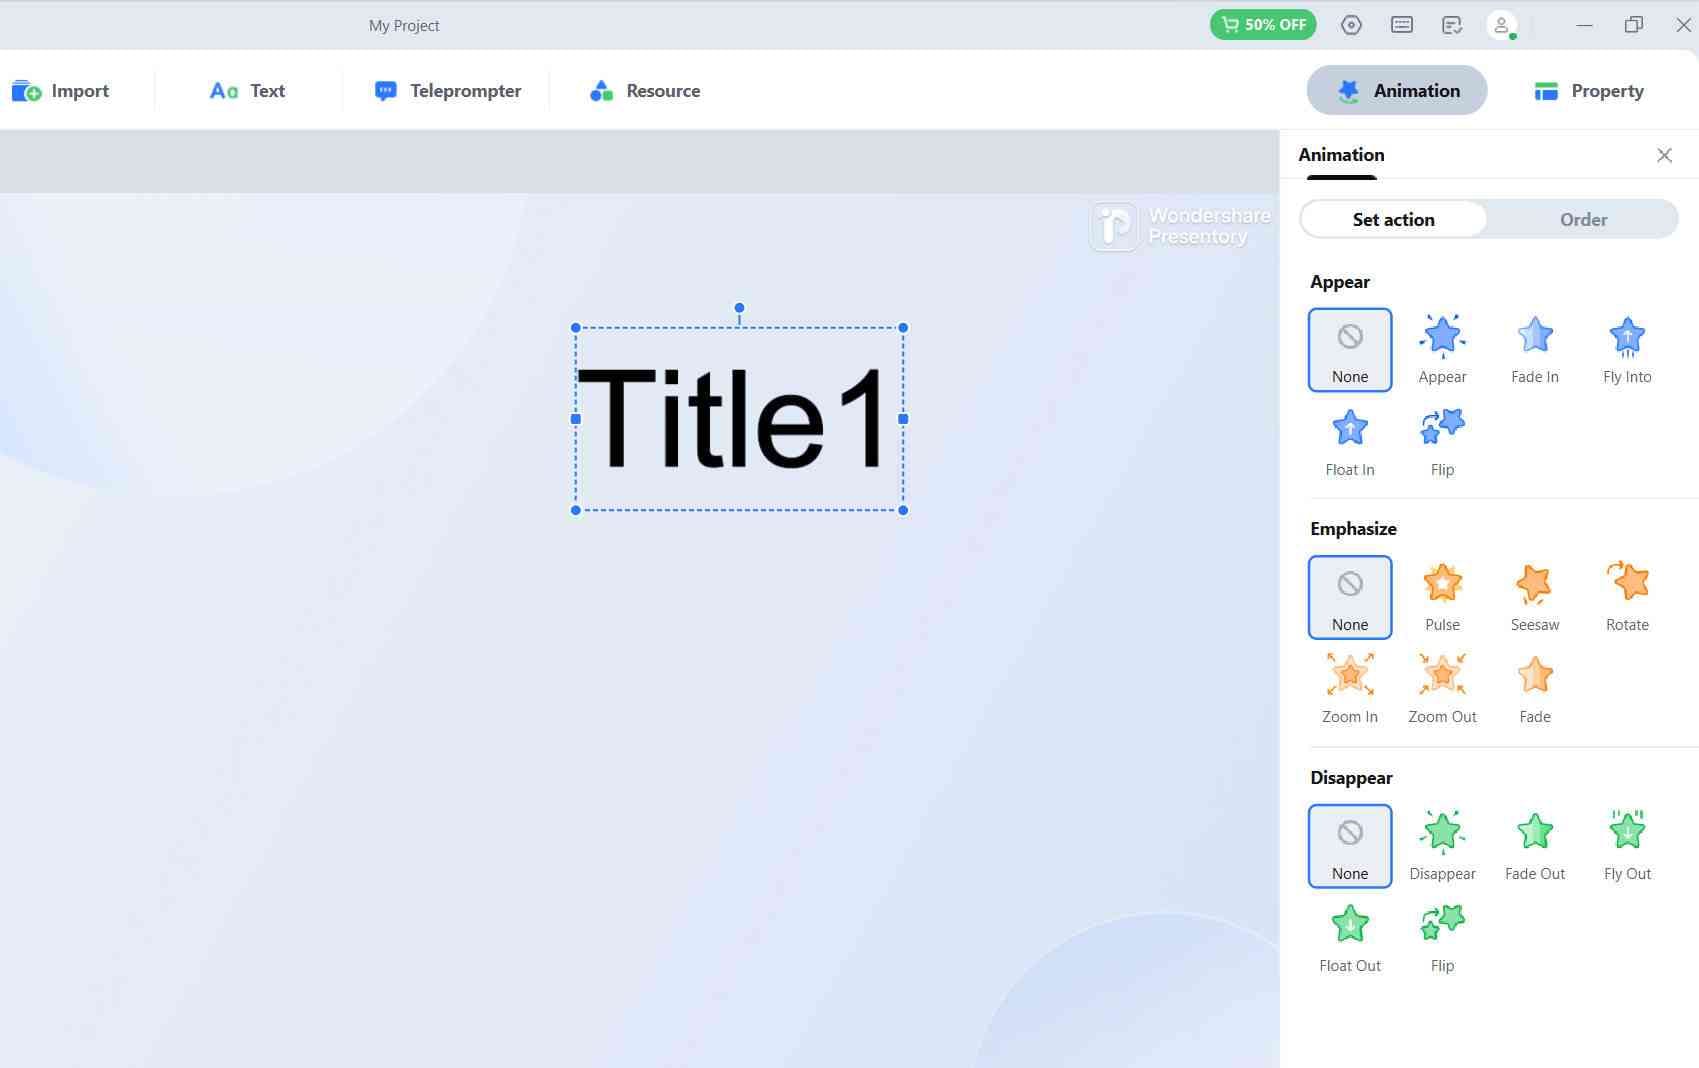
Animation: This feature allows you to add animations and actions to your presentation. By using this feature, you can easily create dynamic presentations with motion and effects.
Properties: This is the place where you can fine-tune settings for each element you've added. For example, if you select a text element, the properties that appear will allow you to adjust text color, font, and more.
Add Slide: Clicking on [+] allows you to add new slides to your presentation. Moreover, by clicking on [︙] on the added slide, you can include [Transitions] to make the screen transitions smoother.
Input Settings: This feature allows you to configure input devices such as microphones, system audio, and webcams.
Stream: This feature enables you to stream your presentation to platforms like Zoom, Teams, Google Meet, and more. It's useful for scenarios where you want to use your presentation in real-time during online meetings and similar situations.

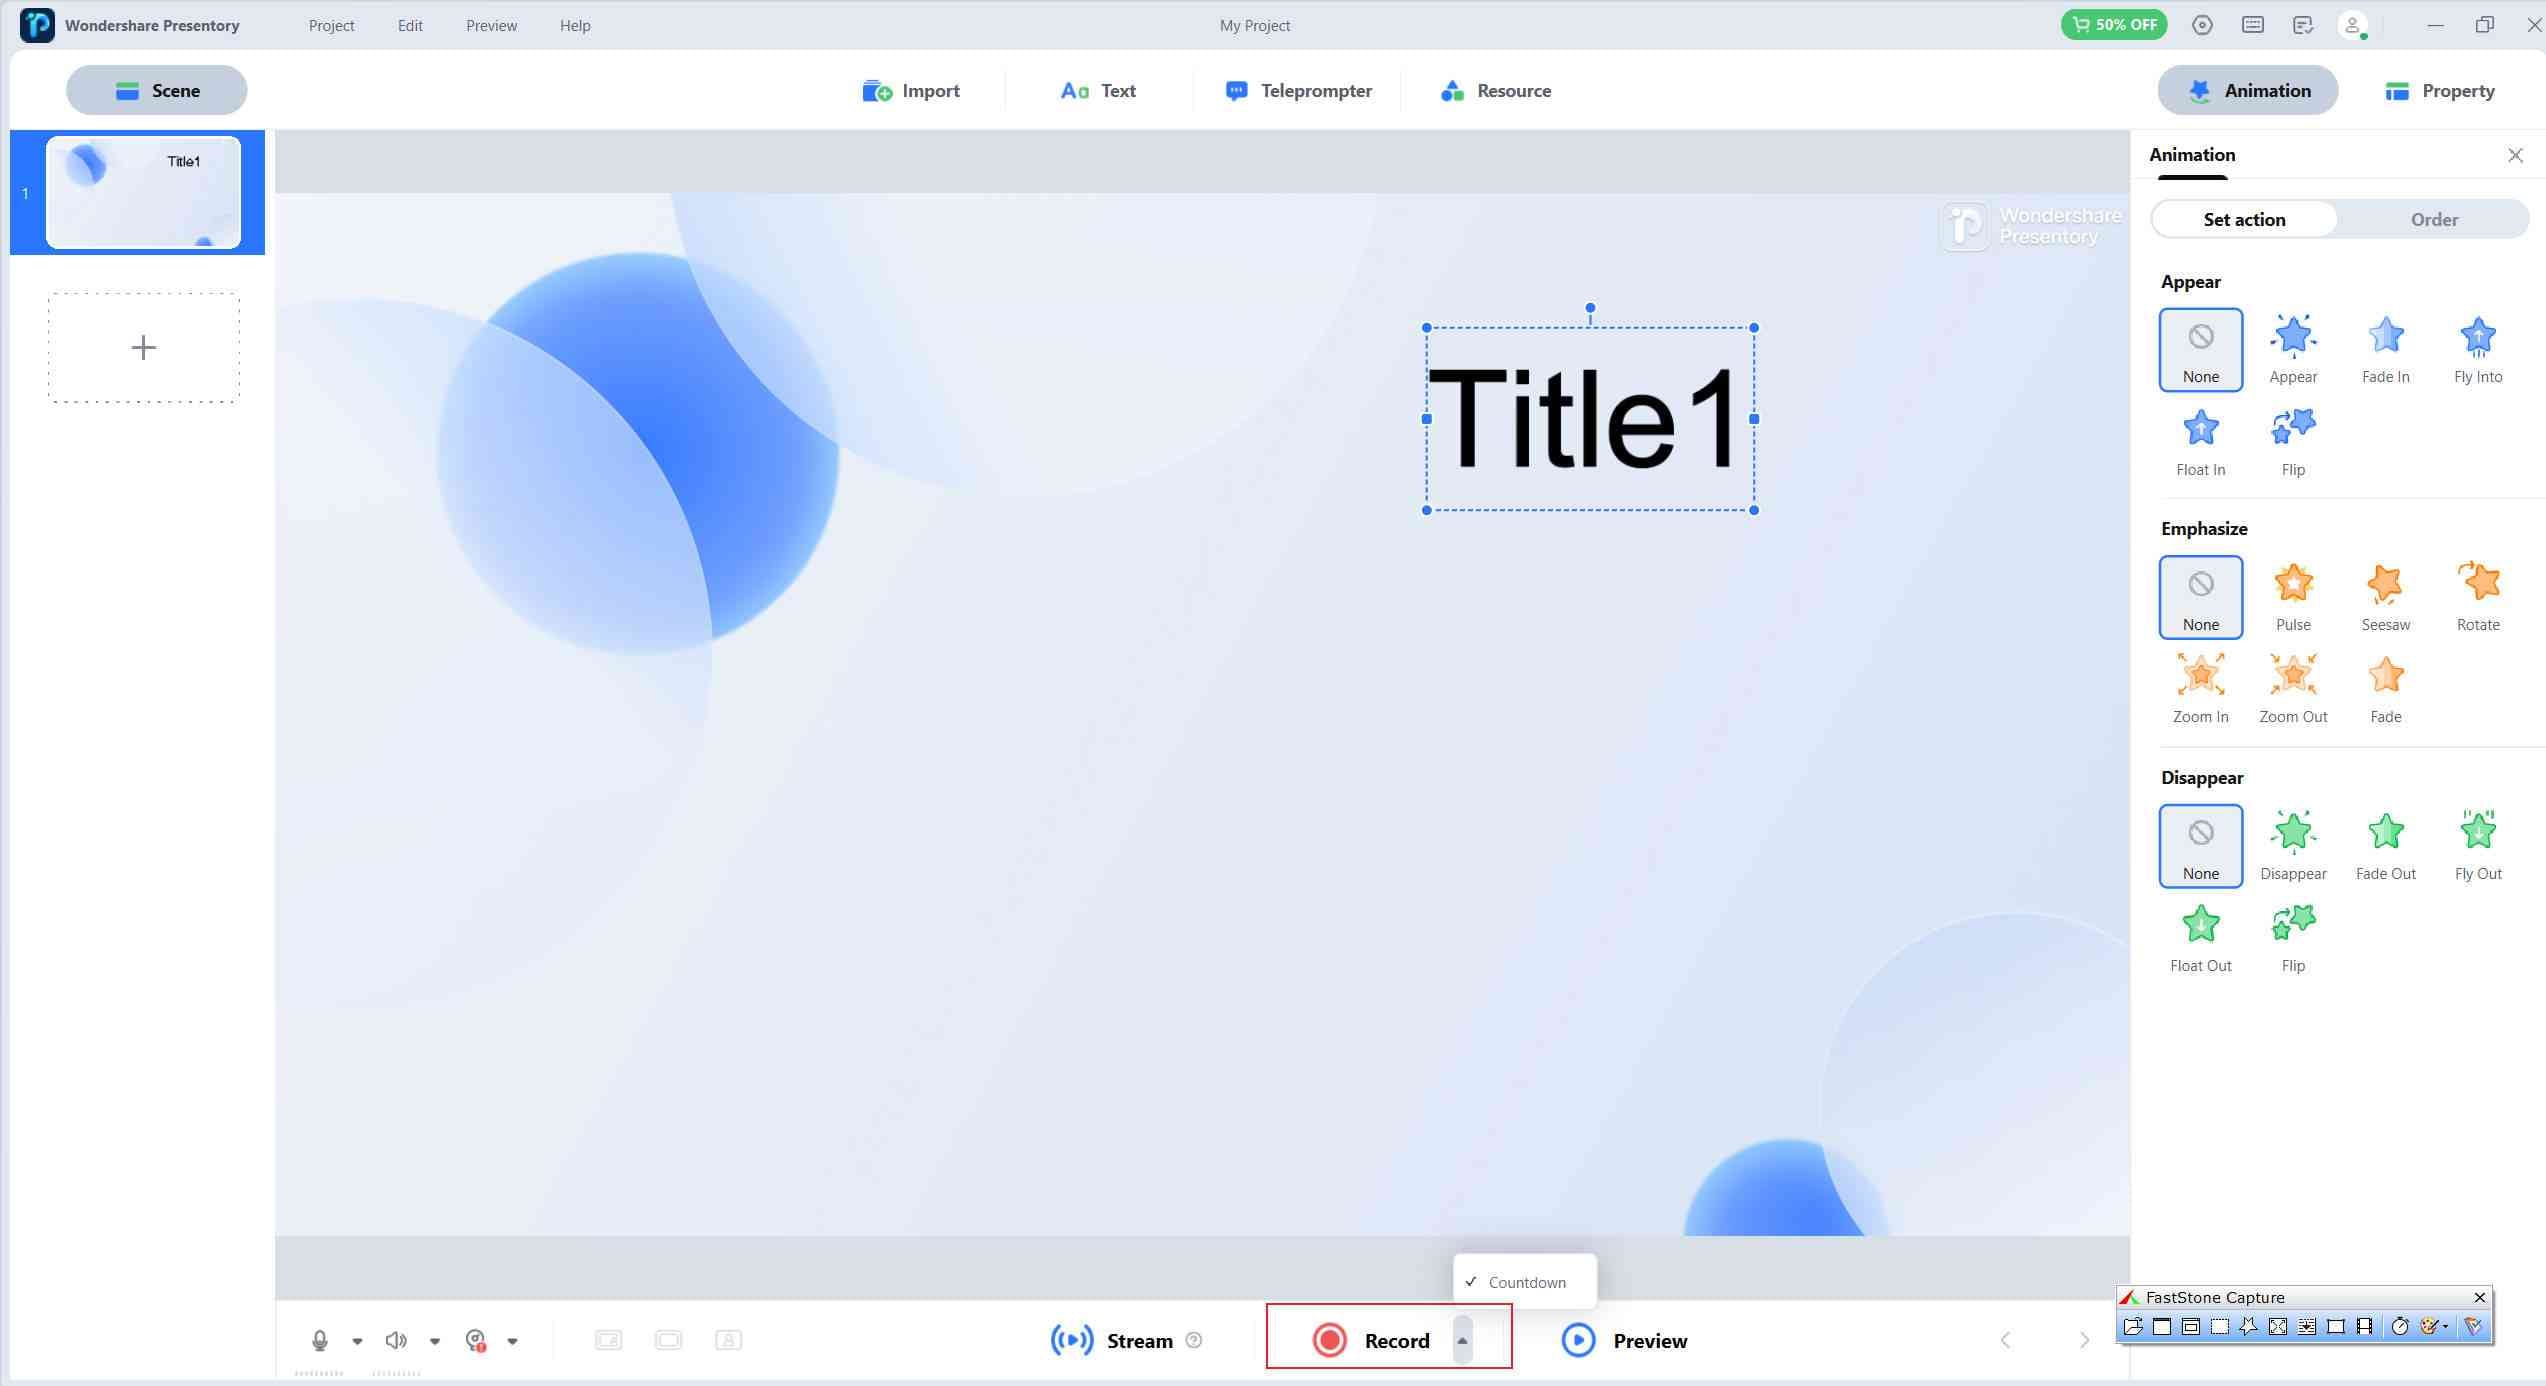
Recording: This feature allows you to record your presentation with a single click, capturing your entire presentation for later use or sharing.
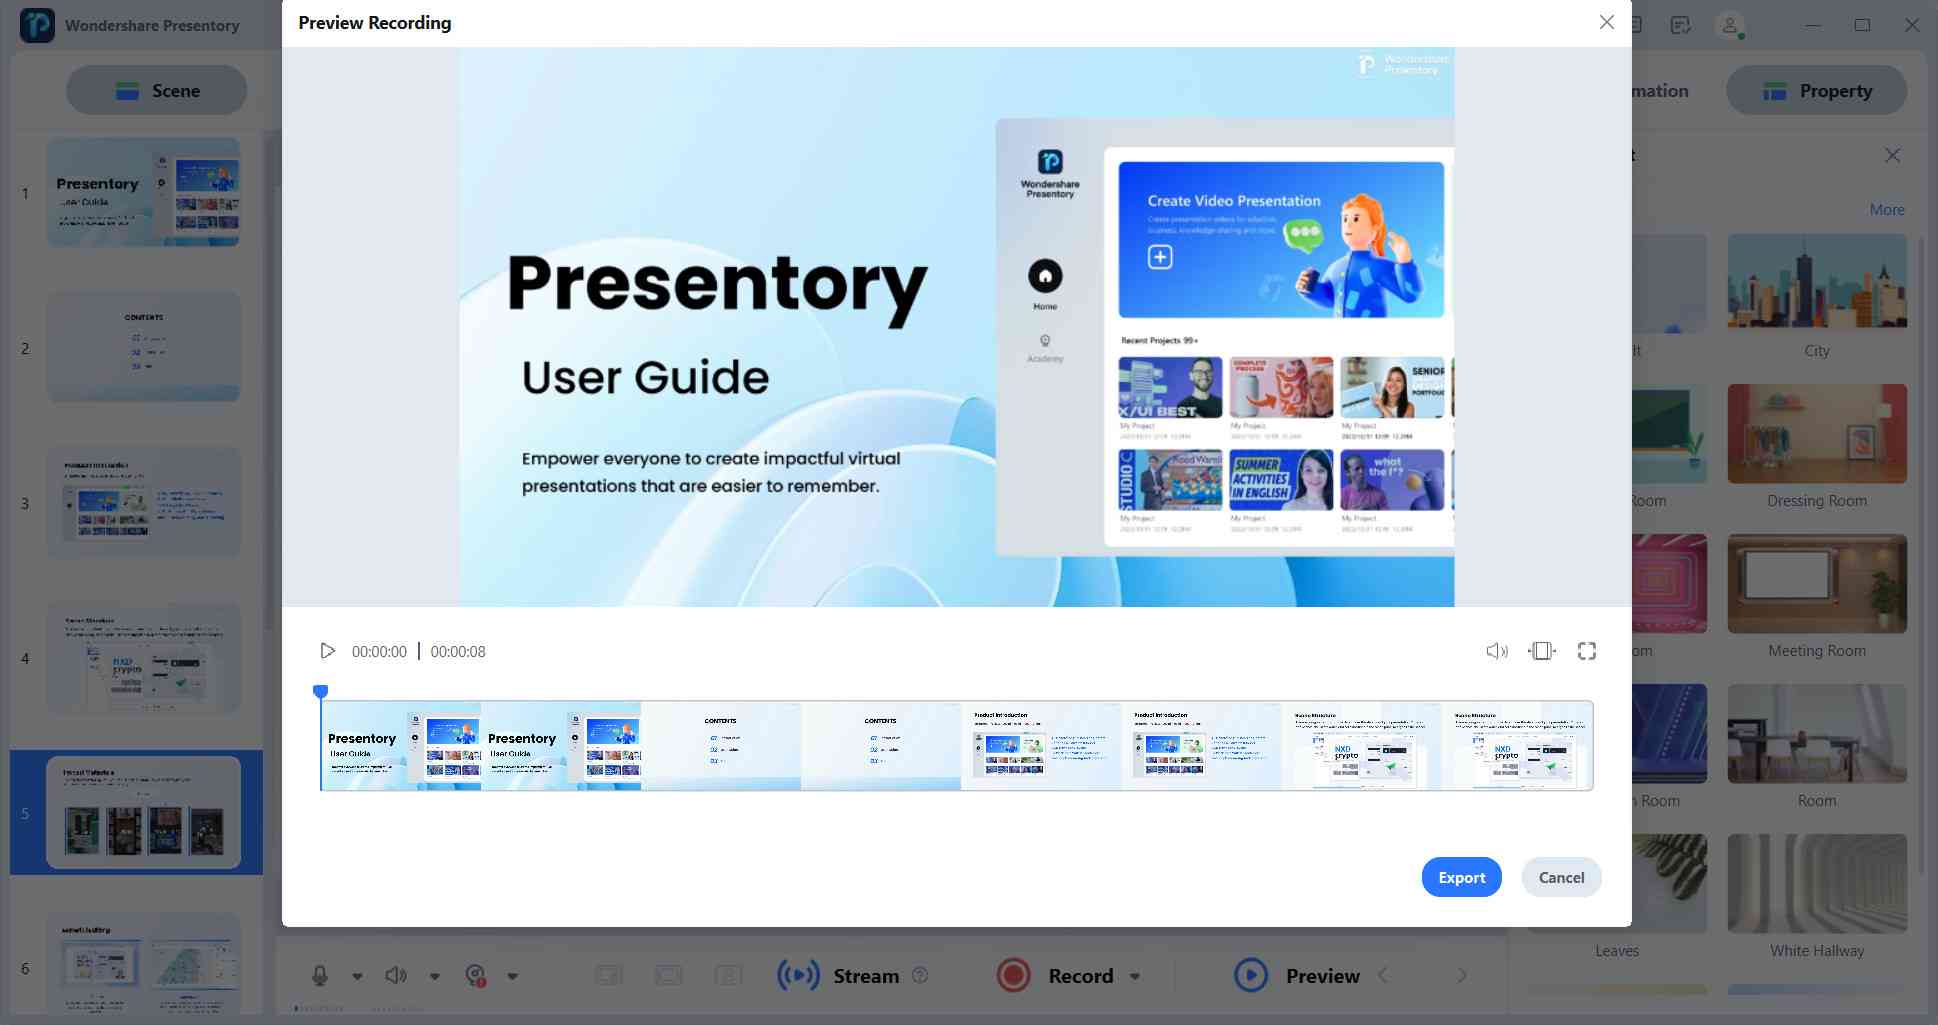
Preview: The preview feature enables you to preview your actual presentation with a single click. By using this feature, you can objectively assess your presentation as you create it, ensuring it meets your expectations and requirements.
step4Creating the Presentation
With the features introduced in Step 3, you can intuitively combine them to create an advanced presentation in Presentory.
Once you've completed your presentation, click on [Recording] (Step 10) to export your presentation as a video!
3. Key Features of Presentory
Presentory offers several excellent features that make it stand out:
AI-Powered Presentation Creation
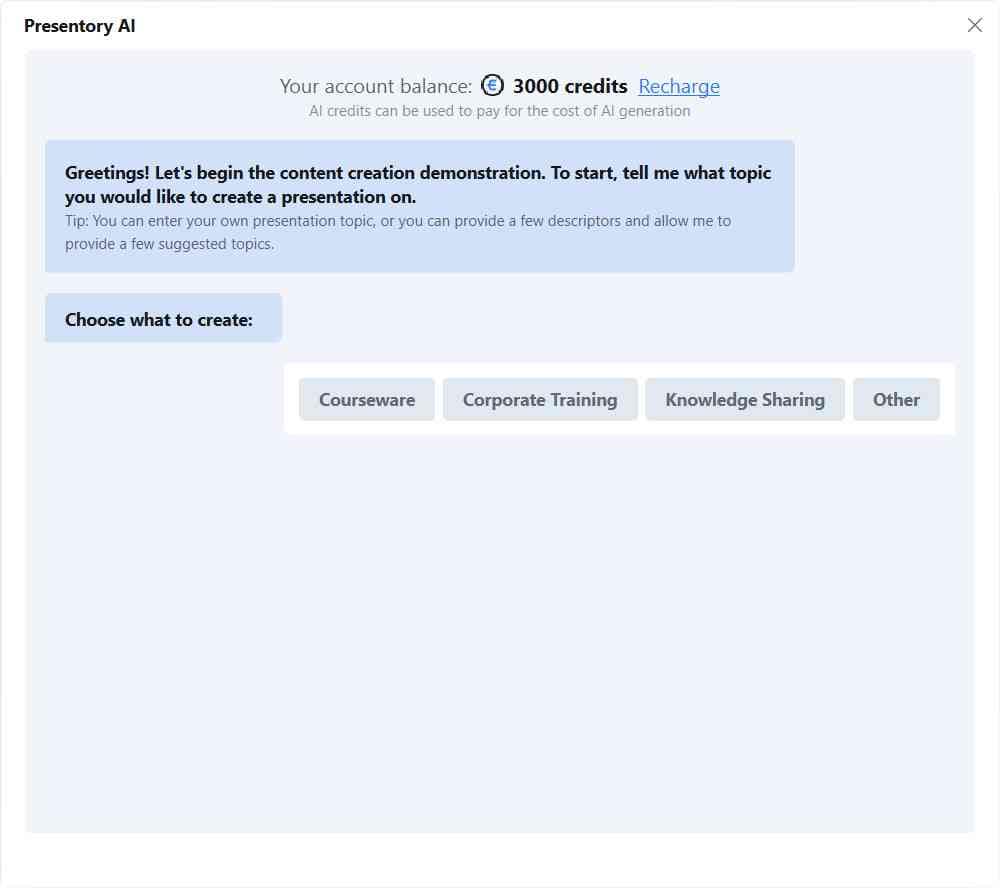
Presentory's AI feature, known as "AI-based creation", accelerates the presentation creation process. You can interact with the AI in a chat-like format, giving it instructions, and it will automatically generate parts of your presentation. You can input topics, and the AI can provide ideas or create specific presentation outlines, streamlining the content creation process. This AI functionality is a valuable tool for speeding up presentation development.
Export to Video
Presentory allows you to export your presentation materials as videos. This feature is particularly useful as it enables you to convert your presentation into a video format, making it suitable for uploading to platforms like YouTube. Additionally, recorded presentations are less prone to mistakes and can be a valuable tool for practicing and refining your presentation skills.
Direct Sharing to Zoom, Teams, and More
By utilizing the streaming feature, you can directly share your presentation from Presentory to services like Zoom and Teams. This real-time online sharing capability allows you to deliver high-quality presentations from anywhere, making it suitable for various scenarios, including business meetings and online classes. With Presentory's features, you can create presentations that stand out and differentiate you from others in these common usage scenarios.
FAQs about Google Slides
Finally, in this chapter, we will provide answers to frequently asked questions about Google Slides. These questions are common among those who have similar doubts or may encounter common issues while using Google Slides in the future, so be sure to take a look here as well!
Question 1: How do I overwrite save in Google Slides?
Google Slides typically saves your presentation automatically to your Google Drive by default. In this case, Google Slides follows an auto-save approach, so you don't need to manually save your presentation.
Question 2: How can I restore the state of my presentation in Google Slides?
In Google Slides, since automatic saving is in place, it generally becomes difficult to branch versions and save them as separate files.
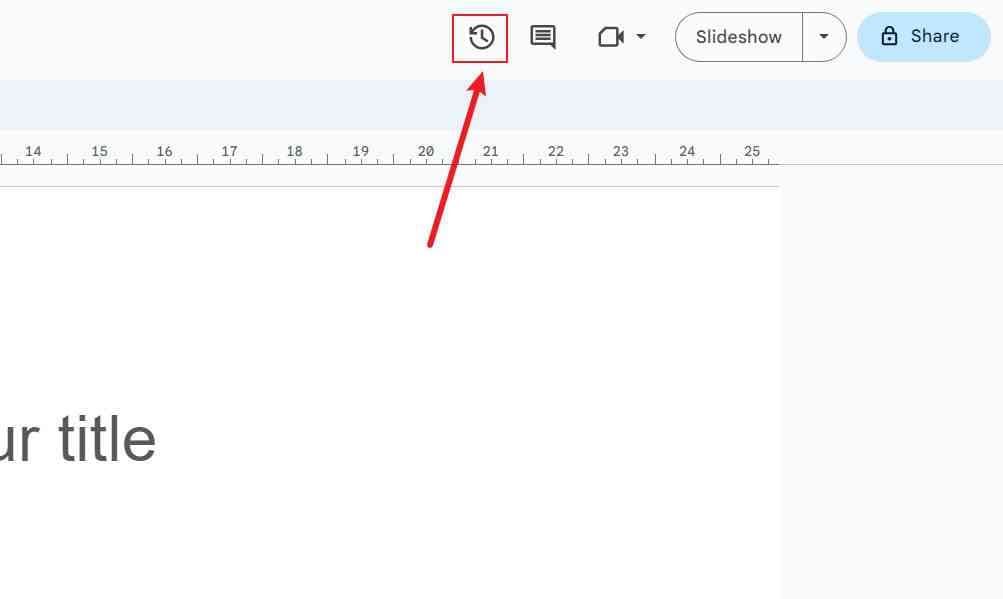
As a result, many users often want to roll back to a previous state, especially when mistakes are made or there's a change in direction. Interestingly, Google Slides comes equipped with a feature that allows you to check the revision history and perform rollbacks, akin to a time machine.
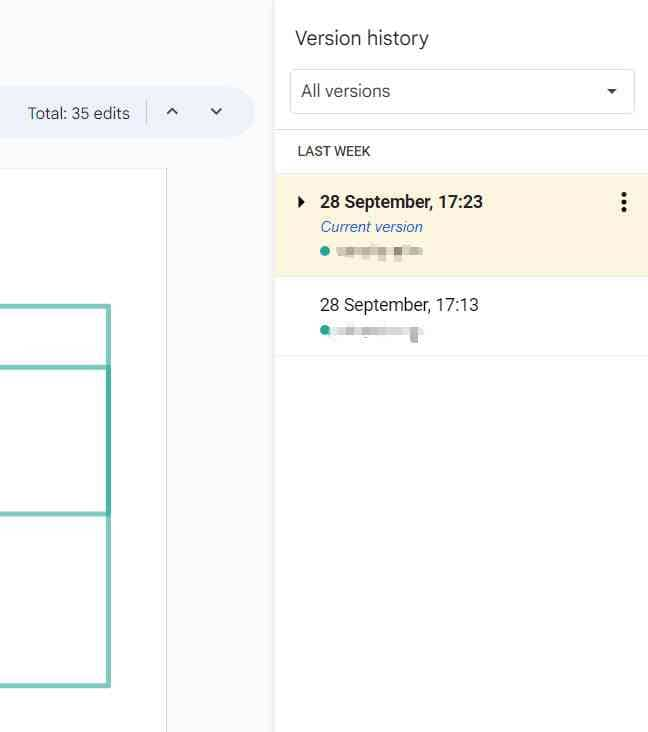
Since the automatic saving includes timestamps and the corresponding states, restoration is also possible.
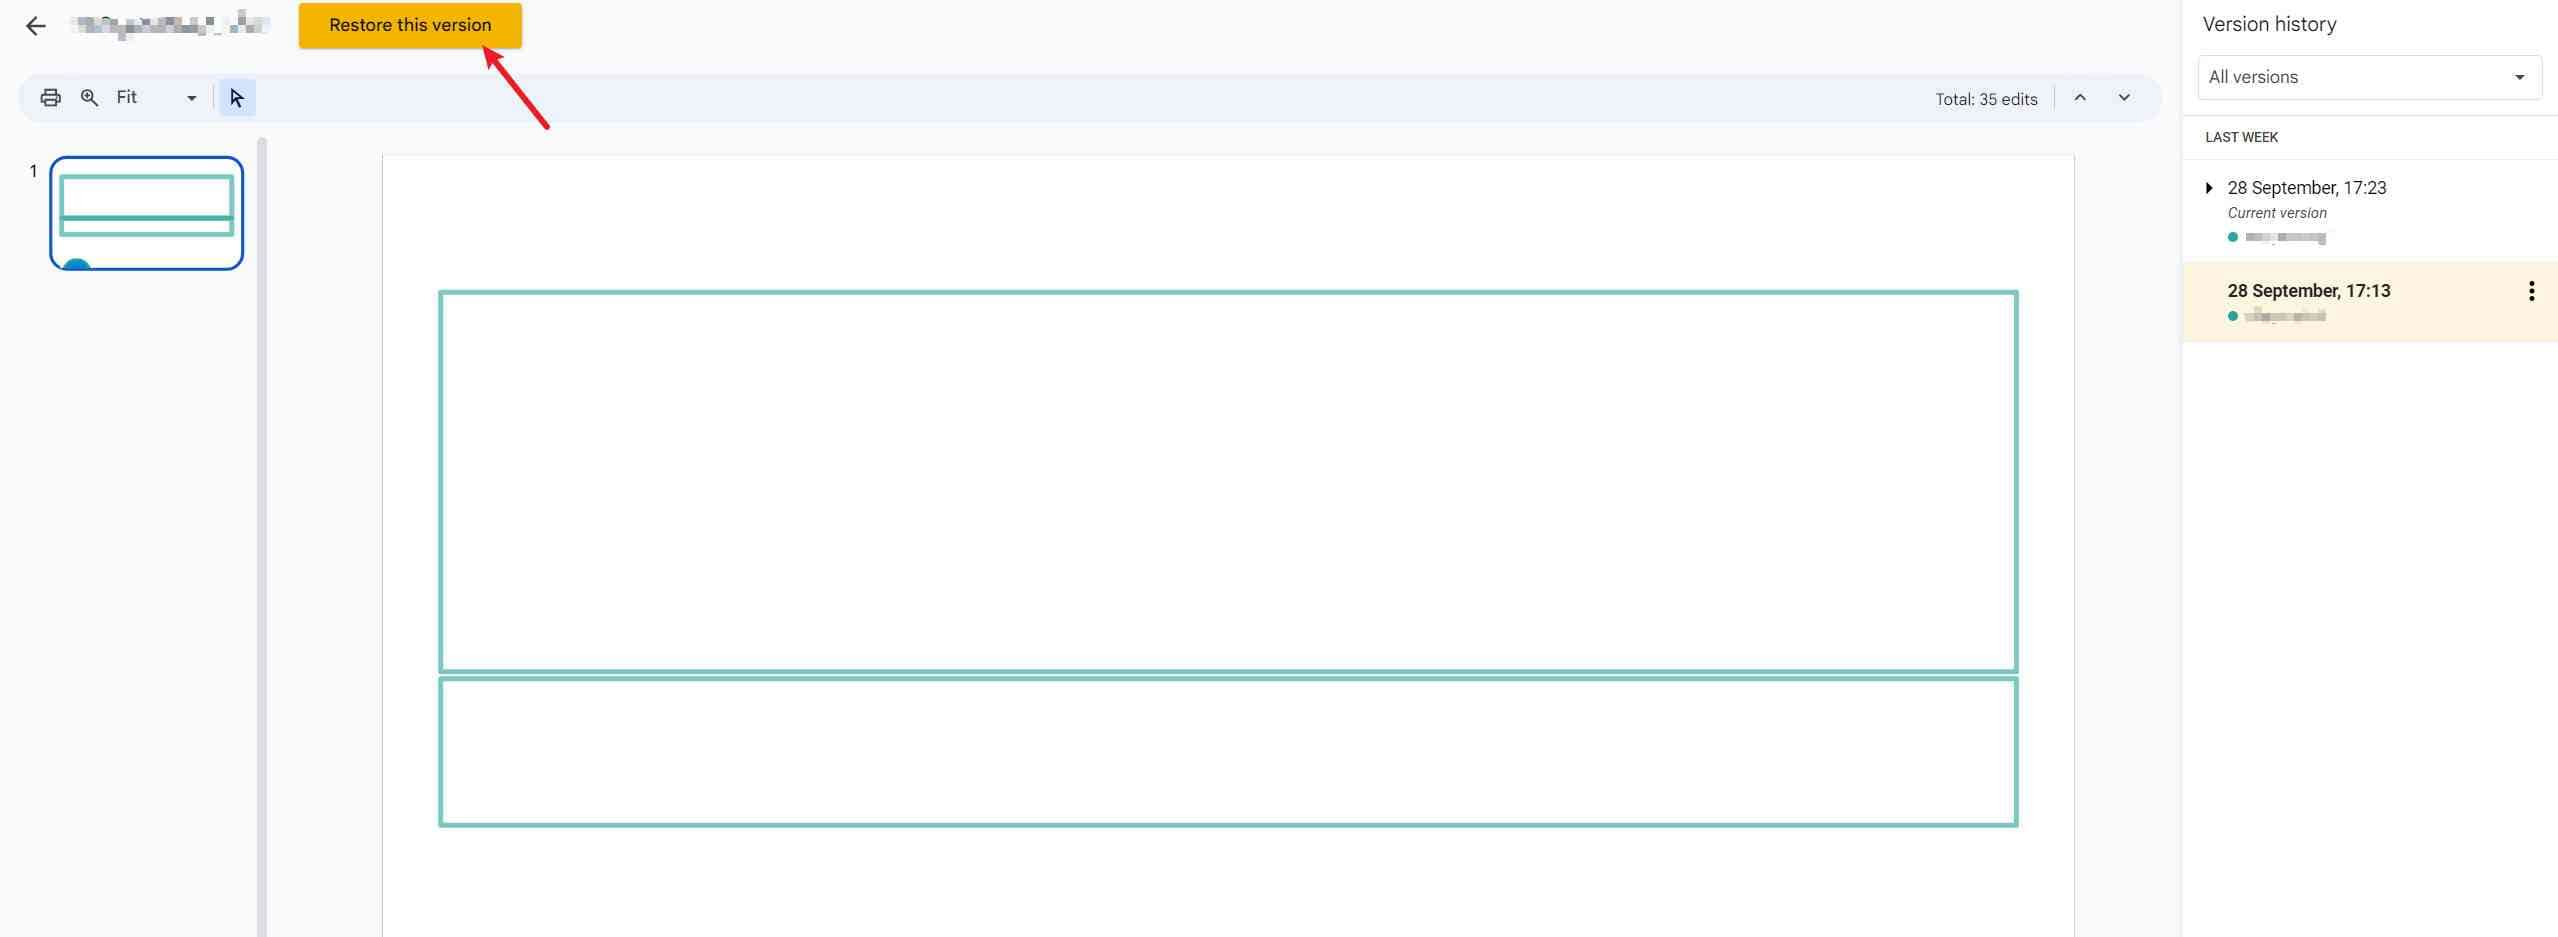
From the "Revision History", select the state you want to restore, and then choose "Restore This Version."
Question 3: Can you merge slides in Google Slides?
To merge multiple slides into one in Google Slides, you can use the slide import feature:
Step 1: Save all the slides you want to merge into one in your Google Drive.
Step 2: Open the slide where you want to merge the slides into and click on "File," then select "Import Slides".
Step 3: Choose the slides you want to import and click "Import".
Step 4: Adjust the order of the imported slides as needed.
By using this feature, you can combine slides from different presentations or created by different people into one cohesive presentation, making it a versatile tool for various scenarios.
Summary: Streamline Your Presentations with Google Slides!
In this article, we've provided a detailed explanation of how to use Google Slides effectively. Google Slides offers an intuitive interface and convenient sharing features, making it a valuable cloud office tool.
Additionally, in Chapter 3, we introduced Presentory, a software that makes creating impactful and easily understandable presentations both quick and intuitive. It's a powerful tool for various scenarios, including online classroom materials, clear and engaging explanations on social media, training materials for business purposes, and shared presentations during online meetings.
Whether you need a simple presentation (Google Slides) or want to create advanced presentations or videos (Presentory), using both tools selectively can be an efficient approach.
For those interested, we recommend trying out Google Slides by following this article and downloading Presentory for a firsthand experience.